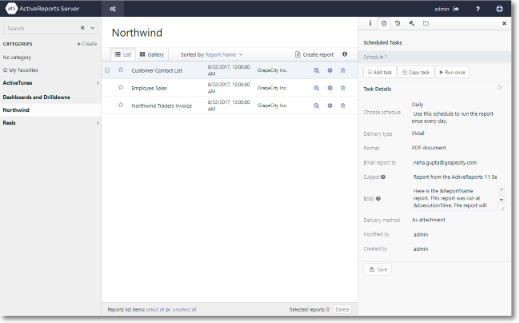
On the Report Portal, when you select a report, Info, Schedule, History, Revisions and Categories tabs appear to the right. On the Schedule tab, you can schedule a report to run by clicking Add Task. There are also a number of options that you can set.
Schedule Options Table
| Option | Description |
|---|---|
| Choose Schedule | Select how often to run the task: Daily, Weekly, or Monthly. |
| Format |
Select the format in which to share the report.
Formats: Excel file (xls), Mht document (archived Web page), Image file, PDF document, Word document, or XML file (xml). |
| Delivery type |
Select how to deliver the report: Windows File Share, Email, or Print. Below are more options that appear with these delivery types.
Note: The Format option is unavailable if the Delivery Type is set to 'Print'. Also note that you must have permissions to the specified printer.
|
| Email Options | |
| Email report to | Enter one or more e-mail addresses where the report is to be sent. Separate multiple e-mail addresses with commas. |
| Subject | Enter text to display in the subject line of the email. If you do not enter text, default text is used. |
| Body | Enter text to display in the body of the email. If you do not enter text, default text is used. |
| Delivery method | Select As Link or As Attachment to define how the report is sent to e-mail recipients. |
| Windows File Share Options | |
| File name | Enter a name to use for the shared report file. |
| Add file extension | Select whether to add the appropriate file extension, for example, xls, to the file name. |
| Path | Enter the file path to which to save the shared report file. |
| User name | Enter a user name with access to the path where the shared report file is saved. |
| Password | Enter the password for the user to access the path where the shared report file is saved. |
| Overwrite | Select whether to Increment filename as newer versions are added, or to Overwrite the existing file if it exists. It is best to choose the latter if the report is large or runs frequently and you are concerned about running out of space. |
| Print options | |
| Printer | Select the printer from the available printers added to the server. |
| Printer Options |
The following options are available. You can modify the following Printer Options only if an administrator has specified the Allow user to choose option in the Administrator Dashboard.
|
| More options that apply to all delivery types | |
| Created by | Displays the name of the person who initially created the schedule. This information is recorded automatically. |
| Modified by | Displays the name of the person who most recently modified the schedule. This information is recorded automatically. |
| Specify report parameters (for parameterized reports only) |
This link only appears if the report you are scheduling has parameters. Click to open a dialog where you can specify parameters. The selected parameters filter the report data when the scheduled task executes. If the parameter is a date that allows any value, you can use the Relative Dates feature. |
To specify report parameters
- In the Details section of the scheduled task, click Specify report parameters.
- In the dialog that appears, drop down the list of report parameter values and double-click to select one.
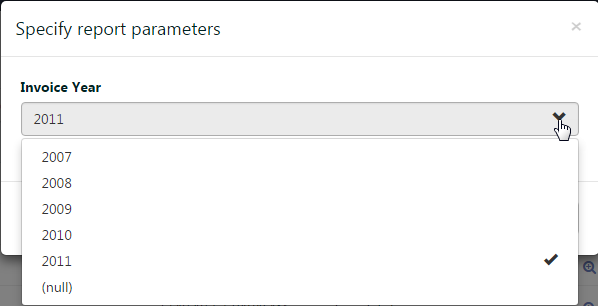
Note: If a report parameter does not have a default value selected, you must enter a value for it to enable the Accept button.
- Click Accept.
See Also