In MultiRow, you can create a layout in the designer that can be used in applications as a template.
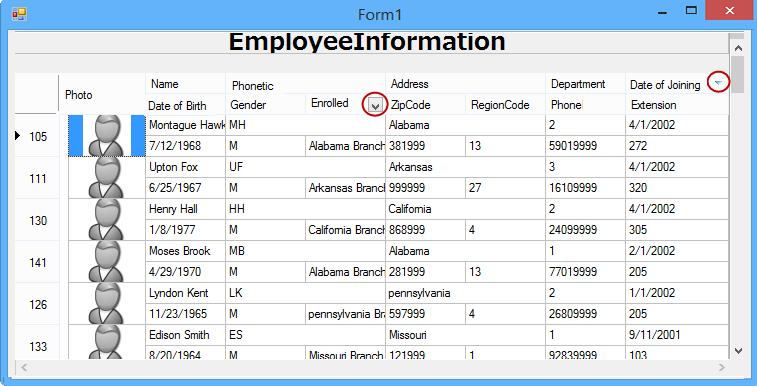
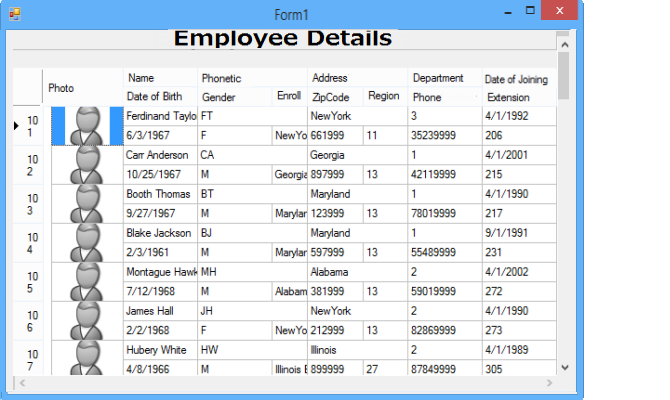
You can create an application with a grid type layout for displaying employee information, as shown below.
Creating a Template
This example shows how to place a GcMultiRow control on the form of a project and create a template. If the GcMultiRow control is not added in the toolbox, please refer to Creating an Application using GcMultiRow.
- Start Visual Studio, and create a new Windows Forms application project.
- Select GcMultiRow from the toolbox, and drag and drop it onto the form.
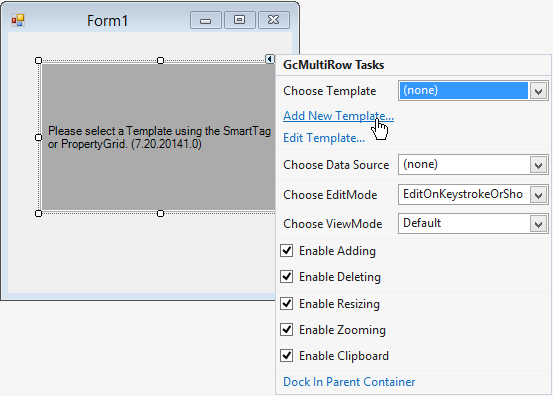
- Select the GcMultiRow control (Example: GcMultiRow1) that you placed, and select the Dock in parent container smart tag.
- Select the GcMultiRow control you placed, and select the Add New Template smart tag.
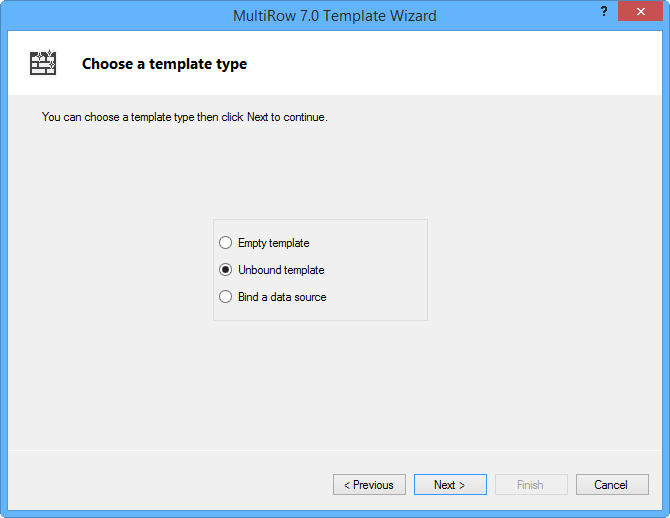
- In the Wizard that gets displayed, click on the Next button.
- In Choose a template type, select Unbound Template.
- In the next screen, select Top to Bottom as the Layout Mode.

- Perform the following settings in Design Template Layout:
- Check the Generate ColumnHeader checkbox.
- Check the Generate RowHeader checkbox.
- Set Horizontal Cells Count to 8.
- Set Vertical Cells Count to 2.
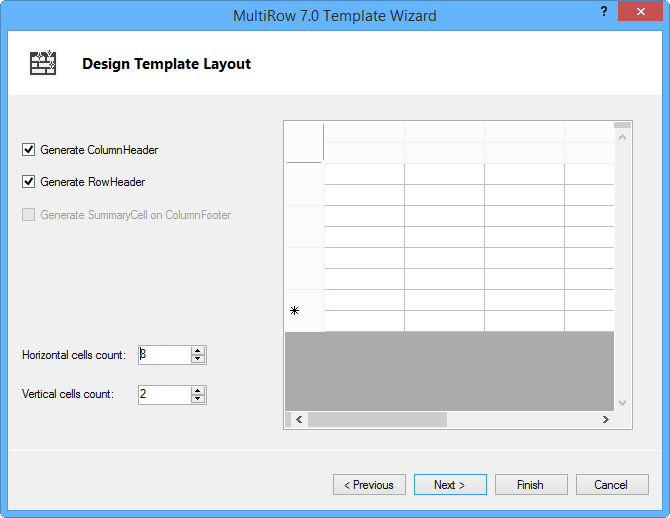
- Click Finish to exit the Wizard.
- Select the GcMultiRow control, then select the Edit Template smart tag, and check that the template is displayed.
Using the above steps, you have created a template with a basic layout.
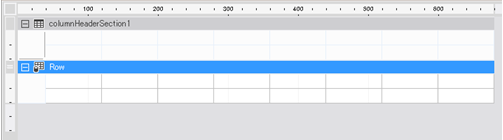
The next step changes the layout of the tabular screen.
Editing Templates Using the Designer
Since the template that you created in the wizard has a very basic layout, you can edit the template in the designer in order to get the layout that you would like to display in the application.
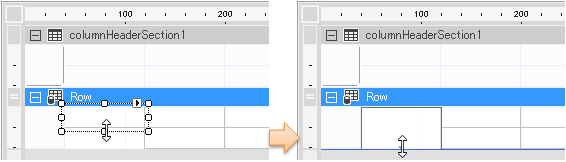
- To remove the cells that are not needed in the layout, select the three cells in the row (textBoxCell4, textBoxCell6, textBoxCell9), and press the Delete key.

- Resize the cells in order to fill the space created due to deletion of the cells. You can resize textBoxCell1 from the bottom, and textBoxCell3 and textBoxCell5 from the right.
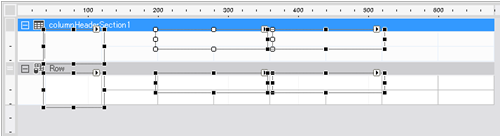
- Similarly, correct the layout of the cells arranged in the column header section.
- To replace the cell type, select textBoxCell1, and select Replace - Common Cells - ImageCell, from the context menu (right-click menu). The Cell name will be changed to imageCell1.
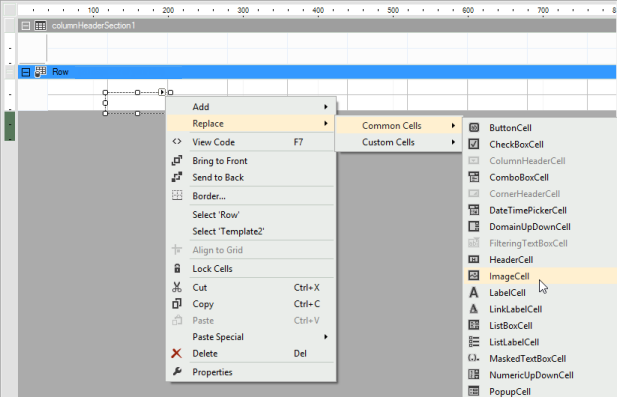
- In the same way, replace the following cell types:
- Replace textBoxCell7, textBoxCell14 with NumericUpDownCell. The cell names will change from textBoxCell7 to numericUpDownCell1, and from textBoxCell14 to numericUpDownCell2.
- Replace textBoxCell8, and textBoxCell10 with DateTimePickerCell. The cell names will change from textBoxCell8 to dateTimePickerCell1, and from textBoxCell10 to dateTimePickerCell2.
- In the Properties window, set the ShowSpinButton property of numericUpDownCell1 and numericUpDownCell2, to NotShown.
- In the Properties window, set the ShowDropDownButton property of dateTimePickerCell1 and dateTimePickerCell2, to NotShown and set Short in the Format property.
- Set the following values in the Value property of each cell that is placed in the column header section.
Cell Name Setting value of the Value property columnHeaderCell1 Photo columnHeaderCell2 Name columnHeaderCell3 Phonetic columnHeaderCell5 Address columnHeaderCell7 Department columnHeaderCell8 Date of Joining columnHeaderCell10 Date of Birth columnHeaderCell11 Gender columnHeaderCell12 Enrolled Branch columnHeaderCell13 ZipCode columnHeaderCell14 Region columnHeaderCell15 Phone columnHeaderCell16 Extension -
Right-click the mouse anywhere in the template, and add a column header section (columnHeaderSection2) by selecting Add - ColumnHeader from the context menu.
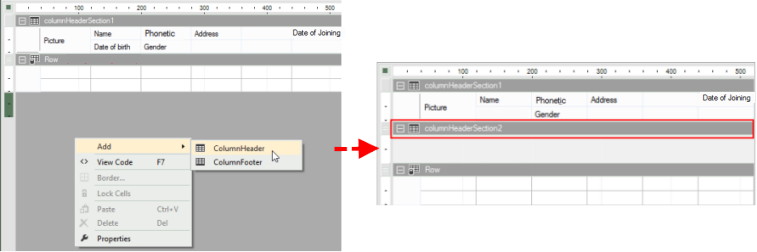
- Click on the title bar of columnHeaderSection2, and move it to the top using drag and drop.

- Select LabelCell from the toolbox, and drag and drop it to columnHeaderSection2.
- In the Properties window, perform the following settings for the LabelCell (labelCell1) that you placed.
- Set [0, 0] in the Location property.
- Set Employee Details in the Value property.
- Click the ... button of the Style.Font property, and set the Font Name property to Arial, Style property to Bold, and Size property to 18.
- Set the Style.TextAlign property to MiddleCenter.
- Resize the labelCell1 to the same size as that of columnHeaderSection2.

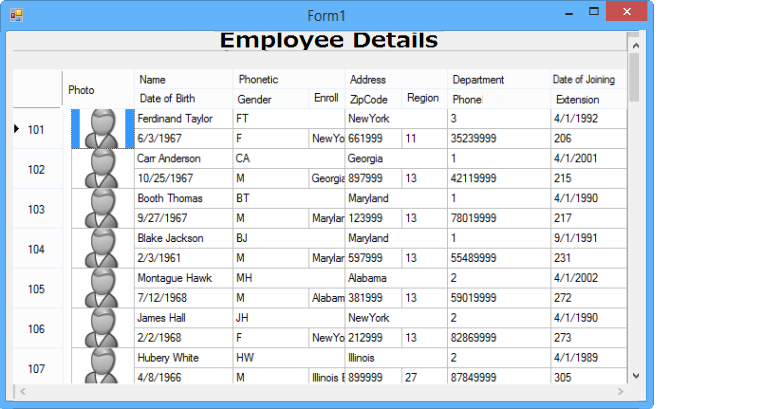
Connecting to the Database
Next, perform the connection settings for the database. In this example, use the Sample.mdb placed under the product samples.
- Sample.mdb is located in the SampleCS folder (or the SampleVB folder) included in the product samples folder.
- Click the Project - Add New Data Source menu in Visual Studio.
- In the Choose a Data Source type screen of the Database Configuration Wizard that is displayed, select Database, and click the Next button.
- In the Choose a Database Model screen, select Data set, and click the Next button.
- In the Choose Your Data Connection screen, click on New Connection, and add a connection with the following configuration.
- Data Source: Microsoft Access Database File
- Database file nameFSample.mdb
- After adding the connection, click the Next button.
- Click on the Next button in the Save the Connection String to the Application Configuration File screen.
- In the Choose Your Database Objects screen, check the checkbox of the following table:
- Employees
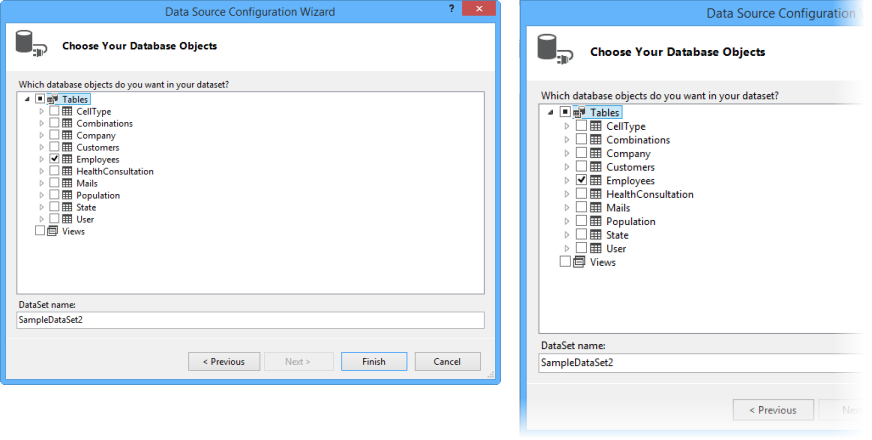
- Click on Finish.
- Check that Employees has been added to the Data Source window of Visual Studio.
- Set the following values in the DataField property of each cell that is placed in the Row.
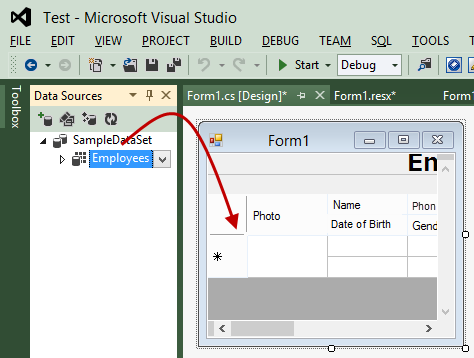
Cell Name Setting value of the DataField property rowHeaderCell1 Employee Code imageCell1 Photo textBoxCell2 Name textBoxCell3 Phonetics textBoxCell5 Address numericUpDownCell1 Department dateTimePickerCell1 Date of Joining dateTimePickerCell2 Date of Birth textBoxCell11 Gender textBoxCell12 Enrolled Branch textBoxCell13 ZipCode numericUpDownCell2 RegionCode textBoxCell15 Phone textBoxCell16 Extension - Click the View - Other Windows - Data Sources menu of Visual Studio.
- From the tree in the Data Source window, drag and drop the Employees table, which is placed under SampleDataSet, into the area of the GcMultiRow control.
- In the Properties window, set the GcMultiRow1.AllowUserToAddRows property to False.
- If you run the project, the values of the data source are loaded into the grid.
- Adjust the size and position of the cells, using the designer.
Setting Sorting and Filtering
You can set sorting and filtering using the ColumnHeaderCell function.
The following steps perform sorting of Date of Joining and filtering by Enrolled Branch.
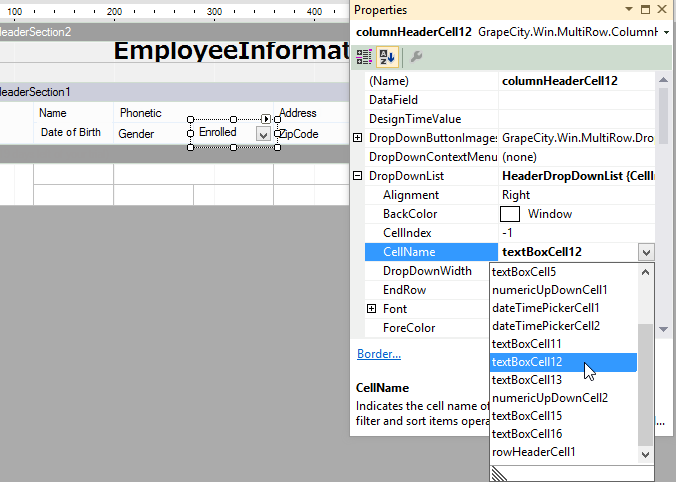
- In the Design screen of the template, select the columnHeaderCell12 (Enrolled Branch).
- From the drop-down list of the DropDownList property in the Properties window, select the Filter and Sort DropDownList.
- Expand the child level of the DropDownList property, and select textBoxCell12 from the drop-down list of CellName property.
- Select the columnHeaderCell8 (Date of Joining).
- Set the SelectionMode property in the Properties window to None.
- Set the SortMode property in the Properties window to Automatic.
- You can use sorting and filtering when running the project.