The following steps create a simple application with a tabular screen that has multiple rows for one record.
Create a Project and Add the Component to the Project
Create a project where the GCMultiRow control can be used. This step can be skipped if GcMultiRow is already registered in the toolbox.
- Start Visual Studio and create a new Windows Application.
- Select Choose Toolbox Items from the Tools menu in Visual Studio.
- Click the .NET Framework Components tab in the Choose Toolbox Items dialog.
- Enter GcMultiRow in the dialog filter to narrow down the listed options.
- Select the GcMultiRow component checkbox from the list.
- Click OK in the dialog box.
After these steps, you can start using GcMultiRow. Check that the GcMultiRow icon has been added to the toolbox.
![]()
If the toolbox is not displayed on the screen, choose Toolbox from the View menu.
Placing the Grid Control
Open the project form created above and add the GcMultiRow control to this form.
- Select GcMultiRow from the toolbox and drag and drop it onto the form.
- Resize the GcMultiRow control (for example: GcMultiRow1) to the desired size.
- Select the GcMultiRow control on the form. Click on the Smart Tag and from the Choose Template drop-down, select Default Template.
- Save the project and run it.
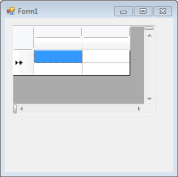
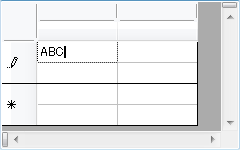
Using the above steps, you have created an application with a very simple tabular interface. Run the application. It looks like a tabular calculation application. You can move from one cell to another using the keyboard, input values into cells, select cells with the mouse, and change them to an editable state using a double-click.
Using the following steps, change the layout of the tabular screen.
Editing Templates using the Designer
In MultiRow, the layout of the tabular screen is managed using an object called Template. Templates provide developers the freedom to design their layouts since they allow cells of the desired size to be placed at any location. The created layout can then be read into the GcMultiRow control and shown as a tabular screen.
- Select the GcMultiRow control on the form. Click on the Smart Tag and from the Choose Template drop-down, select Add New Template.
- Click Next on the Welcome to MultiRow 7.0 Template Wizard page.
- In the Choose a Template Type page, select the Unbound Template option and click Next.
- Choose Top to Bottom for setting the layout of the template, and click the Next button.
- Click Next on the Design Template Layout page.
- Click Next on the Choose a Style page.
- Click Finish on the Complete the MultiRow 7.0 Template Wizard page.
An editable template is added to the project. Check that a new template (for example: Template1.vb) has been added to the project. It can be edited with the designer just like you would edit a form.