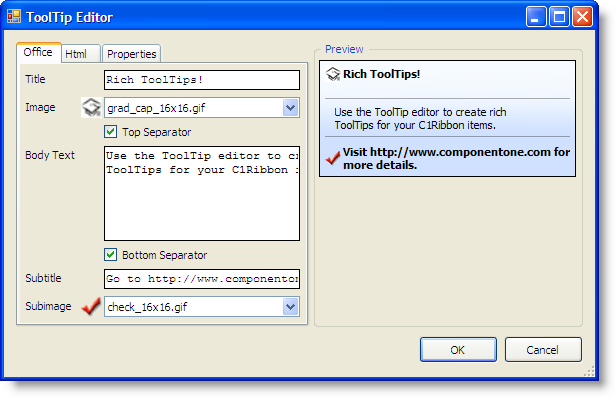
The Office tab page is used to add content, graphics, and separator lines to your ToolTip. The editor automatically creates all of the HTML code behind the ToolTip, saving you time and effort. Any additions or changes you make to your ToolTip under the Office tab will be reflected in the Preview pane.

The following table describes the elements of the Office editor:
| Element | Description |
|---|---|
| Title | The title element appears at the top of the ToolTip; it is bold by default. |
| Image | This image will appear over the body text of the ToolTip. By default, it will appear on the left-hand side. |
| Top Separator | Places a horizontal rule beneath the title and/or image. The horizontal rule is a dark grey. |
| Body Text | The body text holds the main content of the ToolTip; it is where the description and/or instructions for the tool appear. This will appear beneath the title and above the subtitle. |
| Bottom Separator | Places a horizontal rule beneath the the body text. The horizontal rule is a dark grey. |
| Subtitle | The subtitle element appears at the bottom of the ToolTip. |
| Subimage | This image will appear beneath the body text of the ToolTip. By default, it will appear on the left-hand side. |