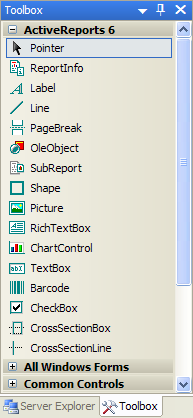
When you are in design view of an ActiveReport, the Visual Studio toolbox automatically displays the ActiveReports controls that you can drag onto your report.
 |
Tip: If you do not see the Visual Studio toolbox, from the View menu, select Toolbox. |
| Control | Description (Important properties are in bold.) |
|---|---|
| Pointer | Selected by default, the pointer allows you to select, move, and resize controls, and resize sections. After you drop or draw a control onto your report, the pointer is automatically selected. |
| ReportInfo |
A text box with preset FormatString options, the report info control allows you to quickly display page numbers, page counts, and report dates. For more information, see Display Page Numbers and Report Dates. |
| Label |
The label allows you to display static text to describe the data you display in text boxes. Use the Text property to set the label text. Set the Angle property to 900 for displaying text vertically. Now supports direct text input and vertical writing. |
| Line | Use the line to visually separate or call out areas of your report. You can drag it to the size and location you want, or use the X1, X2, Y1, and Y2 properties. The AnchorBottom property lets the line grow along with the section. |
| PageBreak | Use the page break to have the report stop inside a section and resume printing on a new page. You may also wish to use the PageBreakBefore or PageBreakAfter properties available on the sections themselves. |
| OleObject |
You can add an OLE object, bound to a database or unbound, directly to your report. When you drop or draw the control onto your report, the Insert Object dialog allows you to create a new object, or select an existing file. When you deploy reports that use the OleObject, you must also deploy the ActiveReports.Interop.dll, or for 64-bit machines, the ActiveReports.Interop64.dll. |
| SubReport |
Use the subreport control as a placeholder for data from a separate report. Use code to connect the separate report to the subreport control. For more information, see Embed Subreports in a Report. |
| Shape | The shape control has a Style property that allows you to select whether to render an ellipse, a rectangle, or a rounded rectangle. |
| Picture | The Image property of the picture control allows you to select any image file to display. Use the PictureAlignment and SizeMode properties to control cropping and alignment. |
| RichTextBox |
You can use different formats on adjacent text in the rich text box control, merge data in it, or load an HTML or RTF file into it. Or double-click inside the control to enter text directly into it. For more information, see Load a File into a RichText Control or Mail Merge with RichText. |
| ChartControl |
The chart control offers you more than 30 chart types and access to properties controlling every aspect of a chart's appearance. For more information, see Create Charts. |
| TextBox |
The text box is the basis of reporting. You can bind it to data using the DataField property, or set it at run time. It is the control that forms when you drag a field onto a report from the Report Explorer. You can use the Summary properties to create summary fields. You can also set the new Padding property to add space between text and the edge of the control. For more information, see Create Summary Fields. Now supports direct text input and vertical writing. |
| Barcode |
Select from over 30 barcode Styles, including the latest postal codes. You can bind it to data using the DataField property, and use the Text and CaptionPosition properties to add a caption. For more information, see BarCodes. |
| CheckBox | You can set the Checked property of the check box in code or bind it to a Boolean database value. Provide static text in the Text property. |
| CrossSectionBox |
Drag the cross section box onto a header section and it spans any intervening sections to end in the related footer section. Set the Radius property to round the edges of the box. See Cross Section Controls for more information. |
| CrossSectionLine |
Drag the cross section line onto a header section and it spans any intervening sections to end in the related footer section. This line control is strictly vertical. If you want a horizontal or diagonal line, use the Line control, which does not span sections. See Cross Section Controls for more information. |