In ActiveReports, the simplest reporting style is a tabular listing of fields from a data source.
This walkthrough illustrates the basics of setting up bound reports by introducing the ideas of using the DataSource icon and dragging fields from the Report Explorer onto the report.
The walkthrough is split up into the following activities:
- Creating a new Visual Studio project
- Adding an ActiveReport to the Visual Studio project
- Connecting the data source to a database
- Adding controls to the report
- Viewing the report
To complete the walkthrough, you must have access to the Northwind database. A copy is located at C:\Program Files\GrapeCity\ActiveReports 6\Data\NWIND.MDB (on a 64-bit Windows operating system, a copy is located in C:\Program Files (x86)\GrapeCity\ActiveReports 6\Data\NWIND.MDB).
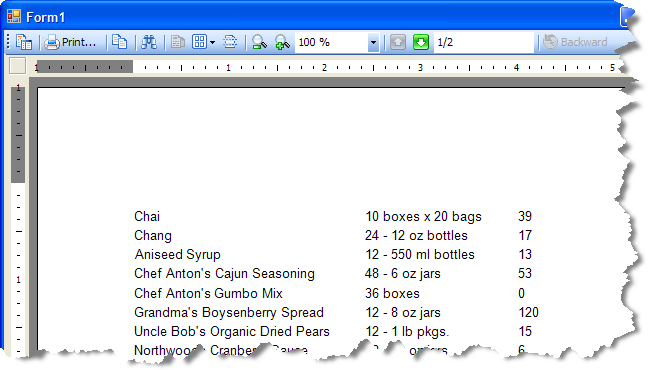
When you have finished this walkthrough, you will have a report that looks similar to the following.
To create a new Visual Studio project
- Open Visual Studio.
- From the File menu, select New > Project.
- In the New Project dialog, select the project type in the Project Types section and then select Windows Application in the Templates section.
- Change the name of your project and click OK.
To add an ActiveReport to the Visual Studio project
- From the Project menu, select Add New Item.
- Select ActiveReports 6 (code-based) File and rename the file rptBound.
- Click Add.
To connect the report to a database
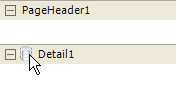
- Click the gray report DataSource icon on the Detail section band to open the Report Data Source dialog.
- On the OLE DB tab, next to Connection String, click the Build button.
- In the Data Link Properties window that appears, select Microsoft Jet 4.0 OLE DB Provider and click the Next button.
- Click the ellipsis (...) button to browse to the Northwind database. Click Open once you have selected the appropriate access path.
- Click OK to close the window and fill in the Connection String field.
- In the Query field, enter the following SQL query
SQL Query Copy CodeSELECT * FROM Products - Click OK to save the data source and return to the report design surface.
To add controls to the report
- In the Report Explorer, expand the Fields node, then the Bound node. Drag the following fields onto the detail section and set the properties of each textbox as indicated.
Field Text Location Size ProductName Product Name 0, 0 2.3, 0.2 QuantityPerUnit Quantity 2.4, 0 1.5, 0.2 UnitsInStock Stock 4, 0 1, 0.2 - Click just below the fields to select the Detail section, and in the Properties Window, set the CanShrink property to True to eliminate white space in the rendered report.
To view the report
You can quickly view your report at design time by clicking the Preview tab at the bottom of the designer.
- Drag the ActiveReports viewer control from the Visual Studio toolbox onto the Windows Form and set its Dock property to Fill.
- Double click the title bar of the form to create a Form_Load event, and add the code needed to run the report and display it in the viewer.
Run the report and display it in the viewer using Visual Basic.NET Copy CodeDim rpt As New rptBound rpt.Run() Me.Viewer1.Document = rpt.Document
Run the report and display it in the viewer using C# Copy CoderptBound rpt = new rptBound(); rpt.Run(); this.viewer1.Document = rpt.Document;

Note: On a 64-bit Windows operating system, you need to change the build target platform prior to viewing reports in runtime. To do this, in the Visual Studio Solution Explorer right-click the project name and select Properties. In the window that opens, go to the Compile tab for Visual Basic, or the Build tab for C#, and set Platform Target to x86. - Run the project to display the report in the viewer.