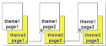
In a Page Report you can create reports with multiple themes, where you can control the page order of a rendered report by selecting the collation mode. This walkthrough uses a report that contains layouts on two page tabs in order to illustrate the collation feature.
This walkthrough is split into the following activities:
- Creating report layout on multiple pages
- Adding themes
- Applying themes
- Setting up collation
- Viewing the report
Note:
- This walkthrough uses the CustomerOrders table from the Reels database. By default, in ActiveReports, the Reels.mdb file is located at [User Documents folder]\GrapeCity Samples\ActiveReports 12\Data\Reels.mdb.
- Although this walkthrough uses Page reports, you can also implement this using RDL reports.
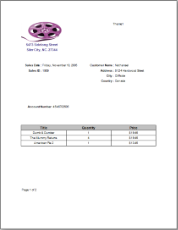
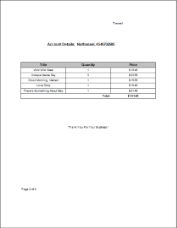
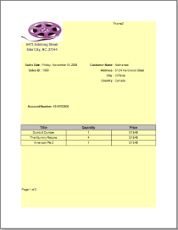
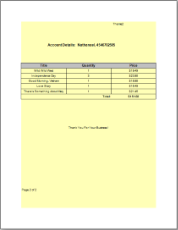
When you complete this walkthrough you get a report that looks similar to the following. These images show the result of the Value collation mode.
| Page 1 | Page 2 | Page 3 | Page 4 |
|---|---|---|---|
|
|
|
|
To create a report layout on multiple pages
In a Page Report, you can apply more than one layout to a single report by using page tabs. See the walkthrough Overflow Data in Multiple Pages, to learn how to create a report that consists of a first page with a different layout from all subsequent pages.
Note: The information provided henceforth is an extension of the Overflow Data in Multiple Pages walkthrough, so we recommend that you go through this topic before moving to the next procedure.
To add themes to the report
- In the Designer, click the gray area around the report page to select a report.
- In the Properties window, select the Themes property and click the ellipsis (…) button to open the Report - Themes dialog.
- In the Report - Themes dialog that opens, click the New icon above the list of themes.
- In the Theme Editor that opens, define the colors and constant expressions for your new theme under the corresponding tabs as follows:
Theme 1
Property Name Property Value Description Text/Background - Light1 (Colors tab) Default (white) To set the background color for the theme. Name (Constants tab) Constant1 To define a name for the constant expression to be used within in a theme. Value (Constants tab) Theme1 To associate a value to be used as a constant in the expression. Description (Constants tab) Default Theme To describe a constant expression. - In the Theme Editor, click OK and in the Save As dialog that opens, choose a directory on your local machine and enter the name, Default Theme for your new theme.
- Click Save to save the theme at the desired location.
- Repeat steps 3-6 above to add another theme to the report. Define the colors and constant expressions of the theme under the corresponding tabs as follows:
Theme 2
Property Name Property Value Description Text/Background - Light1 (Colors tab) Yellow To set the background color for the theme. Name (Constants tab) Constant1 To define a name for the constant expression to be used within in a theme. Value (Constants tab) Theme2 To associate a value to be used as a constant in the expression. Description (Constants tab) Yellow Theme To describe a constant expression.
To apply themes to the report
In order to apply themes to a report, you need to set the theme as a value of a property. In this walkthrough we set the theme in the BackgroundColor property.
- In the Report Explorer, select the Page 1 node to open the layout for the first page of the report.
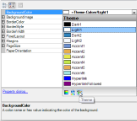
- In the Properties window, go to the BackgroundColor property and click the arrow to display the drop-down list of values.
- In the list that appears, go to the Theme button and select Light1.
- In the Report Explorer, select Page 2 node to open the layout for the second page of the report.
- In the Properties window, go to the BackgroundColor property and click the arrow to display the drop-down list of values.
- In the list that appears, go to the Theme button and select Light1.
- From the Visual Studio toolbox, ActiveReports 12 Page Report tab, drag the Textbox control and drop it onto the Page 1 design surface.
- With this TextBox control selected, set the following properties in the properties window. This is to display a constant value associated with the Theme.
Property Name Property Value Location 4.4in, 0in Size 2.1in, 0.25in Value = Theme.Constants("Constant1")
Note: To set this value, enter it in the Value field of the Properties window. You may also use the Expression Editor option that appears when you click the ellipses (...) button adjacent to the Value property.
- From the Visual Studio toolbox, drag the Textbox control and drop it onto the Page 2 design surface. Set the properties specified in step 8 above in the properties window.
Your layout now contains two themes and a constant expression displaying the theme you are using on the top left corner of the page.
To set up collation
Collation is set to determine the order in which the report pages are rendered when you have multiple themes in the report. In order to define the order, you need to set the CollateBy property.
- In the Designer, click the gray area around the report page to select the report.
- In the Properties Window, go to the CollateBy property and select the Simple mode. The report will be rendered in the following way - the report renders all pages with theme 1, then all pages with theme 2.

- In the Properties Window, go to the CollateBy property and select the ValueIndex mode. The report will be rendered by page number. For example, if you have a report with 2 themes, the report renders page 1 for theme 1 and 2, then page 2 for theme 1 and 2, and so on.
- In the Properties Window, go to the CollateBy property and select the Value mode. The report will be rendered by the grouping expression that you specify in the FixedPage dialog. For example, if you have a report comprising of 2 themes with grouping, the report renders group1 (pages 1 and 2 of theme1, then pages 1 and 2 of theme2), then group 2 (pages 1 and 2 of theme1, then pages 1 and 2 of theme2), and so on.

To view the report
- Click the preview tab to view the report.
OR
- See Windows Forms Viewer to display report in the Viewer at run time.
See Also