You can place a border around a cell or range of cells using the Border Editor of the Spread Designer. You can launch the Border Editor from the Spread Designer by either
- selecting the Home menu option, then the Border drop-down under the font section, and then selecting More Borders...
- selecting cells in the data area, right-clicking, and selecting Borders
The Border Editor appears as shown in this figure.
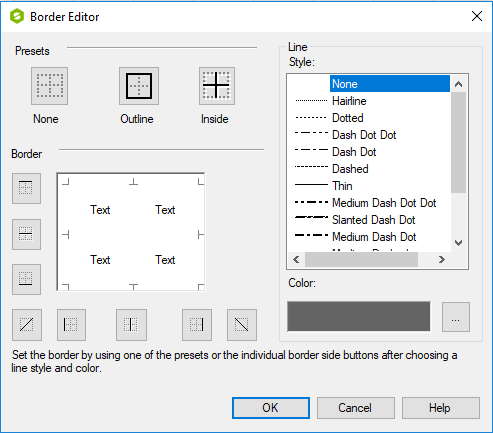
The Presets allow you to select already-defined border locations. For the entire outer edge of a range of cells, click Outline. For borders on all the edges of cells in a range except the outline, click Inside. To clear all the borders, click None.
In the Border area, click on the part of the cell where a border should appear. You do not see anything in the Border area of this dialog until you select a line style, since None is the default. Select the border line style and border line color in the Line settings area. When done, click OK.
For more information on the options for row or column size, refer to Creating and Customizing Cell Borders and Customizing the Outline of the Component in the Developer’s Guide. For more details on borders, refer to the various border classes in the FarPoint.Win assembly.