In this tutorial, you will see how easy it is to add ad hoc query functionality to an application using C1Query DataSource mode. In this case, C1Query and c1QueryFrame controls can be used “as is”, in a very straightforward way. You don’t need to specify a schema or any other settings. You will also see in this tutorial how the end user interacts with C1Query at run time. Complete the following steps:
-
Start a new project.
-
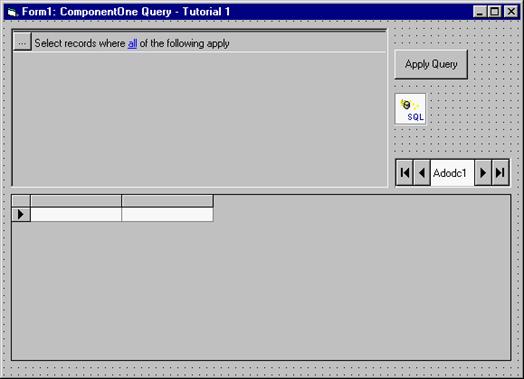
After adding the C1Query and C1QueryFrame controls to the Toolbox, place the following controls on the form as shown in the figure: a C1Query control (C1Query1), a C1QueryFrame control (C1QueryFrame1), a Microsoft ADODC control (Adodc1), a Microsoft DataGrid control (DataGrid1) and a command button (Command1).
-
Connect the C1QueryFrame1 control to C1Query1 by setting the C1QueryFrame1 SchemaControl property to C1Query1.
-
Connect the C1Query1 control DataSource property to the data source Adodc1.
-
Set the FilterMode property of the C1Query1 control to True.
-
Connect the Adodc1 control to the database, specifying, in its Property Pages or in the Visual Basic Properties window. Set Adodc1 control ConnectionString to:
Example Title Copy CodeProvider=Microsoft.Jet.OLEDB.4.0;Data Source=C:\Program Files\Microsoft Visual Studio\VB98\Nwind.mdb;Persist Security Info=False.
Set the Adodc1 CommandType property to 2 – adCmdTable and the RecordSource property to Orders.
-
To show the query results, connect the DataSource property of the DataGrid control to Adodc1.
-
Add the following code to the Click event of the command button:
Example Title Copy CodeC1Query1.BuildSQL Adodc1.Recordset.Filter = C1Query1.ClauseWhere
-
Run the program. Enter a query in the C1QueryFrame control (shown on the figure):
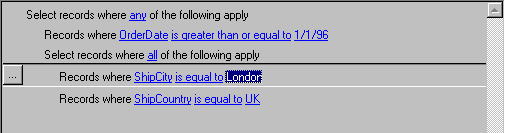
Change all to any: click all and select any from the menu (connective menu) that opens on click.
Press the menu button in the control (the ellipsis button) or the right mouse button. That will open an action menu (main menu). Select Add a new elementary condition.
In the newly added condition click the blank space to the left of is equal to and select OrderDate from the field menu that opens on click.
Change is equal to to is greater than or equal to: click is equal to and select greater or equal from the menu (comparison menu).
Enter the date: click the blank space to the right of is greater than or equal to and type 1/1/96 in the text box that opens on click.
Press the menu button in the control (the ellipsis button) or the right mouse button. That will open an action menu (main menu). Select Add a new complex condition. Select the newly created complex condition (make it current) by clicking on it or with the ArrowDown key.
Add two elementary conditions under the newly created complex condition, using the main menu’s Add a new elementary condition item, as above.
Specify field names (ShipCity, ShipCountry) and values (London, UK) in the newly created conditions, using the instructions above.
-
Press the command button. You will see the result of the query displayed in the data grid.
Using C1Query in DataSource mode is very easy and straightforward, because you do not need to specify database schema, all the schema (fields) information is retrieved automatically from the data source. However, this mode cannot be used for queries that span multiple database tables. For example, if your users need to query Customers and OrderDetails tables in addition to the Orders table, and all that should be possible in a single query with no predetermined structure (so it’s up to the user which tables to include in a query), then you need more advanced capabilities of C1Query that are presented in the following tutorial.