This topic provides a more advanced wijgrid example explaining how to create a wijgrid widget on your Web page using server-side code.
- Create a new C1 ASP.NET MVC 5 Web Application (see Creating an MVC Classic Project)..
- Add a model based on the Northwind database to the project. We'll generate an ADO.NET Entity Data Model (.edmx), from the NORTHWND.MDF database, which you should place in the App_Data folder of this project.
- In the Solution Explorer, right-click App_Data and select Add | Existing Item.
- In the Add Existing Item dialog box, locate and select the NORTHWND.MDF file and click Add.
- Right-click the Models folder and select Add | New Item.
- In the Add New Item dialog box, choose Data under your selected programming language.
- Select ADO.NET Entity Data Model, enter a name, such as MyNorthWindEDM.edmx, in the Name field, and click Add. The Entity Data Model Wizard appears.
- Confirm that Generate from database is selected and click Next.
- In the Choose Your Data Connection dialog box, click New Connection. The Choose Data Source dialog box appears.
- Select Microsoft SQL Server Database File and click Continue.
- Click the Browse button to locate the NORTHWND.MDF file in the project's App_Data folder and click Open.
- If you choose, click the Test Connection button. Then click OK to close the Connection Properties dialog box.
- Confirm that Save entity connection settings in Web.Config as: NORTHWNDEntities is selected and click Next.
- In the Choose Your Database Objects window, select the Tables check box and click Finish. The model, in this case MyNorthWindEDM.edmx, is created and added to the Models folder of the project.
- Add ProductsContoller.cs to the Controllers folder.
- In the Solution Explorer, right-click the Controllers folder and select Add | Controller.
- Name the controller ProductsController and click Add.
- In the ProductsController.cs, add a directive to allow access to the models in the Models folder of the project. In this example, we're only using the MyNorthWindEDM.edmx model.
using PROJECTNAME.Models; - Add the following code to request the server to return a JSON-formatted pageable, sorted grid showing the products table from the Northwind database:
public class ProductsController : Controller { NORTHWNDEntities northwind = new NORTHWNDEntities(); public ActionResult Index() { ViewBag.Message = "Products"; var products = northwind.Products.ToList(); return View(products); } public ActionResult Grid() { return View(); } public JsonResult GetRows() { //paging string sPageSize = Request["paging[pageSize]"]; int pageSize = -1; if (!string.IsNullOrEmpty(sPageSize)) { pageSize = int.Parse(sPageSize); } string sPageIndex = Request["paging[pageIndex]"]; int pageIndex = -1; if (!string.IsNullOrEmpty(sPageIndex)) { pageIndex = int.Parse(sPageIndex); } //sorting var sort = ""; var sortDir = ""; if (Request["sorting[0][dataKey]"] != null && Request["sorting[0][dataKey]"] != "") { sort = Request["sorting[0][dataKey]"]; if (Request["sorting[0][sortDirection]"] != null && Request["sorting[0][sortDirection]"] != "") { sortDir = Request["sorting[0][sortDirection]"]; if (sortDir.ToLower() == "ascending") { sort = "it." + sort + " asc"; } else if (sortDir.ToLower() == "descending") { sort = "it." + sort + " desc"; } } } IEnumerable<ProductModel> products; if (sort != "") { products = from p in northwind.Products.OrderBy(sort).Skip(pageIndex * pageSize).Take(pageSize) select new ProductModel() { ProductID = p.ProductID, ProductName = p.ProductName, UnitPrice = p.UnitPrice.Value }; } else { products = from p in northwind.Products.OrderBy("it.ProductID").Skip(pageIndex * pageSize).Take(pageSize) select new ProductModel() { ProductID = p.ProductID, ProductName = p.ProductName, UnitPrice = p.UnitPrice.Value }; } int totalCount = northwind.Products.Count(); var result = new { TotalRowCount = totalCount, Items = products }; return Json(result, JsonRequestBehavior.AllowGet); } } - Add links to the content delivery network (CDN), which contains the JavaScript dependencies and Wijmo style sheets used to format a view and create Wijmo widgets.
- In the Solution Explorer, expand the Shared folder and double-click _Layout.cshtml to open the file.
- Replace the existing markup in the
<head>tags with the following:<head> <title>@ViewBag.Title</title> <link href="@Url.Content("~/Content/Site.css")" rel="stylesheet" type="text/css" /> <script src="@Url.Content("~/Scripts/jquery-1.5.1.min.js")" type="text/javascript"></script> <link href="@Url.Content("~/Content/Site.css")" rel="stylesheet" type="text/css" /> <link href="http://cdn.wijmo.com/themes/aristo/jquery-wijmo.css" rel="stylesheet" type="text/css" /> <link href="http://cdn.wijmo.com/jquery.wijmo-open.1.1.4.css" rel="stylesheet" type="text/css" /> <link href="http://cdn.wijmo.com/jquery.wijmo-complete.1.1.4.css" rel="stylesheet" type="text/css" /> <script src="http://ajax.microsoft.com/ajax/jquery/jquery-1.5.1.min.js" type="text/javascript"></script> <script src="http://ajax.aspnetcdn.com/ajax/jquery.ui/1.8.9/jquery-ui.min.js" type="text/javascript"></script> <script src="http://cdn.wijmo.com/external/jquery.bgiframe-2.1.3-pre.js" type="text/javascript"></script> <script src="http://cdn.wijmo.com/external/jquery.glob.min.js" type="text/javascript"></script> <script src="http://cdn.wijmo.com/external/jquery.mousewheel.min.js" type="text/javascript"></script> <script src="http://cdn.wijmo.com/external/raphael-min.js" type="text/javascript"></script> <script src="http://cdn.wijmo.com/jquery.wijmo-open.1.1.4.min.js" type="text/javascript"></script> <script src="http://cdn.wijmo.com/jquery.wijmo-complete.1.1.4.min.js" type="text/javascript"></script> <script src="http://cdn.wijmo.com/external/jquery.tmpl.min.js" type="text/javascript"></script> </head>
Note: When linking to the CDN, make sure you are using the latest version of the dependencies at http://wijmo.com/downloads/cdn/. The CDN links are frequently updated and there may be a more recent version than listed in this documentation.
- Now you can add the markup to create the wijgrid. In the Solution Explorer, expand the Views folder, and double-click the Index.cshtml view to open it.
- Add the following jQuery. This markup creates a wijgrid with ProductID, ProductName and UnitPrice columns. It also calls the GetRows method from the ProductsController.cs you just created.
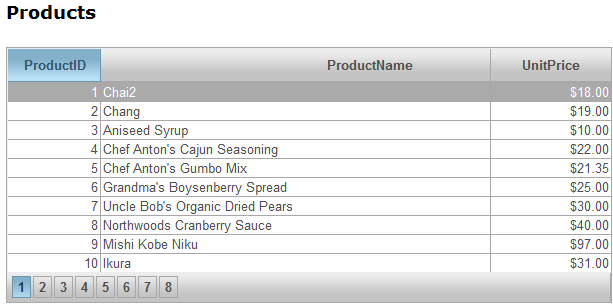
<table class="productgrid">
</table>
<script type="text/javascript">
    $(document).ready(function () {
        var editArray = [];
        $(".productgrid").wijgrid({
            dataKey: "ProductID",
            allowPaging: true,
            allowSorting: true,
            pageSize: 10,
            columns: [
                    { dataType: "number", dataFormatString: "n:0", width: "80px" },
                    {},
                    { dataType: "currency", width: "120px" }
                ],
            data: new wijdatasource({
                dynamic: true,
                proxy: new wijhttpproxy({
                    url: "../../Products/GetRows",
                    type: "POST",
                    dataType: "json"
                }),
                reader: {
                    read: function (datasource) {
                        var count = datasource.data.TotalRowCount;
                        datasource.data = datasource.data.Items;
                        datasource.data.totalRows = count;
                        new wijarrayreader([
                                { name: "ProductID", mapping: "ProductID" },
                                { name: "ProductName", mapping: "ProductName" },
                                { name: "UnitPrice", mapping: "UnitPrice" }
                            ]).read(datasource);
                    }
                }
            })
        });
    });
</script>
Notice that you did not add any HTML to the "productgrid" table as you did in wijgrid Tutorial since you are creating the grid dynamically on the server.
- Press F5 to run the project. The grid looks like this: