You can specify where the menu and submenus open relative to a trigger. For this tutorial, we will be using a a button click to open the menu and trigger the position option. See the Menu > Position sample of the MVC Control Explorer live demo at http://demo.componentone.com/ASPNET/MVCExplorer/menu/Position .
Complete the following steps:
- Create an ASP.NET MVC Wijmo application.
- In the Solution Explorer, click Views | Shared folder and double-click the _Layout.cshtml file to open it.
- Add the following markup to the_Layout.cshtml file to add buttons and a list:
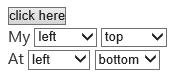
<h2>Position</h2> <div class="main demo"> <!-- Begin demo markup --> <button id="btn1"> click here</button> <ul id="wijmenu1"> <li><a href="#">Breaking News</a></li> <li><a href="#">Entertainment</a></li> <li><a href="#">Finance</a></li> <li><a href="#">Food & Cooking</a></li> <li><a href="#">Lifestyle</a> <ul><li><a href="#">submenu</a></li></ul> </li> <li><a href="#">News</a></li> <li><a href="#">Politics</a></li> <li><a href="#">Sports</a></li> </ul> <!-- End demo markup --> <div class="demo-options"> <!-- Begin options markup --> <div class="option-row"> <label> My</label> <select id="my1"> <option value="left">left</option> <option value="center">center</option> <option value="right">right</option> </select> <select id="my2"> <option value="top">top</option> <option value="center">center</option> <option value="bottom">bottom</option> </select> </div> <div class="option-row"> <label> At</label> <select id="at1"> <option value="left">left</option> <option value="center">center</option> <option value="right">right</option> </select> <select id="at2"> <option value="top">top</option> <option value="center">center</option> <option value="bottom" selected="selected">bottom</option> </select> </div> <!-- End options markup --> </div> </div> - Add the following script to initialize the widget:
<script type="text/javascript"> $(document).ready(function () { $("#wijmenu1").wijmenu({ orientation: 'vertical', trigger: "#btn1" }); $("#my1,#my2,#at1,#at2").change(function () { $("#wijmenu1").wijmenu("option", "position", { my: $("#my1").get(0).value + " " + $("#my2").get(0).value, at: $("#at1").get(0).value + " " + $("#at2").get(0).value }); }); }); </script> - Run your application. Your application should resemble the following image: