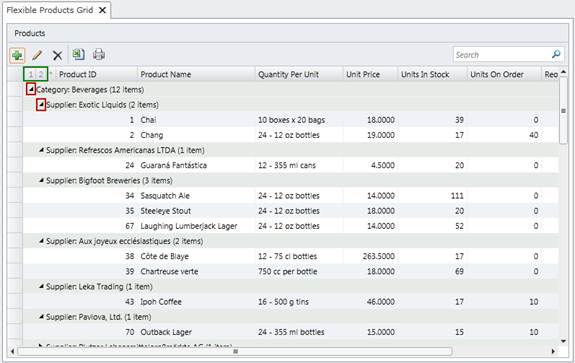
Now we will create groups so you can test drive expanding/collapsing sections.
Creating groups
- Close the application.
- Double-click on the FlexibleProductsGrid screen in the Solution Explorer, then click C1FlexGridRow on the left.
- In the Properties area, open the Appearance group, then select the Category and Supplier check boxes to create the groups. The groups will be created based on the order of the check boxes; just clear and reselect the check boxes to change the order.
- Check the Show Outline Bar check box.
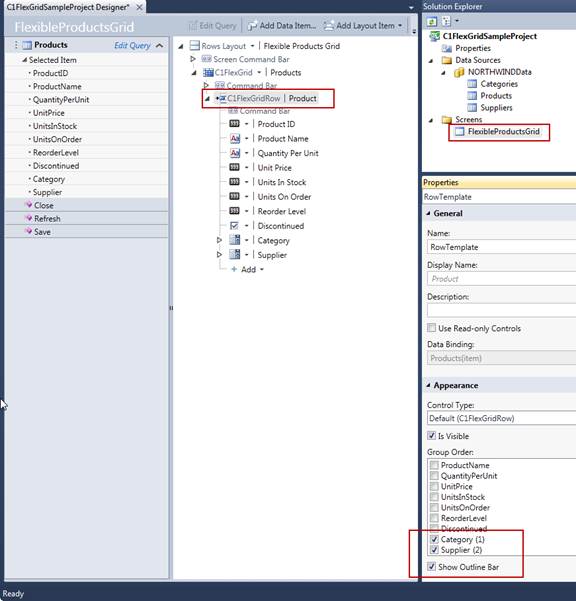
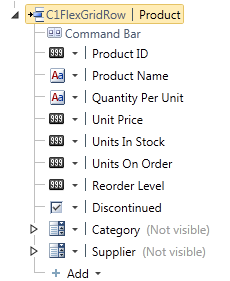
- Under C1FlexGridRow, select the Category element. In the Properties area, click on Appearance and clear the Is Visible check box. Do the same for the Supplier element. The C1FlexGrid area will look like this:
- Run the application. Click on the arrows to expand and collapse the groups in the grid. Click on the numbers in the Outline Bar to view the data collapsed by the group levels we chose earlier (in this case 1 is Category and 2 is Supplier. Click the asterisk to return to the original view of the grid.