A scaled-down version of this user guide project is now available for download.
http://downloads.datadynamics.com/ActiveReports6_UserGuide.zip
You can use Innovasys HelpStudio 3 to customize the help to your application, or you can use Adobe Acrobat to customize the included PDF build of the user guide. If you want to distribute the included CHM or PDF file as is for a quick solution, see Deploy End User Designer Help (Pro Edition).
To customize the PDF file (requires Adobe Acrobat)
- Download the file at: http://downloads.datadynamics.com/ActiveReports6_UserGuide.zip
- Open the zip file, and extract the AR6Designer.pdf file.
- Make any required changes in the file, and save it.
- Deploy it along with your application.
To customize the CHM file (requires Innovasys HelpStudio 3)
For more detailed help on using HelpStudio, see the HelpStudio help file. These steps are just enough to get you started.
- Download the file at: http://downloads.datadynamics.com/ActiveReports6_UserGuide.zip
- Open the zip file, and extract the contents. The main folder that the project extracts to is AR6EUD.
- In the AR6EUD folder, double-click the ActiveReports6EUD.hsp file to open the project in HelpStudio.
- In the table of contents for the help project, you will notice that some of the topics have a purple flag to the left of the topic name. These topics require editing (mainly converting code samples to script) and are not included in the help file output unless you clear the build flags from them.
- To clear the build flag from a topic, right-click the topic in the table of contents and select Topic Properties.
- In the Topic Properties dialog, under the Build Flags node, clear the check box next to In Progress.
- Click the OK button to close the dialog and save the change.
- Double-click any topic in the table of contents to open it for editing. You will also notice that content in some of the overview topics is highlighted with the purple In Progress build flag.
- To clear the build flag from content, select the content and in the toolbar, drop down the Build Flags list.
- Select Remove Build Flag. The selected content no longer appears highlighted in purple, and will be included in the help file output.
- If you want to find and replace specific text within the entire project, for example "ActiveReports" or "GrapeCity," from the Tools menu, select Project Find and Replace.
- Enter the text you want to find in the Find What field, and the text you want to replace it with in the Replace With field.
- Click the Find in Project button or hit Enter on your keyboard. The list of topics containing the search terms appears.
- Double-click any item in the list to open the topic for editing. The find dialog appears and the search term is highlighted in the topic.
- If you add or remove any topics and you are providing context-sensitive help, you need to regenerate the ActiveReports6.h file.
- From the Tools menu, select Create .h Help Context ID File.
- In the Create .h File dialog that appears, click the Browse button.
- In the Browse dialog that appears, select the ActiveReports6.h file and click OK.
- Select the check box to Assign Help Context IDs to any Topics without IDs already assigned.
- Change the #define Prefix to AR6_ or to the value you want to use, and click the OK button to create the file.
- To change the name and other properties of the generated help file, in the Project Explorer, expand the Build Profiles node.
- Double-click the AR6Designer (Compiled HTML Help 1.x file) build profile to open the Build Profile dialog.
- Make any changes to the build profile and click the OK button.
- To change the name and other properties of the generated PDF booklet, in the Project Explorer, expand the Booklets node.
- Double-click the AR6Designer booklet to open the booklet properties tab.
- Make any changes to the booklet and save the project.
- To build the help file, in the HelpStudio toolbar, click the Build this Project (F5) icon.
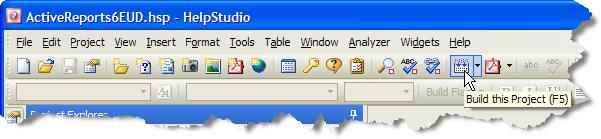
- In the Build Options dialog that appears, select the check boxes that you want to build and click the Build button. The compiled CHM or PDF files appear in the Build folder.
See Also