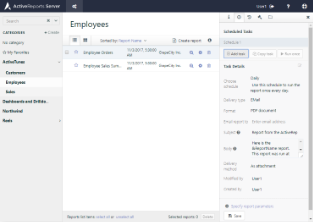
You can publish reports by setting up schedules for when to run them. You can customize how the final report is presented to your users by selecting a format and whether to e-mail the reports as attachments or as links.
To publish a weekly report
You can publish on any schedule that you need. See Schedule Options for more information.
- On the ActiveReports Server Report Portal, select the name of the report that you want to publish, for example, Annual Sales Performance. Information about the selected report appears in tabs to the right.
- Select the Schedule tab, and click the Add Task command. Details that you can set for scheduling appear below.
- To change to weekly, next to Choose schedule, click the drop-down arrow and select Weekly.
- To customize how the report appears, next to Format, hover over PDF document, click the drop-down arrow that appears, and select a file format, for example, Mht document (archived Web page).
- Next to Email report to, enter all of the email addresses to which you want to send the report, separated by commas.
- To send a link to the report in the email, rather than an attachment, next to Delivery method, select As Link from the drop-down list. Your name automatically appears in the Created By and Modified By fields.
- Click Save. The schedule is saved as Schedule 1.
- To change the name of the schedule, click the text Schedule 1. The text becomes editable, and you can press the Enter key on your keyboard to save it.
See Also
