ActiveReports provides you with the ability to create and access data sets that are hosted on an instance of ActiveReports Server. Server shared data sets retrieve data from shared data sources and these data sets can be used in multiple Page or RDL reports.
Using shared data sets, you can update the data set options from one location. For example, if you have multiple reports that use the same shared data set, you only need to update the data set options in one place.
- Accessing the Server Shared Data Sets dialog
- Elements of the Server Shared Data Sets dialog
- Create a Server Shared Data Set
- Edit a Server Shared Data Set
Accessing the Server Shared Data Sets dialog
You can access the Shared Data Sets option from the stand-alone designer or the Visual Studio designer. In order to access the server shared data sets, make sure you are connected to ActiveReports Server. See Connecting to ActiveReports Server for further information.
In the Stand-Alone Designer
Access the Server Shared Data Sets dialog from the Server menu of the stand-alone designer.

In the Visual Studio Designer
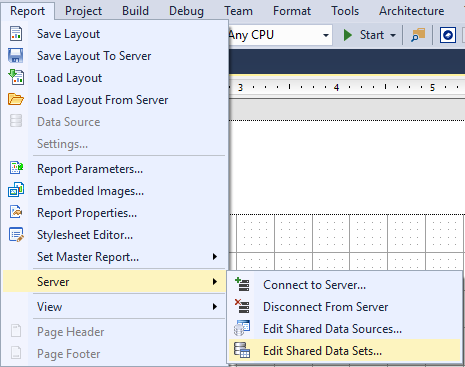
Access the Server Shared Data Sets dialog from the Report menu (Report > Server> Edit Shared Data Sets) of the Visual Studio designer.
Elements of the Server Shared Data Sets dialog
The dialog appears when you click the Shared Data Sets option from the Server menu of the stand-alone designer or the Report menu of the Visual Studio designer. Using the options available in this dialog, users can add, edit or refresh a server shared data set. Operations such as deleting and granting permissions for the shared data set can be performed from the Administrator dashboard. For more information, see Managing Data Sets.
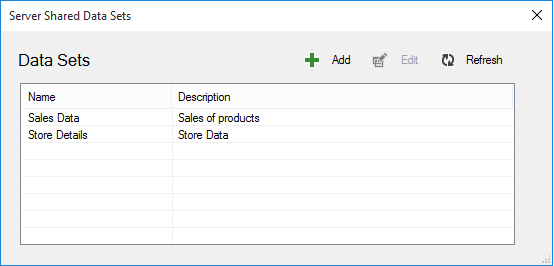
The Server Shared Data Sets dialog consists of the following elements:
| Elements | Description |
|---|---|
| Add | Opens the Server Shared Data Set dialog, that allows users to create a new data set based on the available options for server shared data sets. |
| Edit | Allows users to modify the data set properties of the selected data set. |
| Refresh | Allows users to refresh the list of data sets on ActiveReports Server. |
ActiveReports allows the ActiveReports Server administrator to work with server shared data sets that are hosted on an instance of ActiveReports Server. This section explains how the administrator can add or edit shared data sets using the Server Shared Data Set dialog.
Create a Server Shared Data Set
- Access the Server Shared Data Sets dialog from the stand-alone designer or the Visual Studio designer. See Accessing Server Shared Data Set dialog for more details.
- Connect your stand-alone designer to ActiveReports Server, if you are not already connected to the server. See Connecting to ActiveReports Server for further information.
- In the Server Shared Data Sets dialog that appears, click Add to create a new data set.
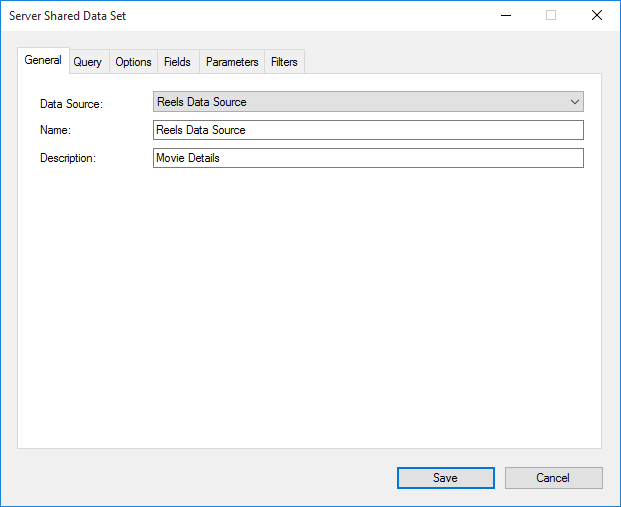
- On the General tab of this dialog, select the Data Source from the drop-down list box, and then enter a name for the data set. For example, Reels Data Source.
You can also choose from the following options available on General page.
Property Names Property Description Data Source Select a server data source from the drop-down list box. See Server Shared Data Sources, for more information.
Name Specify a name for the Server Data Set.
Description Provide a description related to the data set. The description for shared data set is optional.
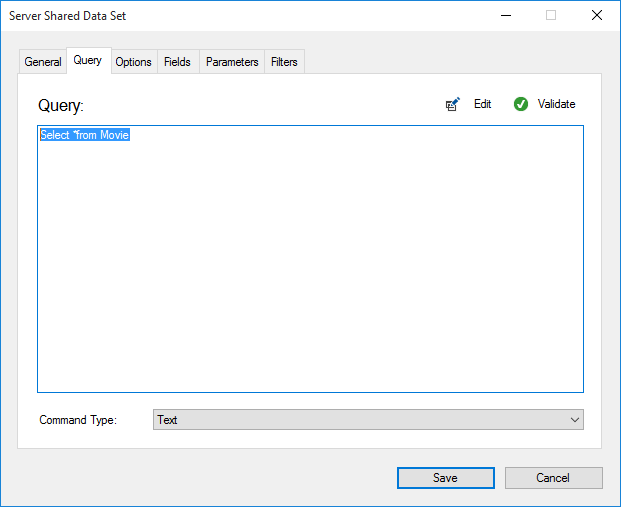
- Next on the Query tab of this dialog, select a Command Type from the drop-down list box. For example, select Text and enter Select *from Movie in the query box.
Note: You can also create dynamic queries on the Query tab. For more information. see UserContext in Multi-Tenant Reports.
You can also choose from the following options available on the Query page.
Property Names Property Description Query Set the query string based on the selected command type. Edit Open the Visual Query Designer to create SQL queries. For more information, see Visual Query Designer. Validate Validate the query. Command Type You can choose from the three enumerated command types.
Text - Choose Text if you want to write a SQL query to retrieve data.
StoredProcedure - Choose StoredProcedure if you want to use a stored procedure.
TableDirect - Choose TableDirect if you want to return all rows and columns from one or more tables.
Note: You can also build queries using the Visual Query Designer. The JSON and XML data providers do not support the Visual Query Designer for server shared data sets. You need to modify the query manually. - Click the Validate button to validate the query.
- Next on the Options tab of this dialog, click the Case sensitivity drop down box, and then select True to make distinctions between upper and lower case letters.
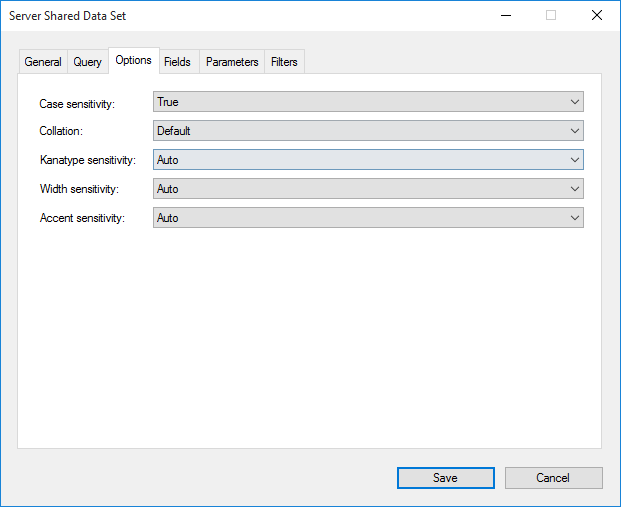
You can also choose from the following options available on the Options page.
Property Names Property Description CaseSensitivity Set this value to Auto, True, or False to indicate whether to make distinctions between upper and lower case letters. Auto, the default value, causes the report server to get the value from the data provider. If the data provider does not set the value, the report runs without case sensitivity. Collation Choose from Default or a country from the list to indicate which collation sequence to use to sort data. The Default value causes the report server to get the value from the data provider. If the data provider does not set the value, the report uses the server locale. This is important with international data, as the sort order for different languages can be different from the machine sort. KanaTypeSensitivity Set this value to Auto, True, or False with Japanese data to indicate whether distinctions are made between Hiragana and Katakana kana types. Auto, the default value, causes the report server to get the value from the data provider. If the data provider does not set the value, the report runs without kana type sensitivity. WidthSensitivity Set this value to Auto, True, or False with Japanese data to indicate whether distinctions are made between single-byte (half-width) characters and double-byte (full-width) characters. Auto, the default value, causes the report server to get the value from the data provider. If the data provider does not set the value, the report runs without width sensitivity. AccentSensitivity Set this value to Auto, True, or False to indicate whether distinctions are made between accented and unaccented letters. Auto, the default value, causes the report server to get the value from the data provider. If the data provider does not set the value, the report runs without accent sensitivity. - Next on the Fields tab of this dialog, you can Add or Delete a field according to your requirements in your data set.
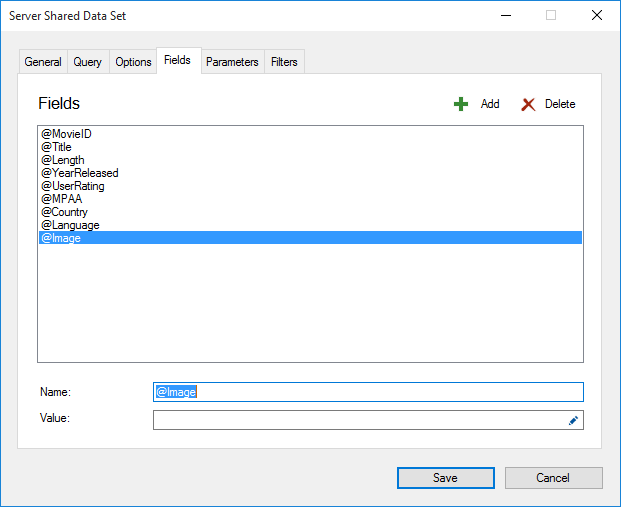
You can also choose from the following options available on the Fields page.
Property Names Property Description Fields Displays a list of fields in the Fields box. To see the fields in the field box, enter a valid query, table name, or stored procedure on the Query page. For more information, see Use Fields in Reports. Add Create a new field in the data set. Delete
Remove the selected field from a data set. Name Specify a name for the field. Value Enter a value for the field or create an expression using the expression editor to determine the value. - Similarly on the Parameters tab of this dialog, you can Add or Delete a parameter according to your requirements in your data set. See Parameters, for more information.
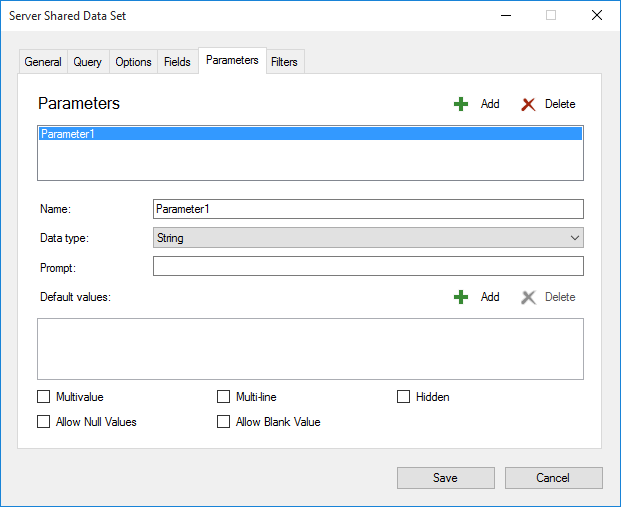
You can also choose from the following options available on the Parameters page.
Property Names Property Description Name Set a name for the parameter in this field. The value you supply here appears in the parameters list and must match the corresponding query parameter. Data type Set the data type for the parameter which must match the data type of the field that it filters. The interface presented might also differ depending on the data type.
- Boolean: Presents the user with two options True or False
- DateTime: Presents the user with a calendar picker to select a date and a time picker to select the time in cases where you do not supply a default value or a drop-down selection of available values
- Integer: Presents the user with a text box or a drop-down selection of available values
- Float: Presents the user with a text box or a drop-down selection of available values
- String: Presents the user with a text box or a drop-down selection of available values.
Prompt
Enter the text you want to see on the user interface to request information from the user in this field. By default this is the same as the Name property. Name Specify the name of the field. Multivalue Select this check-box to allow the user to select multiple items in the available values list. Multiline Select this check-box to allow multiline values in the parameter. The control automatically adjusts to accommodate multiple lines. Hidden Select this check-box to hide the parameter interface from the user and instead provide a default value or pass in values from a subreport or drill-through link. Please note that if you hide the user interface and do not provide a default value, the report will not run. Allow null value Select this check-box if you want to allow null values to be passed for the parameter. It is not selected by default. Allow blank value Select this check-box if you want to allow blank values to be passed for the parameter. It is not selected by default.
- Next on the Filters tab of this dialog, click Add to add a new filter for the data set. By default, an empty filter expression gets added to the filter list.
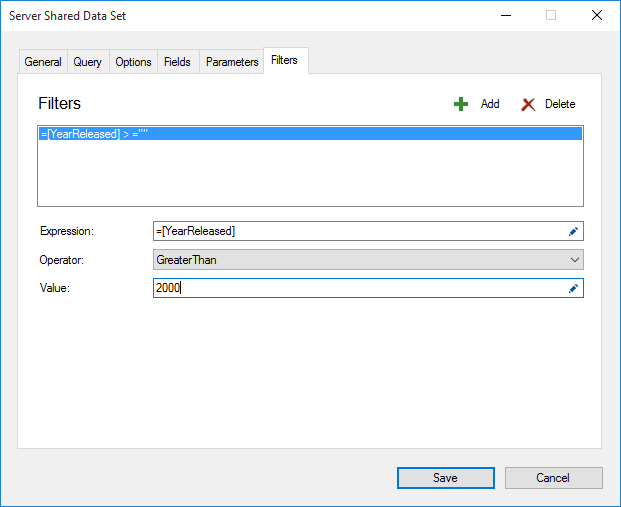
You can also choose from the following options available on the Filters page.
Property Names Property Description Add Create a new filter for the data set. Delete Remove a filter from the data set. Expression
Type or use the expression editor to provide the expression on which to filter data. Operator Select a operator from the drop-down box to compare the expression. See Operator options, for further information. Value Enter a value to compare with the expression based on the selected operator. - Under Expression, enter an valid expression or use the Expression Editor to provide an expression on which to filter your data. For example, =Fields!YearReleased.Value
- Under Operator, select an operator from the list to decide how to compare the Expression with the value. For example, set a GreaterThan operator on the Expression above.
- Under Value, enter a value or set an expression using the Expression Editor with which to compare the expression results. For example, 2000 to represent the year 2000.
- Click Save to add the shared data set to the server. The shared data set appears in the Server Shared Data Sets dialog and can be used while designing reports.
Edit a Server Shared Data Set
- Access the Server Shared Data Sets dialog from the stand-alone designer or the Visual Studio designer. See Accessing Server Shared Data Set dialog for more details.
- Connect your stand-alone designer to the ActiveReports Server if you are not already connected to the server. See Connecting to ActiveReports Server for further information.
- In the Server Shared Data Sets dialog that appears, select a data set from the list, and then click Edit.
- In the Server Shared Data Set dialog that appears, edit the data set properties with the help of this dialog.
- Click Save to update the data set properties and return to the Server Shared Data Sets dialog.