This sample demonstrates how you can digitally sign or set time stamp for a section report when exporting it to PDF format.
Note: PDF digital signatures is for use with the Professional Edition license only. An evaluation message is rendered when used with the Standard Edition license.
Sample Location
Visual Basic.NET
<User Folder>\Documents\GrapeCity Samples\ActiveReports 12\Professional\DigitalSignature\VB.NET
C#
<User Folder>\Documents\GrapeCity Samples\ActiveReports 12\Professional\DigitalSignature\C#
Run-Time Features
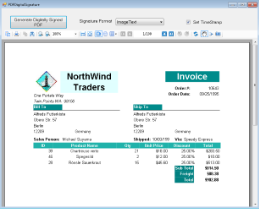
When you run this sample, the Invoice report is displayed in the Viewer control.
Clicking the Generate Digitally Signed PDF button in the Viewer toolbar creates a PDF file with a time stamp or digital signatures, based on the settings you have specified in the Viewer toolbar. You can change the content of signatures in the Signature Format box and you can add the time stamp to the generated pdf file by checking the Set TimeStamp checkbox, in the Viewer toolbar.
When you click the Generate Digitally Signed PDF button, a dialog for saving the destination file appears. After you indicate the location for a new PDF file, the PDF report file is created. Digital signature certificates dynamically reference and use GrapeCity.pfx, included in the project. Also, digital signatures dynamically load and use the gc.bmp file that you can find in the Image folder of this sample project.
Note: To run this sample, you must have access to the Nwind.mdb. A copy is located at [User Documents folder]\GrapeCity Samples\ActiveReports 12\Data\NWIND.mdb. If you are unable to access the data files in the sample, create the Data folder and place all the data files to this folder, or change the reference path to the data files within the folder according to your environment.
Project Details
Image folder
This folder stores the gc.bmp file with the GrapeCity logo that digital signatures dynamically load and use.
Invoice report
The Invoice report is the Sample report that uses three GroupHeader sections, a Detail section and a GroupFooter section as well as a label in the PageFooter section to display data.
See The Bound Data Sample topic for details on the Invoice report.
GrapeCity.pfx
In order to create a digital signature, you must have a valid PKCS#12 certificate (*.pfx) file.
For information on creating a self-signed certificate, see the Adobe Acrobat Help topic "Create a self-signed digital ID."
You can also create a PFX file from the Visual Studio command line. For more information and links to SDK downloads, see http://www.source-code.biz/snippets/vbasic/3.htm.
PDFDigitalSignature form
This is the main form of the Sample that uses the ActiveReports Viewer control in the bottom section of the form, and a panel docked to the top contains the Create Digitally Signed PDF button, the Signature Format box with the drop-down list and the Set TimeStamp checkbox.
Clicking the Generate Digitally Signed PDF button opens a dialog for saving the destination file. After you indicate the location for a new PDF file, the PDF report file is created.
The drop-down list of the Signature Format box contains the following options.
- Invisible - the invisible pdf digital signature.
- Text - the pdf digital signature that contains text only.
- Image - the pdf digital signature that contains graphics only.
- ImageText - the pdf digital signature that contains text and graphics.
Checking the Set TimeStamp checkbox allows you to add the time stamp to the signature of the generated pdf file. The time stamp contains the Time Stamp Server address, its login and password information.
Right-click PDFDigitalSignature in the Solution Explorer and select View Code to see the code implementation for the pdf digital signature options.
Resource1.resx
This file contains the string for the message box that appears after the PDF file is generated.
See Also