This walkthrough illustrates binding a section report to a CSV data source.
The walkthrough is split up into the following activities:
- Adding an ActiveReport to the Visual Studio project
- Connecting to a data source
- Creating a layout for the report
- Viewing the report
Note: This walkthrough uses the Products_header_tab.csv sample database. By default, the Products_header_tab.csv file is located at [User Documents folder]\GrapeCity Samples\ActiveReports 12\Data.
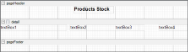
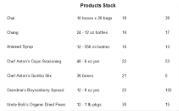
When you complete this walkthrough you get a layout that looks similar to the following at design time and at run time.
Design-Time Layout
Run-Time Layout
To add an ActiveReport to the Visual Studio project
- Create a new Visual Studio project.
- From the Project menu, select Add New Item.
- In the Add New Item dialog that appears, select ActiveReports 12 Section Report (code-based) and in the Name field, rename the file as rptProductsStock.
- Click the Add button to open a new section report in the designer.
See Adding an ActiveReport to a Project for information on adding different report layouts.
To connect the report to a data source
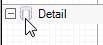
- On the detail section band, click the Data Source icon.
- In the Report Data Source dialog, on the CSV tab, click the Build button next to Connection String.
- To specify the File Path, click the Open button and navigate to [User Documents folder]\GrapeCity Samples\ActiveReports 12\Data and select the Products_header_tab.csv file.
- Select the Column Separator as Tab from the drop-down menu. See the Sample CSV Connection String drop-down in CSV Data Provider topic for further details.
- Click OK to save the changes and close the Configure CSV Data Source wizard. The Connection String tab displays the generated connection string as shown below:
Path=C:\\[User Documents folder]\\GrapeCity Samples\\ActiveReports 12

        \\Data\\Products_header_tab.csv;Locale=en-US;

TextQualifier=";ColumnsSeparator= ;RowsSeparator=\r\n;HasHeaders=True - Click OK to close the Report Data Source dialog. You have successfully connected the report to the CSV data source.
To create a layout for the report
- In the Visual Studio toolbox, expand the ActiveReports 12 Section Report node and drag four TextBox controls onto the detail section and set the properties of each textbox as indicated:
TextBox1
Property Name Property Value DataField ProductName Text Product Name Location 0, 0in Size 2.3, 0.2in TextBox2
Property Name Property Value DataField QuantityPerUnit Text Quantity Location 2.4, 0in Size 2.4, 0.2in TextBox3
Property Name Property Value DataField UnitsInStock Text Stock Location 4, 0in Size 1, 0.2in TextBox4
Property Name Property Value DataField UnitPrice Text Unit Price Location 5.5, 0in Size 1, 0.2in - Drag a Label control onto the pageHeader section and set the properties as indicated:
Property Name Property Value Text Products Stock Location 2.55, 0in Size 1.375, 0.25 in Font Bold: True
Size: 12
To view the report
- Click the preview tab to view the report at design time.
OR
- Open the report in the Viewer. See Windows Forms Viewer for further information.
See Also