MultiRow can connect to a SQL Server database using ADO.NET in the same way as the standard .NET Framework controls.
Assumptions
This topic assumes that the following are being used:
- Microsoft Visual Studio 2008, 2010, 2012 or 2013
- Microsoft SQL Server 2005 or 2008
- Northwind and pubs Sample Databases (
 Download Northwind sample database and pubs sample database from http://msdn.microsoft.com/library/ms143221.aspx)
Reference: Installing Sample Database
The sample database is not installed by default with Microsoft SQL Server. After installing Microsoft SQL Server, refer to the Microsoft SQL Server documentation and MSDN to install the sample database. An example of the installation steps is provided below.
- Install Microsoft SQL Server. The steps below are for the Express Edition but most of them can be used irrespective of the Visual Studio version.
- Download Northwind and pubs Sample Databases for SQL Server 2000 http://www.microsoft.com/downloads/details.aspx?FamilyId=06616212-0356-46A0-8DA2-EEBC53A68034. This database is for Microsoft SQL Server 2000, but can also be used with Microsoft SQL Server 2005 or 2008.
- Install the downloaded samples. The default installation folder is C:\SQL Server 2000 Sample Databases.
- Install Microsoft SQL Server Management Studio Express.
- Run Microsoft SQL Server Management Studio Express as Administrator and connect to Microsoft SQL Server. Example of server name: (local)\SQLEXPRESS
- Select Databases from the tree on the left and click on the Attach menu of the context menu.
- Click the Add button on the Attach Databases page.
- On the Locate Database Files page, select C:\SQL Server 2000 Sample Databases\NORTHWND.MDF and click OK.
- Click OK on the Attach Databases page.
- Expand databases in the tree on the left and check if Northwind has been added.
Connecting to Database
Register the SQL Server datasource into the project. This operation is not dependent on MultiRow.
- Start Visual Studio and create a new Windows application.
- Click Data - Add New Data Source in Visual Studio.
- On the Data Source Configuration Wizard page, select Database and click Next.
- On the Choose Your Data Connection page, click on New Connection and add a connection with the following configuration.
- Data source - Microsoft SQL Server (SqlClient)
- Server name (Example) - (local)\SQLEXPRESS
- Select or enter a database name - Northwind
- After adding the connection, click Next.
- On the Save the Connection String to the Application Configuration File page, click Next.
- On the Choose your Database Objects page, check the following table:
- Orders
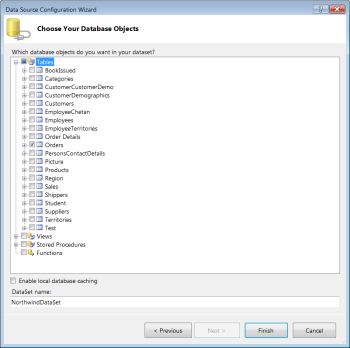
- Click Finish.
- Check that Orders has been added to the Data Sources window of Visual Studio.

Designing Templates
Create a template for MultiRow based on the database definition.
- Click Project - Add New Item in Visual Studio.
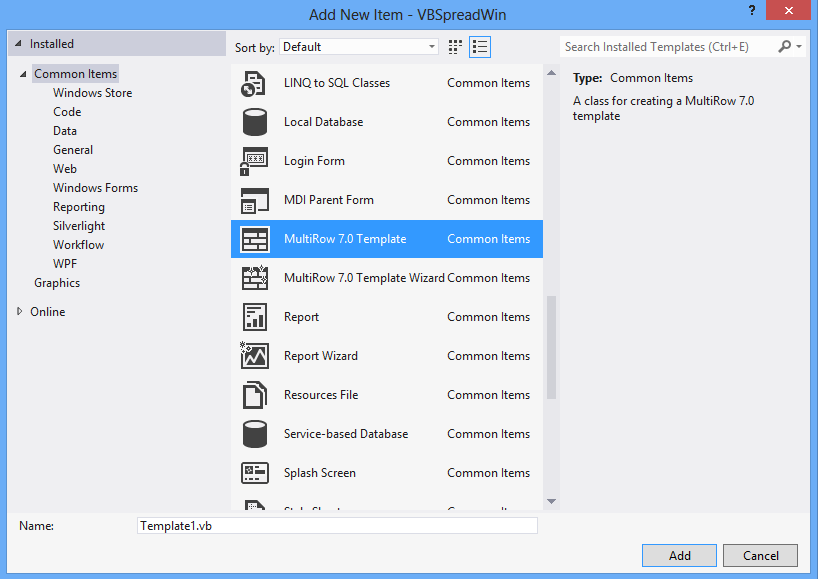
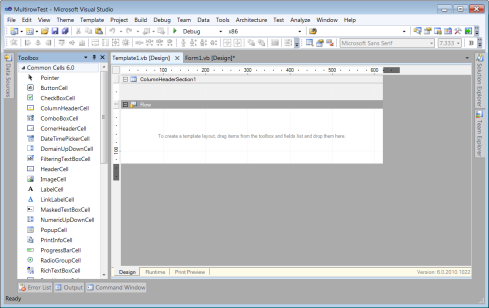
- On the Add New Item page, select the MultiRow 7.0 Templates and click on the Add button.
- Check that the Template1.vb or Template1.cs design page is displayed.
- Click Data - Show Data Sources in Visual Studio.
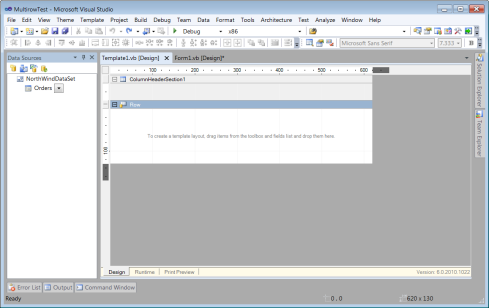
- Select the Orders table under the NorthwindDataSet from the tree in the Data Sources window. Drag and drop it to the Row area while pressing the Ctrl key.
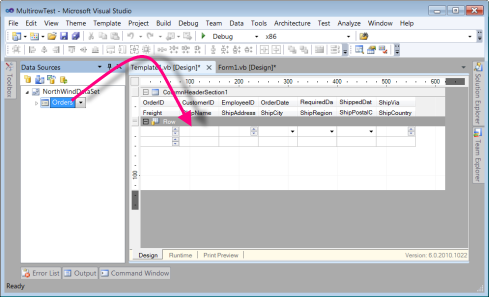
- Double-click on the edges of the row and adjust the height of the row.
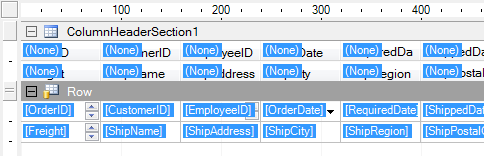
- Click on Template - CellDisplayMode - DataField in Visual Studio and verify that the data fields have been assigned to the cells.
- Save the project and use the next set of steps provided in Binding the Grid to Data.
Binding the Grid to Data
Place the GcMultiRow control on the form and assign the data source and template to the grid.
- Open the design view of the form (Form1).
- Select the Orders table from the Data Sources window and click Customize... from the drop-down list.
- On the Options page that is displayed, check GcMultiRow in the list of Associated controls.
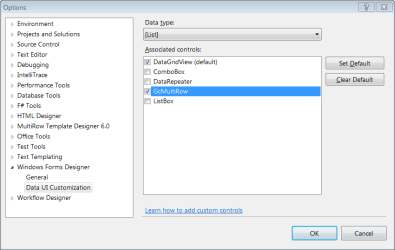
- Close the dialog by clicking on the OK button.
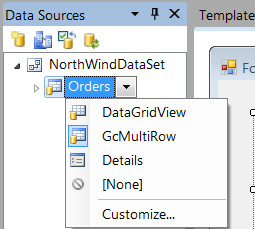
- Select the Orders table, and click on GcMultiRow in the drop-down list of the Data Sources window.
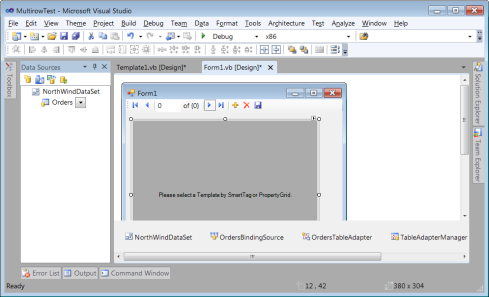
- Drag and drop the Orders table onto the design view of the form (Form1).
- Verify that the BindingNavigator (OrdersBindingNavigator) and GcMultiRow (OrdersGcMultiRow) have been placed on the form.
- Click on Build - Build Solution in Visual Studio.
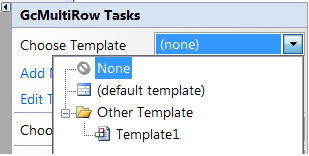
- Select the OrdersGcMultiRow control on the form and select Template1 from the Choose Template option in Smart Tag.
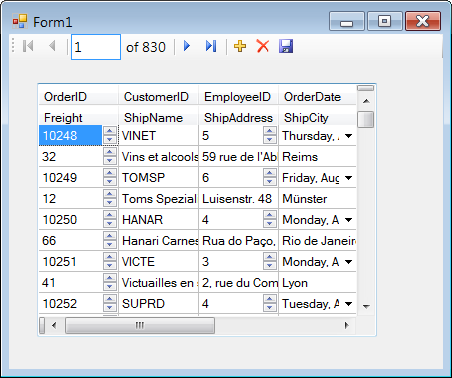
A template and data source have been assigned to the grid using the above steps. When you run the project, you can see that the values from the datasource have been read into the grid.