You can create a blue print of the template in an interactive manner using the wizard. The template created using the wizard can be edited using the Template Designer just like normal templates.
Here, the process has been described with Visual Studio 2012 as an example, but the process is the same with Visual Studio 2008, Visual Studio 2010, and Visual Studio 2013.
Create and Add New Templates
This example explains how to create and add a new template using the wizard.
- Create a new Windows application project in Visual Studio or open an existing one.
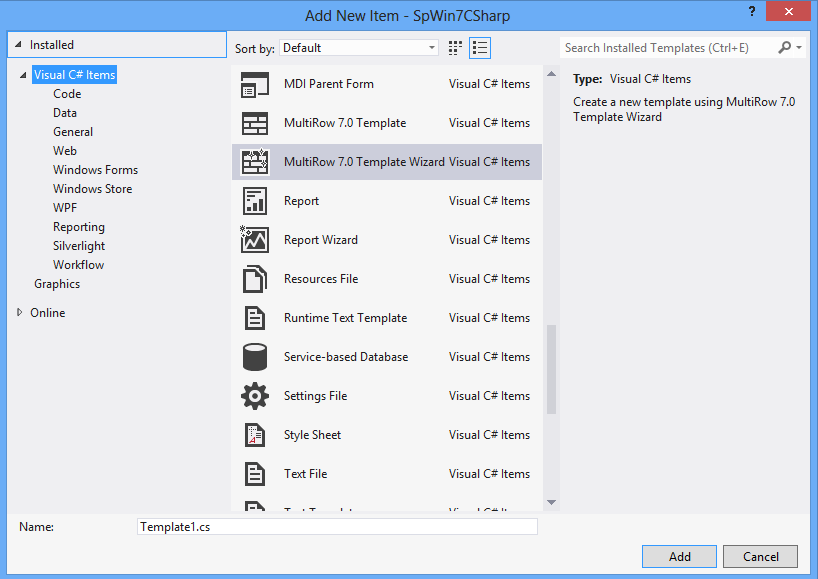
- From the Visual Studio menu, select Project - Add New Item.
- Select MultiRow 7.0 Template Wizard from the list and click the Add button.
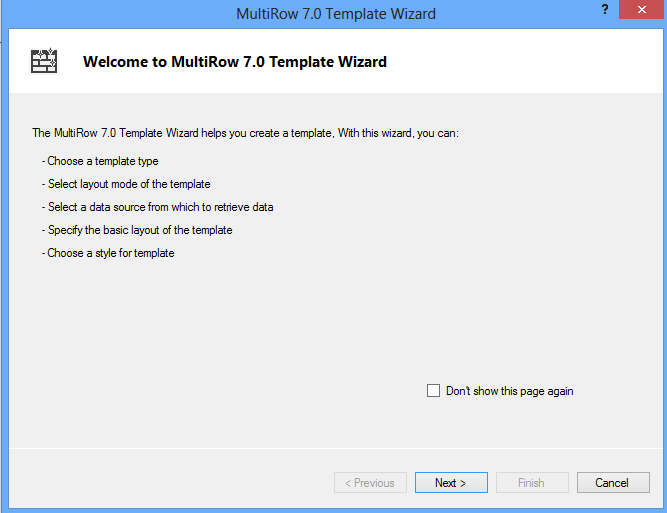
- Create the template using the wizard.
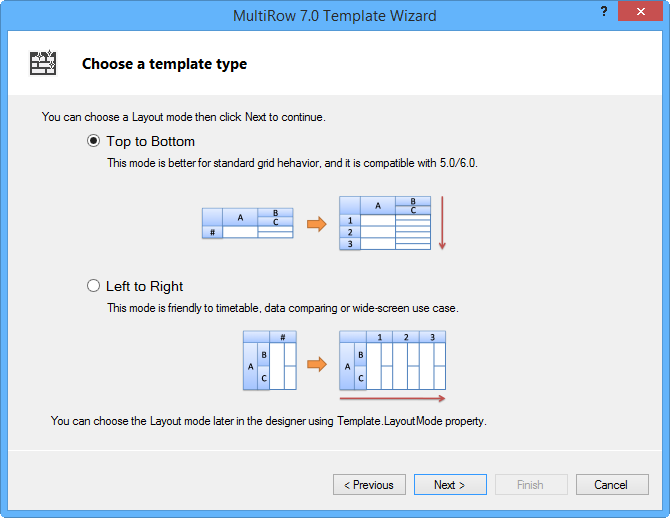
- Select the template mode.
- Check the template added to the project in the Solution Explorer.
Assign Template to the Control
Use the following steps to assign a template created with the wizard to a GcMultiRow control placed on the form.
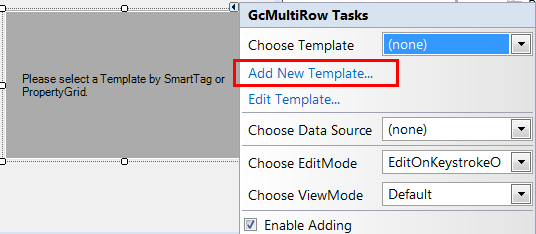
- Select the GcMultiRow control on the form, and then select Select Template - Add New Template from the Smart Tag.
- Create a template using the wizard.
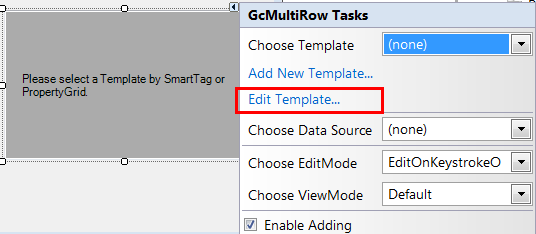
- Select the GcMultiRow control and open the designer by clicking Edit Template in the Smart Tag.
See Also