You can use tables to create multiple tabular screens with rows and columns just like the table creation feature of Microsoft Word or the report designer of Visual Studio. You can select whether you would like to preserve the created tabular screen as a tabular screen, or if you would like to change it to individual cells.
If you change it to individual cells, it is not possible to revert back to the table unless there is an Undo option. Since tables are a design time feature, runtime behavior is not affected if the cells are created from a table. Also, you cannot work with tables at runtime.
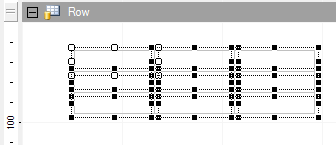
Table Structure
Add Tables
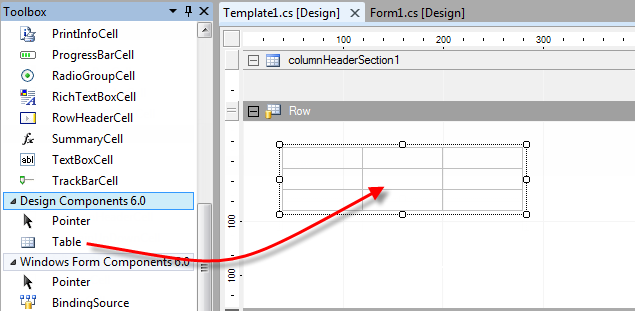
To add tables, drag and drop the Table from the toolbox window in the designer.
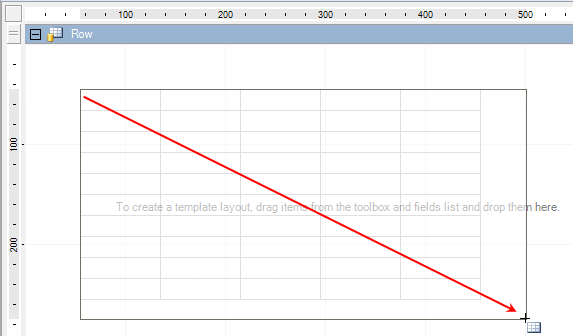
To place a table that includes cells with a default size, drag a specific range in the designer section to match a selected area.
Move Tables
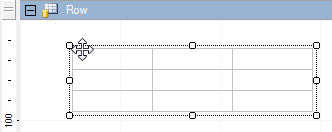
Tables can be moved in the same way as cells, using the mouse or keyboard. Refer to Moving Cells in the Designer.
Delete Tables
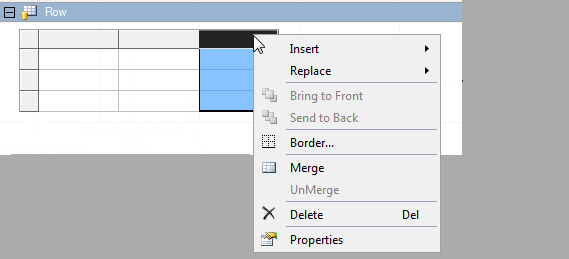
To delete tables, select the table and then press the Delete key or click Delete in the context menu.
Ungroup Tables
To split the cells of the table into individual cells, you need to click Ungroup Table from the context menu. Once the table is converted to individual cells, it is not possible to go back to the original table, unless the Undo option is enabled.
Delete Cells
To delete cells in the table, you need to select the cells inside the table, and then select Delete from the context menu. After the cells have been deleted, a pattern showing that the cells do not exist is shown.
Merge and Split Cells
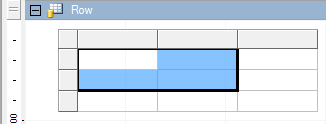
You can merge multiple cells in the table and split the merged cells. When you merge multiple cells, they are changed to a single cell of the same size.
Insert Rows
To insert rows into the table, select the cells or the row headers inside the table and select Insert from the context menu. If you select multiple adjacent rows, and perform row insertion, then the selected number of rows is inserted.
 |
Insert in the context menu does not work if you select multiple rows that are not adjacent. |
Delete Rows
In order to delete the rows from the table, select the row headers from the table, and either press the Delete key or click Delete in the context menu.
Change the Row Width
In order to change the width of the table rows, drag the edges of the table row headers.
Insert Columns
To insert columns into the table, select the cells inside the table, or the column headers, and click Insert in the context menu. If you select multiple adjacent columns, and perform column insertion, then the selected number of columns is inserted.
|
Insert in the context menu does not work if you select multiple columns that are not adjacent. |
Delete Columns
To delete columns from the table, select the column header in the table, and either press the Delete key or click Delete in the context menu.
Change the Column Height
To change the table column height, drag the column header edge with the mouse.
Table and Cell Borders
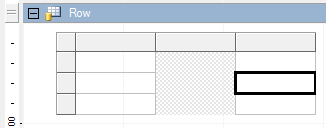
When multiple cell boundaries overlap, the cell borders that have a higher index are given priority. This may cause cases where the results of applied borders might not be as expected, due to the ordering of cell indices. In this case, select the target cells and change the indices.
See the following example:
- Create the table and select four cells at the top left.
- Select Borders in the context menu, and under that, select Normal Border. Select Outline and Inside.
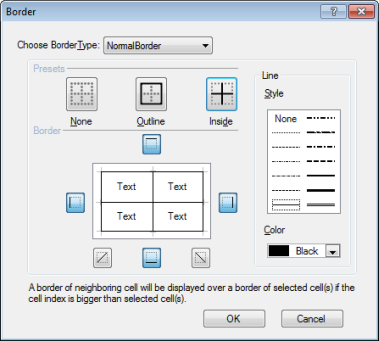
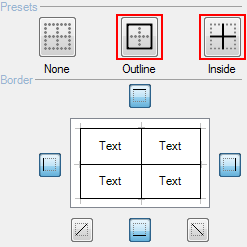
- Click OK to close the dialog.
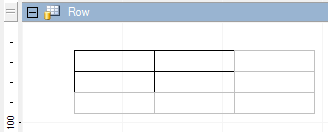
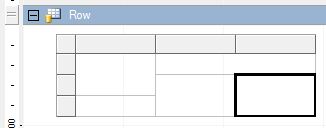
You can see that there is a difference between the applied borders and the preview on the Borders dialog. This is because when the cell boundaries overlap the neighboring cells, the cell borders with higher indices are given preference. In the following image the numbers of the bottom right cells are higher than the selected cells, and since the cells are displayed with grey borders by default, the result looks like this.
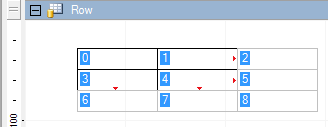
Select four cells at the top left, and from the context menu, select Bring to Front. This changes the index numbers of the cells, and you get the expected result.
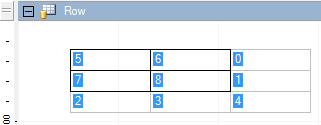
Table Captions
By default, the caption of the table is displayed as "A, B, C, ..." for the column header, and as "1, 2, 3, ..." for the row header. If you want to change the caption of the table, set the TableRowCaptionFormat and TableColumnCaptionFormat in the designer options.
|
It is not possible to change the height of the column header, or the width of the row header, even if a caption that exceeds the display area of the cell is set. |