You can add arbitrary controls to each of your C1Wizards steps using a simple drag-and-drop operation, markup, or code. This topic illustrates how to add a standard Button control to a step This topic assumes you have added at least one step to the control (see Adding a Step).
In Design View
Complete the following steps:
- In the designer, select the step you wish to add the control to. To select a step, select the C1Wizard control and then click on the step.
- Select a Button control from the Visual Studio Toolbox and then drag it onto the C1WizardStep.
In Source View
Complete the following steps:
- Locate the <cc1:C1WizardStep>tag for the step you wish to add the control to and place the following tag between them:
<asp:Button ID="Button1" runat="server" Text="Button" /> -
Run the program and observe that a Button control appears on the step.
In Code View
Complete the following steps:
- Create a Button control and add text to it by entering the following code to the Page_Load event:
To write code in Visual Basic
Visual Basic Copy CodeDim nuButton As Button = New Button() nuButton.Text = "Hello World!"
To write code in C#
C# Copy CodeButton nuButton = new Button(); nuButton.Text = "Hello World!";
-
Add the Button control to the step:
To write code in Visual Basic
Visual Basic Copy CodeC1WizardStep1.Controls.Add(nuButton)
To write code in C#
C# Copy CodeC1WizardStep1.Controls.Add(nuButton);
-
Run the program and observe that a Button control appears on the step.
 This topic illustrates the following:
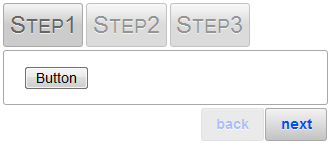
The following image depicts a C1WizardStepwith a button control: