In this step you'll create a simple scheduling application using the C1Calendar and C1Schedule controls. You'll then customize the appearance of your scheduling application using the incorporated Smart Designers and without adding any code to your project.
To begin, complete the following steps:
- Create a new .NET project.
- Add a SplitContainer control to the form and set its Orientation property to Horizontal.
- If the SplitContainer is not docked on the form, set its Dock property to Fill.
- Select Panel1, the top pane of the SplitContainer, and add a C1Calendar control to the form within the pane.
- Set C1Calendar1's Dock property to Fill.
- Select Panel2, the bottom pane of the SplitContainer, and add a C1Schedule control to the form within the pane.
- Set C1Schedule1's Dock property to Fill.
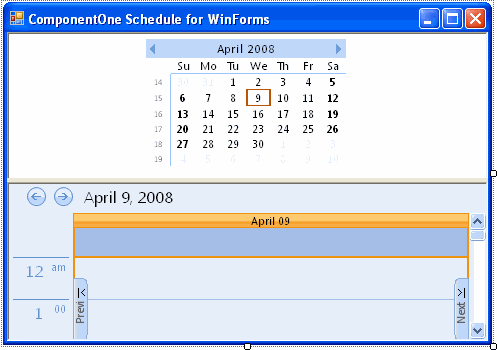
Your form should look similar to the following image:
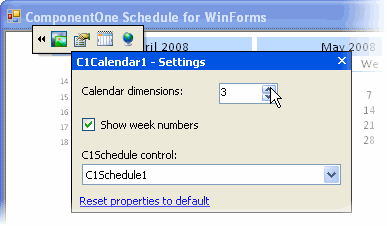
- Open the C1Calendar Smart Designer located near the top left of the C1Calendar control to set some of the C1Calendar settings. For more information on the C1Calendar Smart Designer, see C1Calendar Smart Designer.
- Click the Settings button on the C1Calendar Smart Designer to open the Settings dialog box and then complete the following:
- Select C1Schedule1 from the C1Schedule control drop-down list to link the C1Calendar control to the C1Schedule control.
- Set the Calendar dimensions box to 3.
- Close the Settings dialog box.
Note: The CalendarDimensions property can display only the number of months that it can fit into the available space. - Resize the form and the SplitContainer to accommodate the new C1Calendar dimensions.
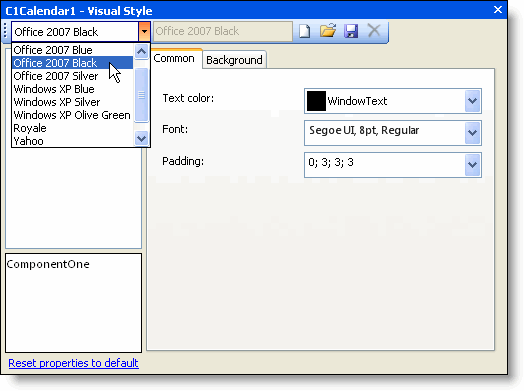
- Click the Visual Style button on the C1Calendar Smart Designer to open the Visual Style dialog box.
- In the Visual Style dialog box, select Office 2007 Black from the Current Visual Style drop-down list, and close the dialog box.
- Open the C1Schedule Smart Designer located near the top left of the C1Schedule control to set some of the C1Schedule settings. For more information on accessing the C1Schedule Smart Designer, see C1Schedule Smart Designer.
- Click the Calendar Settings button and in the Calendar Settings dialog box change the year in the First date drop-down box to 2005.
- Click the Visual Style button on the C1Schedule Smart Designer to open the Visual Style dialog box and complete the following:
- Select Office 2007 Black from the Current Visual Style drop-down list.
- Click the Week View button
- Close the Visual Style dialog box.

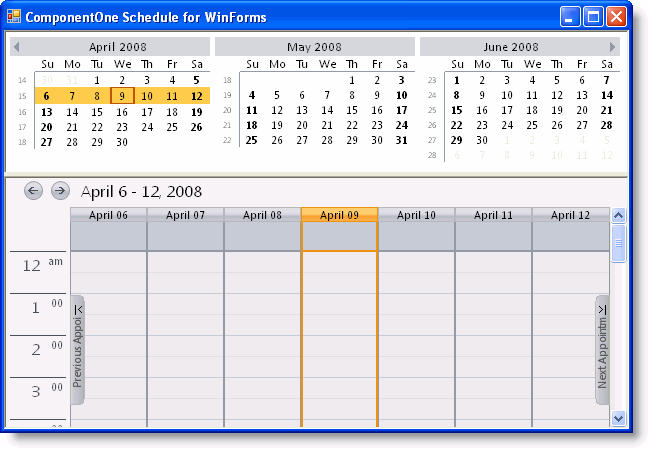
Run the program and observe the following:
A simple schedule application in week view with a three-month calendar using a predefined Visual Style will appear.
You have successfully created a simple scheduling application without writing a single line of code. In the next step, you'll learn how to bind the C1Schedule control to a data source.