 Show All
 Hide All
With ActiveReports 6 Professional Edition, you can set up Web applications for deployment by including the ActiveReports deployment .msm file in your Visual Studio deployment project.
In order to successfully deploy an ActiveReports Web project, the server must have the following installed.
- Microsoft .NET Framework Version 2.0 or higher
- IIS (Internet Information Services) Version 6.0 or higher
- ASP.NET Version 2.0 or higher (must be the same version as the Framework)
To add an installer project to an ActiveReports project
- Open an existing ActiveReports Web project or create a new one.
- From the Build menu, select Build Solution to build your report project.
- From the File menu, select Add, then New Project.
- In the Add New Project dialog that appears, in the Project types pane, expand the Other Project Types node and select Setup and Deployment.
- In the Templates pane, select Web Setup Project, rename the file and click OK. A File System (YourSetupProjectName) tab appears.
- In the Properties window, with YourSetupProjectName selected, enter the name of your file in the ProductName property.
The ProductName property determines the name that is displayed for the application in folder names and in the Add/Remove Programs dialog box.
To add the ActiveReports application to the installer
- Select the installer project in Solution Explorer.
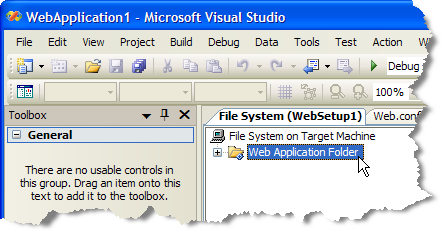
- In the File System Editor, choose the Web Application Folder.

Tip: If the File System Editor is not open, drop down the View menu and select Editor, then File System. - From the Visual Studio Action menu, select Add, then Project Output.
- In the Add Project Output Group window that appears, next to Project, select your ActiveReports project name from the drop-down list.
- Hold down the Ctrl key and select Primary Output and Content Files from the list and click OK to add all of the existing assembly dependencies to your Web application.

- On the Build menu, select Build YourInstallerProjectName to build your installer project.
 |
Note: If you prefer to use the ActiveReports .msm file, please contact powersupport@grapecity.com. |
To deploy the installer application to a Web server
- In Solution Explorer, select the installer project.
- From the Project menu, select Install and follow the wizard's steps to install it.
- To access the Web application that was deployed, start Internet Explorer and enter the URL: http://localhost:nnnn where nnnn is the port number.
 |
Important: If you are using the WebViewer control or HttpHandlers in your application, you must also Configure HTTPHandlers (Pro Edition). If you are using the FlashViewer ViewerType of the WebViewer control, you must add the ActiveReports.FlashViewer.swf file to your IIS root folder. You can find the file in the C:\Program Files\GrapeCity\ActiveReports 6\Deployment folder (on a 64-bit Windows operating system, this file is located in C:\Program Files (x86)\GrapeCity\ActiveReports 6\Deployment). If you are using a localized version of the FlashViewer, you also need to add the ActiveReports.FlashViewer.Resources.swf file. For more information, see Localize the Flash Viewer. |