 Show All
 Hide All
This walkthrough introduces you to Silverlight in ActiveReports and will guide you through the process of creating a Silverlight application in Visual Studio and viewing a report in the ActiveReports Silverlight Viewer.
This walkthrough is split up into the following activities:
- Creating a Silverlight application in Visual Studio 2010
- Adding the ActiveReports Silverlight Viewer control to the xaml page
- Binding a report to the ActiveReports Silverlight Viewer
- Previewing a report
- Printing a report
When you have completed this walkthrough, you will have a Web site that looks similar to the following:

To create a Silverlight application in Visual Studio 2010
- On the Visual Studio File menu, click New Project.
- In the New Project dialog that appears, select Silverlight Application in the list of templates.
- Specify the name and location of the project and then сlick the OK button.

- In the New Silverlight Application dialog, select a method for hosting your Silverlight application and then click the OK button.

To add the Silverlight Viewer control
- Open MainPage.xaml in Solution Explorer.
- From the Toolbox, drag the Viewer control to Design view of MainPage.xaml.
- Drag any corner of the control to enlarge the viewer.
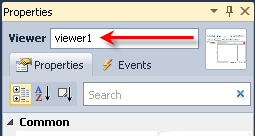
- In the Properties window, rename the Viewer control to viewer1.
 |
Note: Microsoft Silverlight 4 Tools is required for the proper functioning of the ActiveReports Silverlight Viewer. |
To bind a report to the ActiveReports Silverlight Viewer
To bind a report stream (aspx page)
- In Solution Explorer, select the YourProject.Web directory.
- On the Visual Studio Project menu, click Add New item.
- From the basic list of templates, select ActiveReports 6 (code-based) File and create a report as decribed in the Basic Data Bound Reports walkthrough.
- On the Visual Studio Project menu, click Add New item.
- In the dialog that appears, select Web Form.
- Rename the file to GetReport.aspx and then click Add.
- Double-click the design view of GetReport.aspx to create an event-handling method for the Page_Load event.
- On GetReport.aspx.cs/vb that opens, add the following code:
Paste to GetReport.aspx.cs to the Page_Load event Copy CodeYourReportName my_rpt = new YourReportName(); my_rpt.Run(); System.IO.MemoryStream ms = new System.IO.MemoryStream(); my_rpt.Document.Save(ms); Response.BinaryWrite(ms.ToArray()); Response.End();
- In Design view of MainPage.xaml, select the Viewer control.
- In the Properties window, go to the Events view.
- In the list of events, double-click the viewer1_Loaded event.
- On MainPage.xaml.cs/vb, add the following code to the viewer1_Loaded event:
Paste to MainPage.xaml.cs to the viewer1_Loaded event Copy Codethis.viewer1.ViewModel.ReportPath = "../GetReport.aspx";
To bind an RPX report handler
- In Solution Explorer, select the YourProject.Web directory.
- On the Visual Studio Project menu, click Add Reference.
- In the dialog that appears, go to .NET tab, locate and select GrapeCity ActiveReports Web Component and then click OK.
- With the YourProject.Web directory selected, on the Visual Studio Project menu, click Add Existing item.
- In the dialog that appears, locate and select an RPX report and then click OK.
- On MainPage.xaml, add the following code to Design view:
Paste to the UserControl section on the Design view of MainPage.xaml Copy Codexmlns:vvm="clr-namespace:DataDynamics.ActiveReports.ViewModel;assembly=ActiveReports.Silverlight"
- On MainPage.xaml, replace the code with the following one:
Paste to the Design view of MainPage.xaml Copy Coded:DesignHeight="300" d:DesignWidth="400" xmlns:my="clr-namespace:DataDynamics.ActiveReports;assembly=ActiveReports.Silverlight" Loaded="viewer1_Loaded">
- In the Properties window, go to the Events view.
- In the list of events, double-click the viewer1_Loaded event.
- On MainPage.xaml.cs/vb that opens, add the following code to the viewer1_Loaded event:
Paste to MainPage.xaml.cs to the viewer1_Loaded event Copy Codevar relPath = new Uri("../YourReportName.rpx?OutputFormat=Rdf3", UriKind.RelativeOrAbsolute);
viewer1.ViewModel.LoadDocument.Execute(relPath); - In Solution Explorer, open the Web.config file.
- Add the following code to the Web.config file to set an rpx handler. You can find more information on how to configure http handlers in Configure HTTPHandlers (Pro Edition) and Add Report Links to Web Forms (Pro Edition).
XML code. Paste in the XML view of the Web.config file inside the system.web section. Copy Code<httpHandlers>
<add verb="*" path="*.rpx" type="DataDynamics.ActiveReports.Web.Handlers.RpxHandler, ActiveReports.Web, Version=6.0.865.0,
Culture=neutral, PublicKeyToken=cc4967777c49a3ff" />
</httpHandlers>
Note: You should update the Version and PublicKeyToken values to reflect the current version of ActiveReports installed on your machine.
You can find the Version and PublicKeyToken values in the Global Assembly Cache (GAC), C:\WINDOWS\ASSEMBLY.
To bind an RDF report
- In Solution Explorer, select the YourProject.Web directory.
- On the Visual Studio Project menu, click Add Existing item.
- In the dialog that appears, locate and select an RDF report and click OK. You can find sample RDF reports in the C:\My Documents\GrapeCity\ActiveReports 6\Samples\VB\RDFViewer\RDFs folder.
- On MainPage.xaml, add the following code to Design view:
Paste to the UserControl section on the Design view of MainPage.xaml Copy Codexmlns:vvm="clr-namespace:DataDynamics.ActiveReports.ViewModel;assembly=ActiveReports.Silverlight"
- On MainPage.xaml, add the following code to the Grid section:
Paste to the Design view of MainPage.xaml to the Grid section Copy Code<Grid x:Name="LayoutRoot" Background="White">
<my:Viewer HorizontalAlignment="Left" Name="viewer1" VerticalAlignment="Top" Height="300" Width="400">
<my:Viewer.ViewModel>
<vvm:ViewerViewModel ReportPath="..\YourReportName.rdf" />
</my:Viewer.ViewModel>
</my:Viewer>
</Grid>
To bind an RDF report by using the Viewer.ViewModel.ReportPath property
- In Solution Explorer, select the YourProject.Web directory.
- On the Visual Studio Project menu, click Add Existing item.
- In the dialog that appears, locate and select an RDF report and click OK. You can find sample RDF reports in the C:\My Documents\GrapeCity\ActiveReports 6\Samples\VB\RDFViewer\RDFs folder).
- In Design view of MainPage.xaml, select the Viewer control.
- In the Properties window, go to the Events view.
- In the list of events, double-click the viewer1_Loaded event.
- On MainPage.xaml.cs/vb that opens, add the following code to the viewer1_Loaded event:
Paste to MainPage.xaml.cs to the viewer1_Loaded event Copy Codeviewer1.ViewModel.ReportPath = "../YourReportName.rdf";
To bind an RDF report by using OpenFileDialog
- In Solution Explorer, select the YourProject.Web directory.
- On the Visual Studio Project menu, click Add Existing item.
- In the dialog that appears, locate and select an RDF report and click OK. You can find sample RDF reports in the C:\My Documents\GrapeCity\ActiveReports 6\Samples\VB\RDFViewer\RDFs folder.
- From the Toolbox, drag the Button control onto the Viewer control in Design view of MainPage.xaml.


- In the Properties window, rename the Button control to btnOpenReport.
- In the list of events, double-click the Click event.
- On MainPage.xaml.cs/vb that opens, add the following code to the btnOpenReport_Click event:
Paste to MainPage.xaml.cs to the btnOpenReport_Click event Copy CodeOpenFileDialog dialog = new OpenFileDialog(); //Show the dialog bool? dialogResult = dialog.ShowDialog(); if (dialogResult != true) return; using (System.IO.Stream fs = (System.IO.Stream)dialog.File.OpenRead()) { viewer1.ViewModel.LoadDocument.Execute(fs); }
To preview a report
- Press F5 to run the project. The page with the Silverlight Viewer displaying a report, appears in your browser.
To print a report
- On the Silverlight Viewer toolbar, click Print.

- In the Print dialog that appears, select the printer settings and click Print.