Besides previewing your report at design time, you can also view the reports you design in the Viewer. This viewer contains a toolbar and a sidebar with Thumbnails, Search results, Document map and Parameters panes.
Viewer Toolbar
The following table lists the actions you can perform through the Viewer toolbar.
| Toolbar Element | Name | Description |
|---|---|---|
 |
First page | Takes you to the first page of the report. This button is enabled when a page other than the first page is open. |
 |
Last page | Takes you to the last page of the report. This button is disabled on reaching the last page of the report. |
 |
Previous page | Takes you to the page prior to the current page. This button is enabled when a page other than the first page is open. |
 |
Next page | Takes you to the page following the current page. This button is disabled on reaching the last page of the report. |
 |
Current page | Opens a specific page in the report. To view a specific page, type the page number and press the Enter key. |
 |
Backward | Takes you to the last viewed page. This button is enabled when you move to any page from the initial report page. Clicking this button for the first time also enables the Forward button. |
 |
Forward | Takes you to last viewed page before you clicked the Backward button. This button is enabled once you click the Backward button. |
 |
Back to parent report | Returns you to the parent report in a drillthrough report. |
| Default | Allows you to specify a default mouse pointer mode. | |
 |
Pan mode | A hand symbol serves as the cursor that you can use to navigate. |
 |
Selection mode | Allows you to select contents on the report. Click the Copy icon (see image and description below) to copy the selected content to the clipboard. |
 |
Snapshot mode | Allows you to select content on the report that you can paste as an image into any application that accepts pasted images. |
 |
Toggle sidebar | Displays the sidebar that includes the Thumbnails, Parameters, Document map and Search results panes. |
 |
Displays the Print dialog where you can specify the printing options. | |
 |
Galley mode | Provides a viewer mode which removes automatic page breaks from a Report Definition Language (RDL) and displays data in a single scrollable page. This mode maintains page breaks you create in the report and removes only automatic page breaks. |
 |
Copy |
Copies text that you select in the Selection mode to the clipboard.
Note: In case the GrapeCity.ActiveReports.Export.Xml.dll and GrapeCity.ActiveReports.Export.Word.dll are not available in GAC, you might need to add references to these assembly files to enable the viewer's Copy button.
|
 |
Find | Displays the Find dialog to find any text in the report. |
 |
Zoom out | Decreases the magnification of your report. |
 |
Current zoom | Displays the current zoom percentage which can also be edited. |
 |
Zoom in | Increases the magnification of your report. |
 |
Fit width | Fits the width of the page according to viewer dimensions. |
 |
Fit page | Fits the whole page within the current viewer dimensions. |
 |
Single page view | Shows one page at a time in the viewer. |
 |
Continuous view | Shows all preview pages one below the other. |
 |
Multipage view | Offers you an option to select how many pages to preview in the viewer at one time. |
 |
Refresh |
Refreshes the report.
Caution: Refresh button gets disabled when you load a section report in the Viewer control through any of the following: |
 |
Cancel | Cancels the report rendering. |
 |
Touch Mode |
Allows you to select touch mode for the Viewer.
Note: The Touch Mode button only appears on the toolbar while working on touch enabled devices.
|
Viewer Sidebar
The Viewer sidebar appears on the left of the Viewer control when you click the Toggle sidebar button in the toolbar. By default, this sidebar shows the Thumbnails and Search Results panes. The additional Document map and Parameters also appear in this sidebar. You can toggle between any of the viewer panes by clicking the buttons for each pane at the bottom of the sidebar.
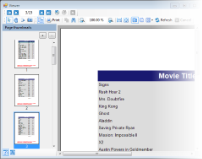
Thumbnails pane
The Thumbnails pane appears by default in the sidebar when you click the Toggle sidebar button in the toolbar.
This pane is composed of a thumbnail view of all the pages in a report. Click any thumbnail to navigate directly to the selected report page. You can also modify the size of the thumbnail when you click (+) or (-) button to zoom in and zoom out.
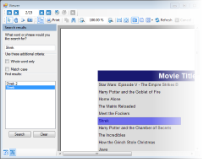
Search results pane
The Search pane is the other default pane besides Thumbnails that appears in the sidebar when you click the Toggle sidebar button. This pane lets you enter a word or phrase from which to search within the report.
To search in a report:
- Enter the word or phrase in the search field.
- Under Use these additional criteria, you may optionally choose to search for the whole word or match the case of the search string while searching in the report.
- Click the Search button to see the results appear in the Find results list.
- Click an item in the list to jump to that item in the report and highlight it.
To start a new search or clear the current search results, click the Clear button under the Find results list.
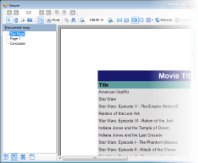
Document map pane
The Documents map pane is enabled for reports where the Label property or the Document map label is set. This pane displays each value for the text box, group, or sub report that you label, and you can click them to navigate to the corresponding area of the report in the Viewer.
If a report does not have the Label property or Document map label set, the Documents map pane does not appear in the sidebar.
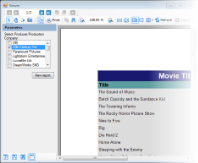
Parameters pane
The Viewer allows you to view reports with parameters. In the toolbar, click the Toggle sidebar button to open the Viewer sidebar and if your report contains parameters, the Parameters pane shows up automatically.
- In the Parameters pane, you are prompted to enter a value by which to filter the data to display.
- Enter a value or set of values and click View report, to filter the report data and display the report.
If a report does not have parameters, the Parameters pane does not appear in the sidebar.
Display Report Output in the Viewer
The following code examples demonstrate how you can display the report output in the Viewer.
- In a Visual Studio Windows Forms application, from the Visual Studio toolbox, drag the Viewer control onto your Windows Form.
- Set the viewer's Dock property to Fill to show the complete Viewer control on the Form.
- Double-click the title bar of the Form to create an event-handling method for the Form_Load event.
- In the Form_Load event, add code like the following to run the report and display it in the viewer. Each of these code snippets presumes a report in the project of the type indicated with the default name. (If you have renamed your report, you need to rename it in the code as well)
To write the code in Visual Basic.NET
The following example demonstrates how you display a page report in the Viewer control.
Visual Basic. NET code. Paste INSIDE the Form_Load event. Copy CodeDim file_name As String = "..\..\PageReport1.rdlx" Dim pageReport As New GrapeCity.ActiveReports.PageReport(New System.IO.FileInfo(file_name)) Dim pageDocument As New GrapeCity.ActiveReports.Document.PageDocument(pageReport) Viewer1.LoadDocument(pageDocument)
The following example demonstrates how you display a RDL Report in the Viewer control.
Visual Basic. NET code. Paste INSIDE the Form_Load event. Copy CodeDim file_name As String = "..\..\RdlReport1.rdlx" Dim pageReport As New GrapeCity.ActiveReports.PageReport(New System.IO.FileInfo(file_name)) Dim pageDocument As New GrapeCity.ActiveReports.Document.PageDocument(pageReport) Viewer1.LoadDocument(pageDocument)
The following example demonstrates how you can display a section report (code-based) in the Viewer control.
Visual Basic. NET code. Paste INSIDE the Form_Load event. Copy CodeDim sectionReport As New SectionReport1() Viewer1.LoadDocument(sectionReport)
The following example demonstrates how you can display a section report (xml-based) in the Viewer control.
Visual Basic. NET code. Paste INSIDE the Form_Load event. Copy CodeDim sectionReport As New GrapeCity.ActiveReports.SectionReport() Dim xtr As New System.Xml.XmlTextReader("..\..\SectionReport1.rpx") sectionReport.LoadLayout(xtr) xtr.Close() Viewer1.LoadDocument(sectionReport)To write the code in C#
The following example demonstrates how you display a page report in the Viewer control.
C# code. Paste INSIDE the Form_Load event. Copy Codestring file_name = @"..\..\PageReport1.rdlx"; GrapeCity.ActiveReports.PageReport pageReport = new GrapeCity.ActiveReports.PageReport(new System.IO.FileInfo(file_name)); GrapeCity.ActiveReports.Document.PageDocument pageDocument = new GrapeCity.ActiveReports.Document.PageDocument(pageReport); viewer1.LoadDocument(pageDocument);
The following example demonstrates how you display a RDL Report in the Viewer control.
C# code. Paste INSIDE the Form_Load event. Copy Codestring file_name = @"..\..\RdlReport1.rdlx"; GrapeCity.ActiveReports.PageReport pageReport = new GrapeCity.ActiveReports.PageReport(new System.IO.FileInfo(file_name)); GrapeCity.ActiveReports.Document.PageDocument pageDocument = new GrapeCity.ActiveReports.Document.PageDocument(pageReport); viewer1.LoadDocument(pageDocument);
The following example demonstrates how you can display a section report (code-based) in the Viewer control.
C# code. Paste INSIDE the Form_Load event. Copy CodeSectionReport1 sectionReport = new SectionReport1(); viewer1.LoadDocument(
sectionReport); The following example demonstrates how you can display a section report (xml-based) in the Viewer control.
C# code. Paste INSIDE the Form_Load event Copy CodeGrapeCity.ActiveReports.SectionReport sectionReport = new GrapeCity.ActiveReports.SectionReport(); System.Xml.XmlTextReader xtr = new System.Xml.XmlTextReader(@"..\..\SectionReport1.rpx"); sectionReport.LoadLayout(xtr); xtr.Close(); viewer1.LoadDocument(sectionReport);
Additional Features
Following is an introduction to the additional capabilities of the Viewer to guide you on using it effectively:
Split windows
- Run your viewer project.
- Click above the vertical scrollbar to grab the splitter control and drag downward.
- With the viewer split into two sections, you can easily compare report pages.
Advanced Printing Options
Viewer provides advanced printing options that allow you to control the report page layout and watermark settings through the Page Setup dialog. In this dialog, you can also preview the report as it would appear with each print setting. See Advanced Print Options for further details.
You can also set the PrintingSettings property of the Viewer to directly print without displaying a dialog or to switch from a ActiveReports print dialog to a .NET Framework standard print dialog (System.Windows.Forms.PrintDialog) on clicking the Print button on the Viewer toolbar. You can set the PrintingSettings property of the Viewer control from the Properties window.
PrintingSettings property provides the following options:
| PrintingSettings Options | Description |
|---|---|
| ShowPrintDialog |
Displays a dialog in which the user can set the printer options before printing. |
| ShowPrintProgressDialog | Displays a print progress dialog, in which the user can cancel the printing job. |
| UsePrintingThread | Specifies whether printing should be performed for individual threads or not. |
| UseStandardDialog | Specifies whether to use the .NET Framework standard print dialog (System.Windows.Forms.PrintDialog) while printing the document (section or page). |
Exporting
Use the Export Filters to export a page or a section report to different formats directly from the Viewer. After you load the document in the Viewer, you can use a sample code like the following which shows one overload of the Export method with a PDF export filter. This code creates an outputPDF.pdf file in the bin\debug folder of your project.
To write the code in Visual Basic.NET
| Visual Basic. NET code. Paste INSIDE an event like Button_Click event. |
Copy Code
|
|---|---|
Dim PDFEx As New GrapeCity.ActiveReports.Export.Pdf.Section.PdfExport
Viewer1.Export(PDFEx, New FileInfo(Application.StartupPath + "\outputPDF.pdf"))
|
|
To write the code in C#
| C# code. Paste INSIDE an event like Button_Click event. |
Copy Code
|
|---|---|
GrapeCity.ActiveReports.Export.Pdf.Section.PdfExport PDFEx = new GrapeCity.ActiveReports.Export.Pdf.Section.PdfExport(); viewer1.Export(PDFEx, new System.IO.FileInfo (Application.StartupPath + "\\outputPDF.pdf" )); |
|
Note: Make sure that you add a reference to the required export assembly in your project before setting the export filter in code. See Export Filters further details.
Annotations Toolbar
You can use annotations when working with a report in the Viewer and add notes, special instructions or images directly to the reports.

Annotations are added via the Viewer's toolbar, which is hidden by default. You can make the Annotations toolbar available by setting the AnnotationDropDownVisible property to true in the viewer's properties grid.
| Annotation Name | Description |
|---|---|
| AnnotationText | A rectangular box in which you can enter text. |
| AnnotationCircle | A circle without text. You can change the shape to an oval. |
| AnnotationRectangle | A rectangular box without text. |
| AnnotationArrow | A 2D arrow in which you can enter text. You can change the arrow direction. |
| AnnotationBalloon | A balloon caption in which you can enter text. You can point the balloon's tail in any direction. |
| AnnotationLine | A line with text above or below it. You can add arrow caps to one or both ends and select different dash styles. |
| AnnotationImage | A rectangle with a background image and text. You can select an image and its position, and place text on the image. |
Keyboard Shortcuts
The following shortcuts are available on the Viewer:
| Keyboard Shortcut | Action |
|---|---|
| Ctrl + F | Shows the find dialog. |
| Ctrl + P | Shows the print dialog. |
| Esc | Closes the find or print dialogs. |
| Page Down | Moves to the next page. |
| Page Up | Moves to the previous page. |
| Ctrl + T | Shows or hides the table of contents. |
| Ctrl + Home | Moves to the first page. |
| Ctrl + End | Moves to the last page. |
| Ctrl + Right | Navigates forward. |
| Ctrl + Left | Navigates backward. |
| Ctrl + - | Zooms out. |
| Ctrl + + | Zooms in. |
| Left, Right, Up, Down | Moves the visible area of the page in the corresponding direction. |
| Ctrl + 0 (zero) | Sets the zoom level to 100%. |
| Ctrl + rotate mouse wheel | Changes the zoom level up or down. |
| Ctrl + M | Turns on the continuous view. |
| Ctrl + S | Turns off the continuous view. |
| Ctrl + I | Shows multiple pages. |
| Ctrl + G | Focuses on PageNumber area and selects content. |
| F5 | Refreshes the report. |
| Home | Moves to the start of the current page. |
| End | Moves to the end of the current page. |
Viewer's Thumbnails pane shortcut keys
You can use the following shortcut keys while using the thumbnails pane in the Viewer.
| Keyboard Shortcut | Action |
|---|---|
| Up Arrow | Goes to the previous page. |
| Down Arrow | Goes to the next page. |
| Right Arrow | Goes to right page. If no thumbnail exist on the right, it goes to the next page. |
| Left Arrow | Goes to left page. If no thumbnail exist on the left, it goes to the previous page. |
| Page Down | Scroll to the next thumbnail's view port. It also keep the current selected page unchanged. |
| Page Up | Scroll to the previous thumbnail's view port. It also keep the current selected page unchanged. |
| Home | Goes to the first page. |
| End | Goes to last page. |
Touch Support
ActiveReports introduces touch support for Windows Viewer. This feature gives you the flexibility to interact with the Viewer using simple touch gestures. Now you can install ActiveReports on any touch enabled Windows device and view the reports anywhere you are.
You can switch to the touch mode by just clicking the Touch mode button on the Viewer toolbar.
Note: In touch mode, you can still use the mouse to perform ActiveReports operations.
Touch mode Toolbar
The following table lists the actions you can perform through the Viewer toolbar.
| Icon | Function | Details |
|---|---|---|
 |
Sidebar | Displays the sidebar that includes the Thumbnails, Parameters, Document map and Search results panes. |
 |
Displays the Print dialog where you can specify the printing options. | |
 |
Galley mode |
Provides a viewer mode which removes automatic page breaks from a Report Definition Language (RDL) and displays data in a single page. This mode maintains page breaks you create in the report and removes only automatic page breaks. For RDL report only. |
 |
Copy |
Copies text that you select in the Selection mode to the clipboard.
Note: In case the GrapeCity.ActiveReports.Export.Xml.dll and GrapeCity.ActiveReports.Export.Word.dll are not available in GAC, you might need to add references to these assembly files to enable the viewer's Copy button.
|
 |
Find | Displays the Find dialog to find any text in the report. |
 |
Current zoom | Displays the current zoom percentage which can also be edited. |
 |
Single page view | Shows one page at a time in the viewer. |
 |
Continuous page | Shows all preview pages one below the other. |
 |
Multiple page | Offers you an option to select how many pages to preview in the viewer at one time. |
 |
Previous page | Takes you to the page prior to the current page. This button is enabled when a page other than the first page is open. |
 |
Current page | Opens a specific page in the report. To view a specific page, type the page number and press the Enter key. |
 |
Next page | Takes you to the page following the current page. This button is disabled on reaching the last page of the report. |
 |
Back to parent report | Returns you to the parent report in a drillthrough report. |
 |
Refresh |
Refreshes the Viewer.
Caution: Refresh button gets disabled when you load a section report in the Viewer control through any of the following: |
 |
Cancel | Cancels the report rendering. |
|
Touch mode | Allows you to select touch mode for the Viewer. |
Context menu
To display the context menu, you must tap and hold in the preview area.
| Icon | Function | Gesture | Details |
|---|---|---|---|
 |
Pan mode | Tap | Hand cursor used to move the visible portion of the reports. Drag the hand tool in the direction you want to move the report. |
 |
Selection mode | Tap | Allows you to select contents on the report. Click the Copy icon (see image and description above) to copy the selected content to the clipboard. |
 |
Snapshot mode | Tap | Allows you to select content on the report that you can paste as an image into any application that accepts pasted images. |
Preview
| Gesture | Gesture (Image) | Preview Area Element | Details |
|---|---|---|---|
| Flick |  |
Single Page View | Flick in the vertical or horizontal direction moves to the next or previous page. A single flick moves single page. |
| Continuous Page View | Performs the page scrolling. | ||
| Tap |  |
Link | Opens links (URL, drill-though links, etc). |
| Pan |  |
Slider | Moves the slider. |
| Border between Sidebar and Preview Area |
Moves the border.
Note: The pan gesture does not work in the report area where ScrollbarEnabled property is set to False.
|
||
| Selection mode, Snapshot mode | Pan from selection start point to selection end point. | ||
| Pinch |  |
Preview Area |
Pinch to zoom out. |
| Stretch |  |
Preview Area |
Stretch to zoom in. |
| Double tap |  |
Preview Area |
Tap twice to change the view mode (from the Single page view to the Multiple page mode). |
| Tap and hold |  |
Selection mode, Snapshot mode | Displays the context menu where you can select the pan, selection, or snapshot mode. |
See Also