What are Report Parts?
Report parts are groups of controls (with data and settings) in a report that you can reuse in other reports. Report parts are supported in Page, RDL, and Section reports. For example, you can use Chart and Tablix data regions from Report1, and a Table data region from Report2 to create a new report.
Why use report parts?
Enhanced reusability: With Report Parts, you can reuse report controls along with their associated data resources such as data sets and data source connections. In earlier versions, you could copy controls from one report to another, but not the resources associated with them. Using report parts, you can add everything that is required for that control to work.
Automatic conflict resolution: ActiveReports automatically resolves name conflicts for report parts. For example, if a report already contains a Tablix1 data region and you add a report part named Tablix1, it automatically changes the new report part's name to Tablix2.
Zero dependency: After adding a report part to a report, you can modify it independent of the original report part. For example, if you add Table1 as a report part in your current report, you can modify its properties without impacting the Table1 settings in your original report.
Here is some guidance on how to work with Report Parts
- Show or hide the Reports Library
- Add report parts from local reports
- Hide report parts from the Reports Library
- Clear report parts from the Reports Library
- Use report parts in your reports
- Limitations
Show or Hide the Reports Library
When ActiveReports is installed on your system, a View Reports Library button is automatically added to the Visual Studio toolbar. It appears every time you create a new application.
- Right-click the Visual Studio toolbar and select ActiveReports 13 to display the report designer toolbar. See Toolbar for further details.
- On the report designer toolbar, click the View Reports Library button. The Reports Library 13 window appears.
- Click the View Reports Library button again to hide the Reports Library 13 window.
- If the Reports Library window does not appear automatically in your application, select View > Other Windows > Reports Library 13 in Visual Studio.
- The stand-alone designer application (GrapeCity.ActiveReports.Designer.exe) also contains a Reports Library window. See Stand-alone Designer and Viewer for more information.
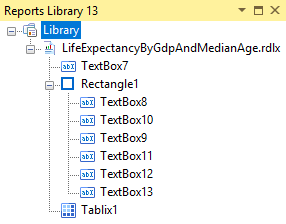
- Report authors can place reports in the GrapeCity Reports Library folder to show them as report parts in the Reports Library window. By default, the GrapeCity Reports Library folder is located in the User Documents folder.
Add report parts
- In the stand-alone designer, click the File menu and select Open. Alternatively, to add a report part from the Reports Library window, right-click the Reports Library node and select Add.
- In the Open dialog that appears, navigate through the folder hierarchy and select the report you want to use for report parts.
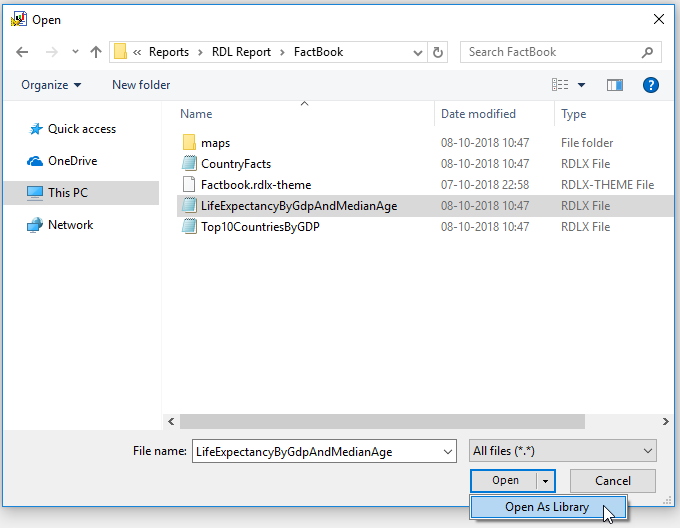
- Click the dropdown arrow next to the Open button and select Open As Library to add report parts to the Reports Library 13 window. Once the report parts are added to your Report Library, you can use them to design new or existing reports.
Hide report parts from the Reports Library
- Open the Reports Library window. For more information on how to open Reports Library window, see Show or Hide the Reports Library
- In the Reports Library window, select the report part that you want to hide.
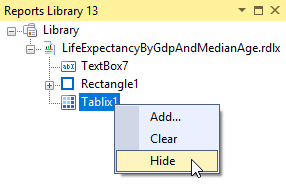
- Right-click on the selected report part and then select Hide option from the context menu to hide the selected report part from Reports Library window.
Clear report parts from the Reports Library
- Right-click anywhere inside the Reports Library window and select the Clear option from the context menu to completely clear the Reports Library window.
Use report parts in your reports
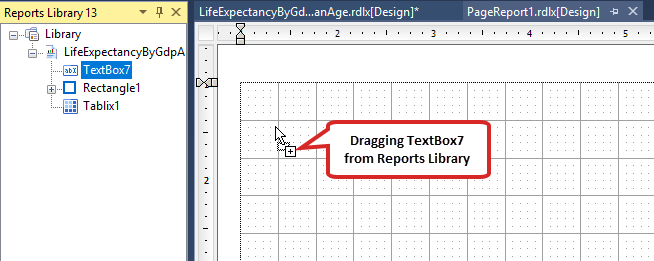
- Once you have added the Report Parts to the Reports Library window, you can drag and drop the control from the Reports Library window onto the design surface. The report part is added to your report along with its dependencies such as data sources, data sets, and parameters.
Note: If you are working with a Page or RDL report, Section report parts are disabled in the Reports Library window and vice versa.
Limitation
- Page and RDL reports: CheckBox, Shape, Line, and Subreport controls are not supported as report parts.
- Section reports: Picture, RichTextBox, Barcode, and Chart are the only controls that you can add as report parts. The rest of the controls are not supported as report parts.