You can create and add a new logical table to a model, or base a new one on an existing entity from the list.
To create a new logical table (entity)
Follow these steps to create a new entity using a SQL query.
Create a new entity from a query
- In the Models list, select the model that you want to edit and then click Edit model button. The model editor appears.

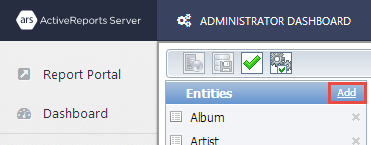
- In the model editor that appears, in the Entities list on the left, click Add. The New Entity dialog appears.
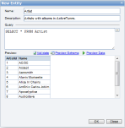
- In the New Entity dialog, enter a Name for the new entity. This value appears in the list of entities for the model.
- In the Description box, enter a description that provides users with additional information about the entity, such as when it is appropriate to use it.
- In the Query box, define the entity with a SQL query that pulls the data that you want.
- Check your query using the commands above the preview box.
- Validate verifies the query and displays any errors it finds in red at the top of the dialog.
- Preview Schema populates a table with information pulled by the query (column name, size, data type, and is nullable).
- Preview Data populates a table with a sampling of the data pulled by the query.
- Click OK to add the new logical table to the model as a new entity.
Note: In the Entities pane, when you select an entity that you created, an Edit command appears next to the Add command at the top of the pane. Click Edit to re-open the New Entity dialog and make changes to the name, description, or query.
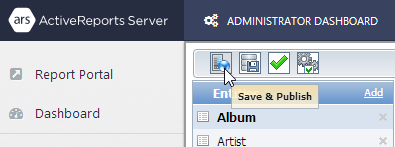
- In the Model Editor toolbar, click the Save & Publish button to save the changes. The new logical table is added to the model and displayed in the Entities list.
Base a new entity on an existing logical table
Follow these steps to select an existing logical table to use as a new entity.
Base a new entity on an existing logical table
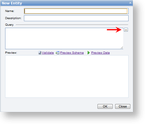
- In the Entities pane to add an existing entity, click Add. The New Entity dialog appears.
- To the right of the Query box, click the ellipsis button.
- In the Select an Existing Table dialog that appears, select the table that you want and click OK. The Query box in the New Entity dialog is populated with the table name, for example _Expenses, and the Name box is populated with the user friendly table name, for example Expenses.
- You can check your results using the commands above the preview box.
- Validate verifies the query and displays any errors it finds in red at the top of the dialog.
- Preview Schema populates a table with information pulled by the query (column name, size, data type, and is nullable).
- Preview Data populates a table with a sampling of the data pulled by the query.
- In the Description box, enter a description that provides users with additional information about the entity, such as when it is appropriate to use it.
- Click OK to add the new logical table to the model as a new entity.
- In the Model Editor toolbar, click the Save & Publish button to save the changes. The new logical table is added to the model and displayed in the Entities list.
See Also