You can add printers on ActiveReports Server and manage the properties of available printers from the Printers page. After a printer is added to the server, you can create scheduled printing tasks. You can also assign permissions to the roles that can schedule tasks on the printer.
To add a printer
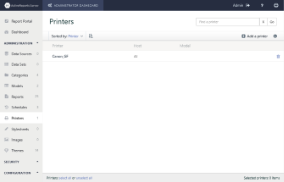
- In the Administration section of the Administrator Dashboard, click Printers.
- On the Printers page, click the Add a printer button. The Add Printer dialog appears.
- Fill in the options in the Add Printer dialog as follows:
Options Description Printer Name Specify the printer name. The printer name should be the same as the name of a printer installed on the server machine. This is a required field. Model Name Specify the model name. Hosts Select the host to use for server printing. You can select multiple hosts or select 'All' to select all the available hosts. This is a required field. Description Add a description of the printer. Assign permissions Select the role(s) that can schedule server printing. - Click the Test connection button to test the connection between the printer and the server.
- On successful testing, click Create to add the printer to the server.
Note: Virtual printers such as Microsoft XPS Document Writer and Universal Document Converter are not supported in ActiveReports server. If a user performs server printing with a virtual printer, the status of the task will always appear as executing and the agent machine will hang. In this case, the user will not be able to preview a report or perform other tasks. To resolve this, the user needs to remove this schedule from the report and restart the agent service manually.
To edit the printer settings
- In the Administration section of the Administrator Dashboard, click Printers.
- On the Printers page, select a printer from the list, and then click the printer properties button.
- Modify the printer properties, change permissions, or host settings. You cannot modify the Printer Name.
- Click Save to save the modified printer properties.
On re-installing or upgrading the product, 'Unable to resolve all agents' error message is displayed under the Host name of the printer(s) on the Printers page. To resolve this error, you need to set the agents again as follows:
- Go to the Printers page.
- Select the printer from the list and click printer properties button.
- Check the Checkbox to select the agent from the list of Hosts.
See Also