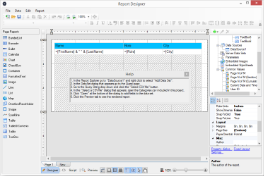
The Custom Data Provider sample demonstrates how to create a project that use a custom data provider and how to pull data from a comma separated value (CSV) file. This sample is part of the ActiveReports Professional Edition.
Sample Location
Visual Basic.NET
<User Folder>\Documents\GrapeCity Samples\ActiveReports 12\Professional\CustomDataProvider\VB.NET
C#
<User Folder>\Documents\GrapeCity Samples\ActiveReports 12\Professional\CustomDataProvider\C#
Run-Time Features
When you run this sample, a DesignerForm displaying the DemoReport.rdlx report in ActiveReports Designer and a HelperForm explaining the steps to connect a report to the comma separated value (CSV) file appears.
In the ActiveReports Designer, you can add a dataset with a comma separated values (CSV) file. For adding this file,in the Report Explorer, expand the DataSources node, right-click the node for the data source and select Add DataSet. In the DataSet dialog that appears, under Query section, go to the Query String field and click the drop-down arrow to display the custom query editor. In the custom query editor, click the Select CSV File button and select the Categories.csv file kept within the project.
Go to the Preview tab of the Designer to view the report with the data pulled from the custom data provider.
Project Details
CustomDataProvider folder
CSVDataProvider folder
This folder contains the following classes.
- CsvColumn - this class represents information about fields in the data source.
- CsvCommand - this class provides the IDbCommand implementation for the .NET Framework CSV Data Provider.
- CsvConnection - this class provides an implementation of IDbConnection for the .NET Framework CSV Data Provider.
- CsvDataProviderFactory - this class implements the DataProviderFactory for .NET Framework CSV Data Provider.
- CsvDataReader - this class provides an implementation of IDataReader for the .NET Framework CSV Data Provider.
CustomDataProviderUI folder
CSVFileSelector
This is the form that contains the Select CSV File button. This button is displayed in the CVS data provider query editor when you open the DataSet dialog and under Query, in the Query String field and click the drop-down arrow to display the custom query editor.
Clicking the Select CSV File button allows you to select the Categories.csv file that is used as a custom data provider for the sample report.
QueryEditor
CustomDataProviderUITest folder
Categories.csv
This is the comma separated values (CSV) file that serves as a custom data provider for the sample report.
This file is selected in the Please, select CSV File dialog that appears when you click the Select CSV File button in the Query String field under Query in the DataSet dialog.
DemoReport.rdlx
The DemoReport.rdlx displays the custom data. This report contains one Table data region with the TextBox controls, which display the name, the role and the city information of an employee.
DesignerForm
This is the main form of this sample that appears when you run the sample. On this form, you can connect the sample report to a custom data provider by adding a dataset with a comma separated values (CSV) file.
Right-click the form and select View Code to see the code implementation for the ActiveReports Designer.
GrapeCity.ActiveReports.config
The configuration file that configures the project to use the custom data provider.
HelperForm
This form appears on top of the main DesignerForm when you run the sample. This form contains the explanatory text with the steps on how to bind the sample report to the comma separated value (CSV) file. You can close the Help form by clicking the X button in the upper-right corner of the form.
