Now that you have specified the database to use, you need to retrieve the records from the database table you want to display in your Spread control. To do this, you will use the OleDbDataAdapter control.
- If the Toolbox is not displayed, from the View menu choose Toolbox.
- Click the Data tab to display the available data controls.
- Double-click the OleDbDataAdapter control to add it to your form.
The OleDbDataAdapter control is added in the area below the visible area of the form. The Data Adapter Configuration Wizard appears.
- Choose Next to begin completing the wizard.
- In the Choose Your Data Connection dialog, under Which data connection should the data adapter use? select the connection you created in Step 2 from the drop-down list. Then choose Next.
- In the Choose a Query Type dialog, select Use SQL statements and then choose Next.
- In the Generate the SQL statements dialog, choose Query Builder.
The Add Table dialog appears to let you specify the table to use in the database.
- Select the Products table from the list and choose Add, then choose Close.
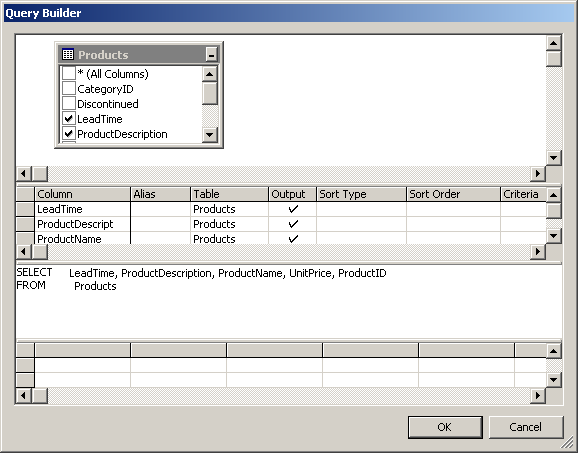
- In the Query Builder dialog, the Product table appears in a window, with a list of the available fields in the table. Select the following fields:
- LeadTime
- ProductDescription
- ProductName
- UnitPrice
- ProductID
- The Query Builder creates your SQL query in the status box. Your dialog should look like this:
- Choose OK to close the Query Builder dialog, then choose Next in the wizard.
- The wizard summarizes your choices. Choose Finish to complete the wizard.
- Press F4 to display the Properties window for the OleDbDataAdapter control.
- In the Properties window, change the name of the control to dbAdapt.