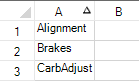
You can set the spreadsheet to allow the user to automatically sort the data when a column header is clicked. The first time the column header is clicked (selected) the unsorted icon is displayed. The second click displays the sort icon and sorts the column. If the user clicks successively on the same column, then the direction of the sort is reversed. This does not affect the data model, only how the data is displayed. This figure shows the unsorted icon:

Use the Column object AllowAutoSort property or the SheetView SetColumnAllowAutoSort method to allow the user to perform automatic sorting when the header cell of a column is clicked. Set the SortIndicator property of the column you want to show the indicator.
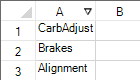
The SetColumShowSortIndicator method or ShowSortIndicator property can be set to display or hide the sort indicator. The sort indicator appears in the header column as shown in the following figure, illustrating the ascending and descending sort indicators.
| Ascending Sort Indicator | Descending Sort Indicator |
|---|---|
|
|
|
When a user sorts data, the AutoSortingColumn event occurs before the sort and then the AutoSortedColumn event occurs after the sort.
Using the Properties Window
- At design time, in the Properties window, select the Spread component.
- Select the Sheets property.
- Click the button to display the SheetView Collection Editor.
- In the Members list, select the sheet for which to set up sorting.
- In the properties list, select the Columns property and click the button to open the Cell, Column, and Row Editor.
- Select the columns for which you want to allow automatic sorting.
- In the properties list, select the AllowAutoSort property and set the value to True.
- Click OK to close each of the editors.
Using a Shortcut
Use either the AllowAutoSort property of the columns or the SetColumnAllowAutoSort method of the Sheets object to allow automatic sorting of the specified columns.
Example
This example allows automatic sorting for the first 30 columns in the sheet.
| C# |
Copy Code
|
|---|---|
fpSpread1.Sheets[0].Columns[0,29].AllowAutoSort = true; //or //fpSpread1.Sheets[0].SetColumnAllowAutoSort(0,30,true); |
|
| VB |
Copy Code
|
|---|---|
fpSpread1.Sheets(0).Columns(0,29).AllowAutoSort = True 'or 'fpSpread1.Sheets(0).SetColumnAllowAutoSort(0,30,True) |
|
Using Code
Use the AllowAutoSort property to allow automatic sorting of the specified columns.
Example
This example allows automatic sorting for the first 30 columns in the sheet.
| C# |
Copy Code
|
|---|---|
FarPoint.Win.Spread.Column mycols;
mycols = fpSpread1.ActiveSheet.Columns[0,29];
mycols.AllowAutoSort = true;
|
|
| VB |
Copy Code
|
|---|---|
Dim mycols As FarPoint.Win.Spread.Column mycols = fpSpread1.ActiveSheet.Columns(0,29) mycols.AllowAutoSort = True |
|
Using the Spread Designer
- Select the sheet tab for the sheet for which you want to allow automatic sorting.
- From the property list for the sheet, select Columns. Click on the button to open the Cell, Column, and Row editor.
- Select the columns for which you want to allow automatic sorting.
- In the properties list, select the AllowAutoSort property and set the value to True.
- From the File menu choose Apply and Exit to apply your changes to the component and exit Spread Designer.