You can allow your end user to select a color from a color picker using the color picker cell. A color picker cell displays a dialog for selecting a color. There are several options for the color dialog.
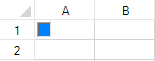
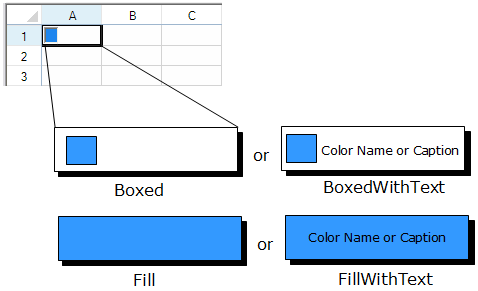
When a color picker cell is selected it displays a single color, which can appear either in a box, as shown in the following image, or filling the entire area of the cell. Optionally text can be displayed.
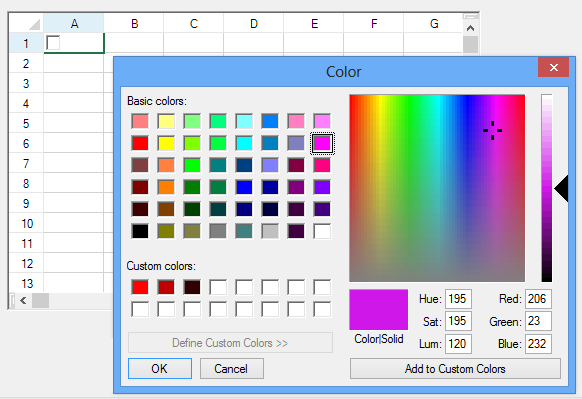
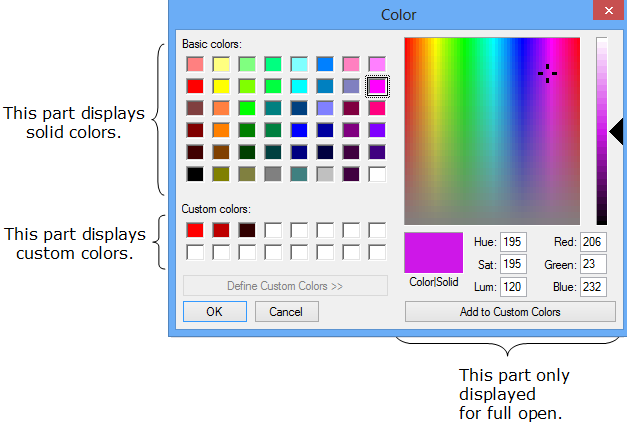
When the cell is double-clicked, either the drop-down color picker is displayed or the pop-up color dialog is displayed. There are several options for the display of the color dialog. The following figure shows the pop-up color dialog:
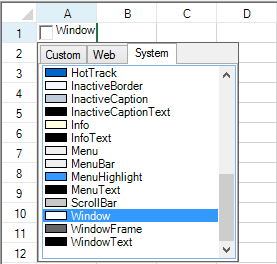
The following figure shows the drop-down color picker:
To create a color picker cell, use the ColorPickerCellType class. Create a color picker cell using the procedure and example shown below.
Customizing the Color Cell
The options for the color picker cell are in the ColorPickerStyle enumeration.
Customizing the Color Dialog
The color picker cell allows these customizations of the color dialog.
| Property | Description |
|---|---|
| AllowFullOpen | Sets whether to allow the color dialog to open fully to show the custom color selector. |
| AnyColor | Sets whether the color dialog displays all available colors in the set of basic colors. |
| Caption | Sets the text that appears in the cell (if any). |
| CustomColors | Sets the custom colors shown in the color dialog. |
| DialogShowing | Sets whether to display the color dialog automatically. |
| DropDown | Sets whether to use the drop-down color picker (not the pop-up color dialog). |
| FullOpen | Sets whether the color dialog opens fully to show controls used to create custom colors. |
| SolidColorOnly | Sets whether the color dialog restricts users to selecting solid colors only. |
| Style | Sets the style of the color dialog. |
| UnknownText | Sets the text for an unknown color. |
| UnknownTextStyle | Sets the style of the text for an unknown color. |
The following figure illustrates the color dialog when it is set to fully open.
Note that some graphical elements in certain cell types are affected by XP themes (visual styles). Setting the VisualStyles property of the Spread component to "off" can allow visual customizations of those graphical cell types to work as expected. For more information, refer to Using XP Themes with the Component.
For more information on the properties and methods of this cell type, refer to the ColorPickerCellType class.
Using the Properties Window
- At design time, in the Properties window, select the Spread component.
- Select the Sheets property.
- Click the button to display the SheetView Collection Editor.
- In the Members list, select the sheet in which the cells appear.
- In the property list, select the Cells property and then click the button to display the Cell, Column, and Row Editor.
- Select the cells for which you want to set the cell type.
- In the property list, select the CellType property and choose the ColorPicker cell type.
- Expand the list of properties under the CellType property. Select and set these specific properties as needed.
- Click OK to close the Cell, Column, and Row Editor.
- Click OK to close the SheetView Collection Editor.
Using Code
- Define the color picker cell by creating an instance of the ColorPickerCellType class.
- Specify the properties of the color picker cell.
- Assign the color picker cell type to a cell or range of cells by setting the CellType property for a cell, column, row, or style to the ColorPickerCellType object.
Example
This example creates a color picker cell.
| C# |
Copy Code
|
|---|---|
FarPoint.Win.Spread.CellType.ColorPickerCellType cp = new FarPoint.Win.Spread.CellType.ColorPickerCellType(); cp.AllowFullOpen = true; cp.AnyColor = false; cp.CustomColors = new int[] {255, 190, 50}; cp.FullOpen = true; cp.Style = FarPoint.Win.Spread.CellType.ColorPickerStyle.BoxedWithText; FarPoint.Win.Spread.CellType.ColorPickerCellType c = new FarPoint.Win.Spread.CellType.ColorPickerCellType(cp); fpSpread1.ActiveSheet.Cells[0, 0].CellType = c; |
|
| VB |
Copy Code
|
|---|---|
Dim cp As New FarPoint.Win.Spread.CellType.ColorPickerCellType cp.AllowFullOpen = True cp.AnyColor = False cp.CustomColors = New Integer() {255, 190, 50} cp.FullOpen = True cp.Style = FarPoint.Win.Spread.CellType.ColorPickerStyle.BoxedWithText Dim c As New FarPoint.Win.Spread.CellType.ColorPickerCellType(cp) fpSpread1.ActiveSheet.Cells(0, 0).CellType = c |
|
Using the Spread Designer
- Select the cell or cells in the work area.
- In the property list, in the Misc category, select CellType. From the drop-down list, choose the ColorPicker cell type. Now expand the CellType property and various properties are available that are specific to this cell type. Select and set those properties as needed.
Or right-click on the cell or cells and select Cell Type. From the list, select ColorPicker. In the CellType editor, set the properties you need. Click Apply.
- From the File menu choose Apply and Exit to apply your changes to the component and exit Spread Designer.