You can allow the user to adjust the size of a row or column in the sheet. Set the Resizable property for the row to allow the user to resize rows and the Resizable property for the column to allow the user to resize columns. The user can also double-click on the border between the column headers to resize the column to match the width of the header text.
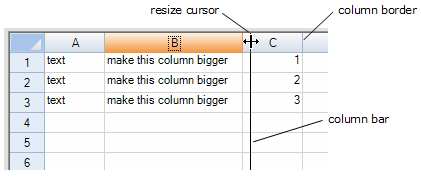
For users to resize rows or columns, they left click on the edge of the header of the row or column to resize and drag the side of the header and release the mouse at the desired size. While the left mouse button is down, a bar is displayed along with the resize pointer as shown in the following figure. Be sure to click on the right edge of the column and bottom edge of the row.
Double-clicking on the row or column edge resizes the row or column to fit the tallest or widest content of that row or column (preferred height or width). Wrapped text in the column is ignored when double-clicking on a column divider. Unwrapped text is ignored when double-clicking on a row divider. You can specify the automatic fit behavior with the AutoFitColumnOptions or AutoFitRowOptions property.
By default, user resizing of rows or columns is allowed for rows and columns in the data area and not allowed for the header area. In code, you can resize row and column headers, not just data area rows and columns. You can override the default behavior using the Resizable property and prevent the user from resizing.
The following code turns on resizing for a single column in the row header:
spread.Sheets[0].RowHeader.Columns[0].Resizable = true;
The following code turns on resizing for all columns in the row header:
spread.Sheets[0].RowHeader.Columns.Default.Resizable = true;
You can determine if a row or column can be resized by the user with these methods in the SheetView class:
To resize the rows or column based on the size of the data, refer to Resizing the Row or Column to Fit the Data.
Using the Properties Window
- At design time, in the Properties window, select Sheet.
- In the Properties window, select Column or select Row, and click on the button for the Cell, Column, and Row Editor.
- In the Editor, select a column or a row.
- Select the Resizable property.
- Click the drop-down arrow to display the choices and select the value (True or False). Repeat this for each property.
Using Code
Set the Resizable property for the row or Resizable property for the column.
Example
The following example sets the sheet to allow the first row and first column to be resizable.
| C# |
Copy Code
|
|---|---|
fpSpread1.Sheets[0].Columns[0].Resizable = true; fpSpread1.Sheets[0].Rows[0].Resizable = true; |
|
| VB |
Copy Code
|
|---|---|
fpSpread1.Sheets(0).Columns(0).Resizable = True fpSpread1.Sheets(0).Rows(0).Resizable = True |
|
Using the Spread Designer
- Select Sheet from the drop-down combo list located on the top right side of the Designer.
- From the Appearance category, select Column or select Row, and click on the button for the Cell, Column, and Row Editor.
- In the Editor, select a column or a row.
- Select the Resizable property.
- Select the value from the drop-down list (either True or False).
- From the File menu, select Save and Exit to save the changes.