You can use the name box control to display or create custom names at run time. Custom names that are created by the name box can only refer to a cell or a range of cells.
Setting up the Name Box
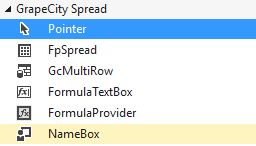
Select the name box control from the Toolbox and draw it on the form or use the NameBox class to create the control at runtime. Then attach the control to Spread. The following image displays the NameBox control in the toolbox.
Using the Name Box
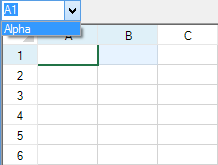
To create a custom name, select a cell or range of cells in the Spread control, type a custom name in the name box control, and then press the equal key to create the custom name.
Use the drop-down list in the name box control to display the custom names. You can select one of the names to see the cell or cell range that the name refers to.
Using Code
Create the name box and attach it to the control.
Example
This example code creates a name box control and a custom name.
| C# |
Copy Code
|
|---|---|
| fpSpread1.ActiveSheet.AddCustomName("Alpha", "A1:B1", 0, 0); FarPoint.Win.Spread.NameBox namebox1 = new FarPoint.Win.Spread.NameBox(); namebox1.Location = new Point(0, 0); namebox1.Size = new Size(80, 20); this.Controls.Add(namebox1); namebox1.Attach(fpSpread1); |
|
| VB |
Copy Code
|
|---|---|
| fpSpread1.ActiveSheet.AddCustomName("Alpha", "A1:B1", 0, 0) Dim namebox1 As New FarPoint.Win.Spread.NameBox() namebox1.Location = New Point(0, 0) namebox1.Size = New Size(80, 20) Controls.Add(namebox1) namebox1.Attach(fpSpread1) |
|