In this tutorial, you will learn how to modify the grid appearance by using the new features incorporated into the DataView property. Utilizing the flexibility of True DBGrid you can present data in a variety of formats.
-
Start a new project.
-
From the Visual Basic Project menu, select Components, then check the boxes labeled ComponentOne True DBGrid Pro 8.0 (OLEDB) and Microsoft ADO Data Control (OLEDB).
-
Place an ADO Data control, a True DBGrid control and a ComboBox on the form.
-
Next we will connect Adodc1 to the TDBG8Demo database.
Display the custom property pages for Adodc1. Click the General tab and select the Use Connection String option. Click Build. Choose the Microsoft Jet 4.0 OLE DB Provider option. Click Next. Enter the datasource name by pressing the Ellipsis button and locating the database (TDBGDEMO.MDB). Test the connection to make sure it works. Press OK to close the dialog window. Press the Apply button.
-
Choose the Recordsource tab. Set the Command Type to 2 – adCmdTable and the Table or Stored Procedure Name to Customers. Press the OK button to accept the selections and close the properties page.
-
-
Set the TDBGrid1 DataSource to Adodc1.
-
Change the Name property of the combo box to cboDataView and the Text property to Data View.
-
Open the List property of the Combo Box and add the following items:
Example Title Copy Code0 - Normal 1 - Hierarchical 2 - Group 3 - Form 4 - Inverted
-
Next, add the following code, which inserts the button header, prevents the user from selecting the hierarchical view at run time, selects the data view, and adjusts the row height for a more pleasing appearance.
Example Title Copy CodeDim Col As TrueOleDBGrid80.Column Private Sub Form_Load() For Each Col In TDBGrid1.Columns Col.ButtonHeader = True Next Col End Sub Private Sub Form_Activate() cboDataView.ListIndex = dbgNormalView End Sub Private Sub cboDataView_Click() ' Hierarchical View is not available at run time. If cboDataView.ListIndex = dbgHierarchicalView Then MsgBox "Hierarchical view must be set at design time" cboDataView.ListIndex = dbgNormalView End If TDBGrid1.DataView = cboDataView.ListIndex If TDBGrid1.DataView = dbgFormView Then TDBGrid1.RowHeight = 315 ElseIf TDBGrid1.DataView = dbgInvertedView Then TDBGrid1.RowHeight = 330 Else TDBGrid1.RowHeight = 225 End If TDBGrid1.SetFocus End Sub -
Next, add the following code, which facilitates sorting in Group mode, adds bitmaps, and adjusts the appearance.
Example Title Copy CodePrivate Sub TDBGrid1_GroupColMove(ByVal Position As Integer, ByVal ColIndex As Integer, Cancel As Integer) ' This is executed in the Group view after a column is dragged to the ' grouping area. Dim s As String For Each Col In TDBGrid1.GroupColumns If s <> vbNullString Then s = s & ", " ' Construct the "WHERE" part of the SQL statement that will be passed ' to the Sort property of the recordset object. s = s & "[" & Col.DataField & "]" With Col.HeadingStyle ' Add a picture to the column header. .ForegroundPicture = LoadPicture(App.Path & "\bitmaps\SortUp.bmp") .ForegroundPicturePosition = dbgFPRight .TransparentForegroundPicture = True End With Next Col ' Change the split divider. If TDBGrid1.Splits.Count > 1 Then TDBGrid1.Splits(1).DividerStyle = dbgDarkGrayLine End If TDBGrid1.HoldFields ' Apply the sorting. Adodc1.Recordset.Sort = s End Sub
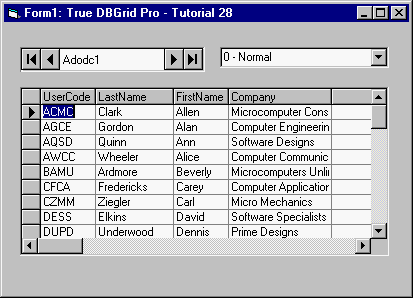
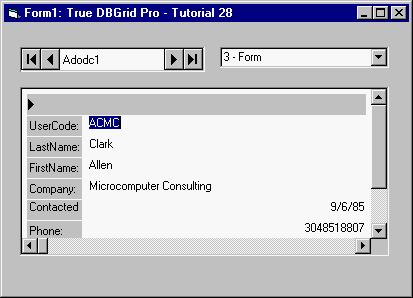
Run the program and observe the following:
The applicaiton should look like this:
-
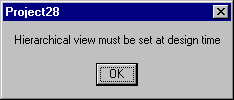
Set the combo to 1 – Hierarchical and you will receive this message box:
-
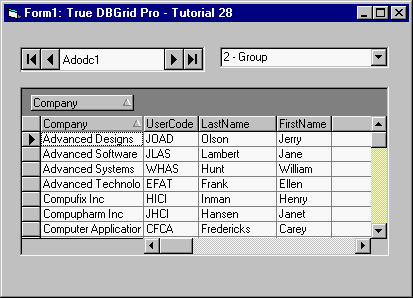
Change the combo box to 2 – Group. Drag the Company column header to the top section of the grid header. Notice that the grid automatically groups the cells in relation to the new title.
-
Change the combo box to 3 – Form. Notice that the grid reconfigures the data into the form style.
-
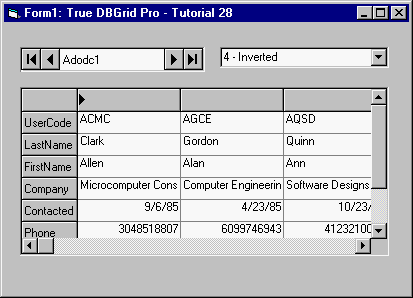
Change the combo box to 4 – Inverted. Notice that the grid automatically inverts the rows and columns placing the user code across the top of the grid.