In this tutorial, you will learn how to use the DataView property of True DBGrid to display hierarchical data. Hierarchical data generally refers to data that is stored in multiple relational tables, where a master (or "parent") table is linked by keyed fields to detail (or "child") tables. The hierarchical display gives you the ability to present the master data to your users, such that the related detail data can be viewed in the same grid with a single mouse click.
Note: The DataView property is only supported by the OLE DB version of True DBGrid.
When the grid is bound to a master-detail data source, you can display related groups of hierarchical data by using bands. A band is a virtual representation of a hierarchical recordset, not the data itself. Therefore, hierarchical grids are read-only. A band is created for each level in a hierarchical recordset, and may consist of entire tables or a just a few selected fields. At run time, users can expand and collapse bands using a TreeView-like interface.
See Hierarchical Data Display for more information.
For simplicity, this tutorial does not cover all of the different ways of binding to the various types of data sources. For example, you can bind to a Data Environment created with the Visual Basic Data View window. Another way is to create an ODBC Data Source. An ODBC Data Source is both a reference to a database file and to a specific ODBC driver that is used to access the data in the database, and is one of the easiest ways to specify the set of records you want to display in the hierarchical grid.
-
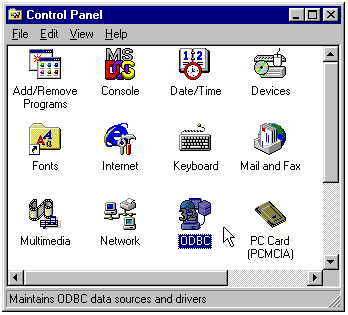
Create an ODBC Data Source. In Control Panel, double-click the ODBC icon. You may have 16-bit and 32-bit ODBC Icons depending on what other software is installed on your system. (You will want to choose the 32-bit icon in such a case.)
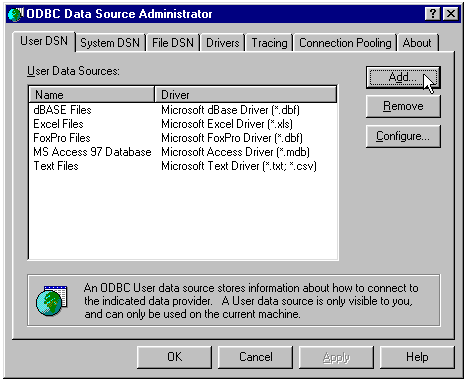
This will display the ODBC Data Source Administrator. You can create ODBC Data Sources that are visible to yourself only, to all users on the system, and so on. The list box in the center of the dialog shows the Data Source Names for the data sources that have already been defined. In this example, you will create a new User Data Source Name (DSN). Click the Add button to add a new User DSN as shown in the next figure.
-
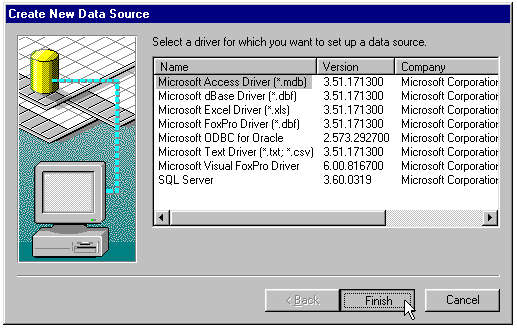
Choose an ODBC Driver to use with your data source. The driver you choose should reflect the type of database file you wish to access. The database used by the rest of this tutorial is a Microsoft Access 7.0 database, so highlight the Microsoft Access Driver (*.mdb) selection and choose Finish.
-
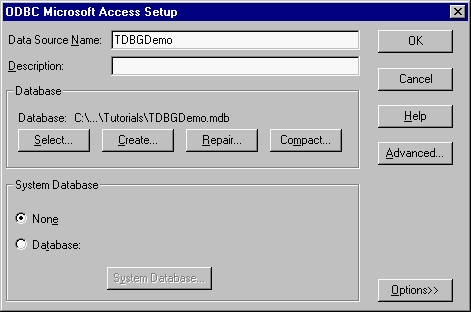
Choosing Finish will display the ODBC Microsoft Access Setup Dialog.
Note: The Microsoft Access ODBC driver is installed by a number of applications, including Access, Visual Basic, Visual C++ 5.0 and others.
The next step is to select a database file to work with. Click on the Select button to bring up a file browse dialog. Locate and select the TDBGDemo.mdb database in the Tutorial subdirectory where you installed True DBGrid. When creating your own data sources, you will browse for the database file you wish to work with and select it.
Once you have done that, enter a name for this data source in the Data Source Name box. For this example, the DSN must be called TDBGDemo, because that is the name used in the tutorial code, so enter TDBGDemo in the Data Source Name box. When you are finished, choose OK to close the dialog.
-
Choose OK to close ODBC Administrator. This concludes the creation of the ODBC Data Source.
Once the ODBC Data Source is created, you can reuse it over and over again—you will not have to repeat these steps to use this database in a different project. In order for the ODBC Data Source to work in conjunction with the hierarchical grid, you must also identify the actual recordsets to be displayed. This is done in code for this tutorial.
-
Start a new project.
-
From the Visual Basic Project menu, select Components, then check the boxes labeled ComponentOne True DBGrid Pro 8.0 (OLEDB) and Microsoft ADO Control 6.0 (OLEDB).
-
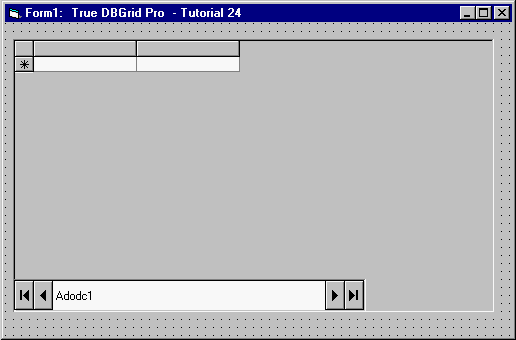
Place an ADO Data control (Adodc1) and a True DBGrid control (TDBGrid1) on the form as shown in the following figure.
-
Set the DataView property of TDBGrid1 to 1 – Hierarchical.
-
Add the following code to the Form_Load event of the form:
Example Title Copy CodePrivate Sub Form_Load() Dim strCn As String Dim strSh As String ' Create a ConnectionString. strCn = "Provider=MSDataShape.1;Data Source=TDBGDemo;Data Provider=MSDASQL" ' Create a Shape command. strSh = "SHAPE {SELECT First, Last, Country FROM `Composer`} AS Composer " & _ "APPEND ({SELECT Last, Opus FROM `Opus`} AS Opus RELATE " & _ "Last TO Last) AS Opus" ' Assign the ConnectionString to an ADO Data Control's ConnectionString ' property, and the Shape command to the control's RecordSource property. With Adodc1 .ConnectionString = strCn .RecordSource = strSh .Visible = False End With ' Set the grid control's DataSource property to the ADO Data control. Set TDBGrid1.DataSource = Adodc1 With TDBGrid1 .ExtendRightColumn = True .Styles("Normal").WrapText = True End With End Sub
Run the program and observe the following:
-
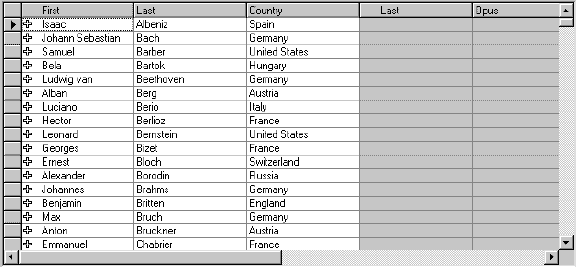
True DBGrid displays the data in a hierarchical format. There are two recordsets, or Bands displayed in the grid: Composer and Opus. The code includes a Shape command that establishes the master-detail relationship between the two recordsets based on the Last field, and also selects which fields to display. The first three columns, from Composer, are populated with data, the last two columns, from Opus, are empty. An expand icon ("+") appears at the left of each record.
-
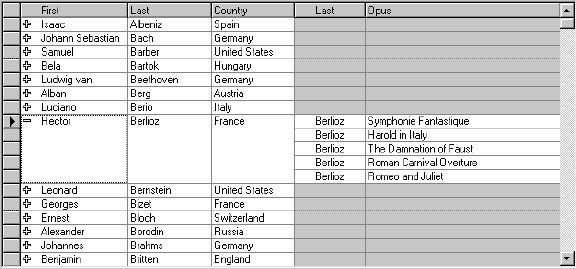
Click an expand icon. The record expands, displaying the related data held in the Last and Opus columns. The expand icon changes to a collapse icon ("–").
-
Click on the expanded record's collapse icon. The detail fields collapse, and the collapse icon changes back to an expand icon. The grid now looks as it did when it first opened.