In this tutorial, you will learn how to use the printing and exporting capabilities of True DBGrid.
-
Start with the project created in Tutorial 1.
-
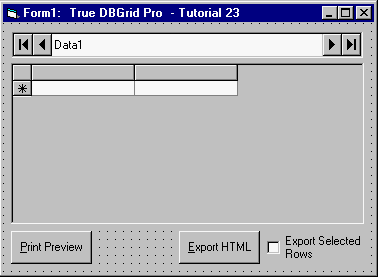
Add two command buttons (Command1 and Command2) and a check box (Check1) to the form (Form1)
-
Set the Caption property of Command1, Command2, and Check1 to "Print Preview", "Export HTML", and "Export Selected Rows", respectively. Your form should now look like this:

-
Enter the following code in the Form_Load event:
Example Title Copy CodePrivate Sub Form_Load() ' Initialize the Data control. Data1.Refresh ' Allow user to change the column order. TDBGrid1.AllowColMove = True ' Change the presentation of the grid. With TDBGrid1.Columns .Item("Country").BackColor = vbCyan .Item("Country").Font.Name = "Times New Roman" .Item("Last").NumberFormat = ">" .Item("Last").ForeColor = vbRed End With With TDBGrid1.HeadingStyle .Font.Bold = True .BackColor = vbBlue .ForeColor = vbYellow End With End Sub -
Add the following code to the Click events of Command1 and Command2:
Example Title Copy CodePrivate Sub Command1_Click() With TDBGrid1.PrintInfo ' Set the page header. .PageHeaderFont.Italic = True .PageHeader = "Composers table" ' Column headers will be on every page. .RepeatColumnHeaders = True ' Display page numbers (centered). .PageFooter = "\tPage: \p" ' Invoke Print Preview. .PrintPreview End With End Sub Private Sub Command2_Click() ' Depending on the Check1.Value the grid will export all or just selected rows. TDBGrid1.ExportToFile App.Path & _ "\Tutor23.html", False, Check1.Value End Sub
Run the program and observe the following:
-
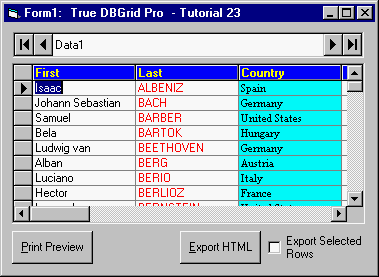
True DBGrid displays the data using the font and color changes specified in step 4.

-
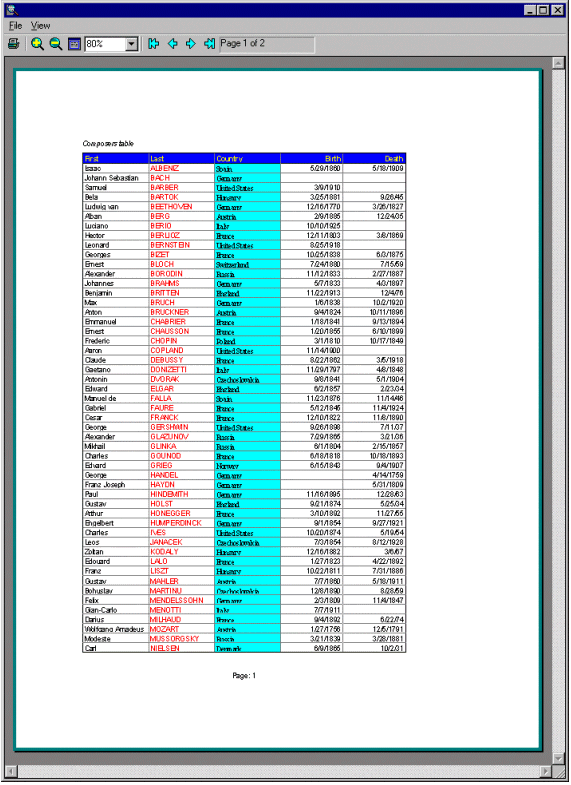
Click the Print Preview button to display a separate application window similar to the following. Note that the output mirrors the format of the grid.

-
Press the PgDn key to view the next page of records. Note that this page also contains column headers because the RepeatColumnHeaders property was set to True in code.
-
Experiment with the View menu commands and the zoom factor combo box to preview the output at different resolutions. When you are finished, close the preview window.
-
Click the Export HTML button to create a file named TUTOR23.HTML in the TUTOR23 directory. Load this file into your browser and note that the generated HTML table mirrors the format of the grid.
-
Go back to Form1 and select one or more records in the grid. Check the box labeled Export Selected Rows, then click the Export HTML button. Refresh your browser, and note that only the selected rows appear in the table.