In this tutorial, you will learn how to use the unbound storage mode (DataMode property set to 4 - Storage) of True DBGrid to display an array of strings. Unlike unbound (extended) and application modes, storage mode does not fire data-gathering events. Instead, it uses an XArrayDB ActiveX object to store, access, and maintain data.
In code, you create, redimension, and populate an XArrayDB object with your data just as you would a Visual Basic array, then assign the XArrayDB object to the Array property of the grid. The data will then be maintained and exchanged between the grid and the XArrayDB object automatically. There are no unbound events to write, making this mode the easiest to use.
-
Start a new project.
-
Place a True DBGrid control (TDBGrid1) on the form (Form1).
-
Set the DataMode property of TDBGrid1 to 4 - Storage (the default value of this property is 0 - Bound).
Configuring the grid at design time
We shall configure the grid to display four columns.
-
Right-click TDBGrid1 to display its context menu and choose Edit from the context menu. The grid will enter its visual editing mode, enabling you to interactively change the grid's row and column layout.
-
By default, the grid contains two columns. We are going to create two more. Right-click anywhere in the grid to display the visual editing menu. Choose the Append command to add a new column at the end of the grid. Execute this command again to get a total of four columns.
-
Right-click TDBGrid1 to display its context menu.
-
Choose Properties to display the Property Pages dialog. On the General property page, set the AllowAddNew and AllowDelete properties to True. (Note that the AllowUpdate property is True by default.)
-
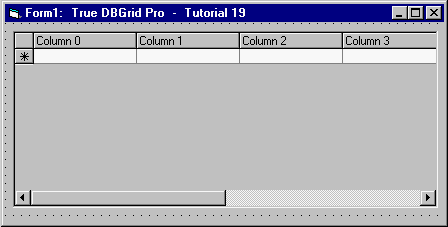
Click the Columns tab to display a list of the available columns, designated as Columns(00) through Columns(03). Expand the Columns(00) node and set its Caption property to "Column 0". Repeat the process for the remaining columns until the grid looks like this.
Adding XArrayDB to the project
Before writing the code, we need to add the ComponentOne XArrayDB Object to the project.
-
Select References from the Project menu to display a list of available type library references. Select the check box labeled ComponentOne XArrayDB Object (XADB8.OCX), then press the OK button.
Initializing the array data
Next, create the XArrayDB object in code.
-
In the General section of Form1, insert the following declarations:
Example Title Copy Code' General declarations. Option Explicit Dim x As New XArrayDB -
In the Form_Load event, ReDim the XArrayDB object to contain 100 rows and 4 columns. After populating the XArrayDB object, assign it to the grid's Array property.
Example Title Copy CodePrivate Sub Form_Load() ' Allocate space for 100 rows, 4 columns. x.ReDim 0, 99, 0, 3 Dim row As Long, col As Integer ' The LowerBound and UpperBound properties correspond to the LBound and ' UBound functions in Visual Basic. Hard-coded dimensions can be used ' instead, if known. For row = x.LowerBound(1) To x.UpperBound(1) For col = x.LowerBound(2) To x.UpperBound(2) x(row, col) = "Row " & row & ", Col " & col Next col Next row ' Bind True DBGrid Control to this XArrayDB instance. Set TDBGrid1.Array = x End Sub
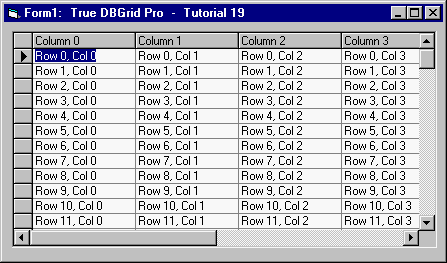
Run the program and observe the following:
-
The grid displays the data assigned to the XArrayDB object in code and appears as follows.
-
Type a different value into any cell. When you click another row, the new data is saved to the array.
-
Select an entire row by clicking its record selector. Press the Del key. The grid will remove the record from the display (and from the array).
-
Scroll down until the AddNew row appears. Enter any data into the cells. When you click a cell in another row, the array is redimensioned to accommodate an extra row at the end, and the newly added data is saved to that row.
This concludes Tutorial 19.