In this tutorial, you will learn how to change the grid's display to highlight rows by defining new styles at run time. True DBGrid uses Style objects to apply font and color characteristics to rows, columns, and individual cells.
-
Start with the project used in Tutorial 10.
-
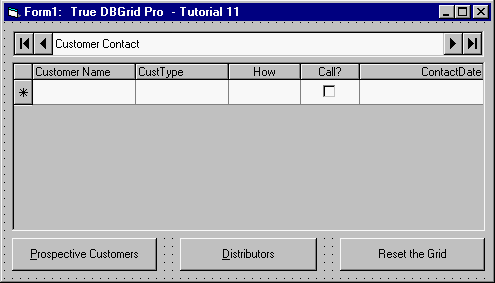
Add a control array of three command buttons to the form. Change the captions of Command1(0) to "Prospective Customers", Command1(1) to "Distributors", and Command1(2) to "Reset the Grid" so that the form appears as follows.

-
Add the following declarations to the General section of Form1:
Dim ButtonFlag As Integer
Dim Prospective As New TrueDBGrid80.Style
Dim Distributors As New TrueDBGrid80.Style
-
Enter the following code in the Click (Visual Basic) event of Command1:
Private Sub Command1_Click(Index As Integer)
Select Case Index
Case 0
ButtonFlag = 0
TDBGrid1.FetchRowStyle = True
Case 1
ButtonFlag = 1
TDBGrid1.FetchRowStyle = True
Case 2
TDBGrid1.FetchRowStyle = False
End Select
TDBGrid1.Refresh
End Sub
-
Enter the following code in the Form_Load event:
Private Sub Form_Load()
Set Prospective = TDBGrid1.Styles.Add("Prospective")
Prospective.Font.Italic = True
Prospective.Font.Bold = True
Prospective.ForeColor = vbBlue
Set Distributors = TDBGrid1.Styles.Add("Distributors")
Distributors.BackColor = vbRed
Distributors.ForeColor = vbWhite
End Sub
-
Enter the following code in the FetchRowStyle event of TDBGrid1:
RSClone.Bookmark = Bookmark
If ButtonFlag = 0 And RSClone("CustType").Value = 1 Then
RowStyle = Prospective
End If
If ButtonFlag = 1 And RSClone("CustType").Value = 4 Then
RowStyle = Distributors
End If
Run the program and observe the following:
-
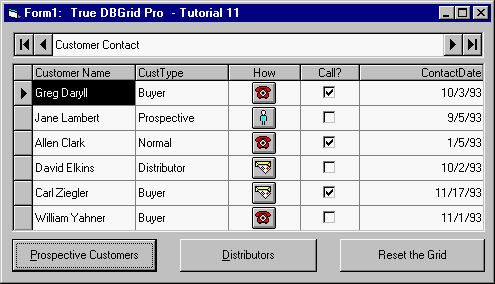
TDBGrid1 displays data as in Tutorial 10.
-
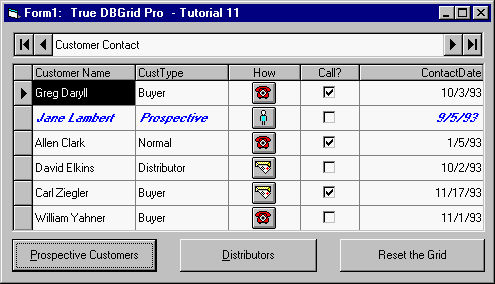
Click the Prospective Customers button. The grid should appear as follows.

-
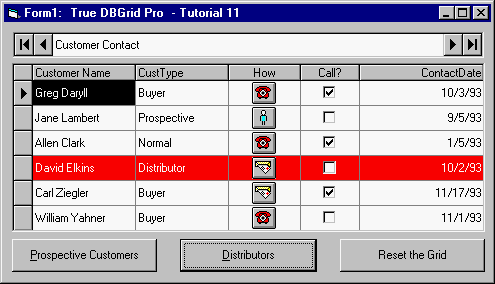
Click the Distributors button. The grid should now appear as follows:

-
Finally, click the Reset the Grid button. The grid should now appear as follows.

This concludes Tutorial 11.