In this tutorial, you will learn how to use the ValueItems collection to display bitmaps and check boxes in a cell—without writing a single line of code!
-
Start with the project used in Tutorial 7.
-
First, we will change the captions of the ContactType and Callback columns. Right-click TDBGrid1 to display its context menu.
-
Choose Properties to display the Property Pages dialog. Select the Columns property page by clicking the Columns tab. Expand the ContactType column and change its Caption property from ContactType to How. Repeat with the Callback column, changing its Caption property from Callback to Call?
-
Change the Alignment property of these two columns so that the bitmaps will be centered within each cell. Click the Splits tab and expand the Splits(00) object, its Columns collection, and the How column. Select the column's Alignment property and change it to 2 – Center. Repeat this step with the Call? Column.
-
Select the Style Factory property page by clicking the Style Factory tab. Expand the Normal style and change its VerticalAlignment property from 0 - Top to 2 - Vertical Center. This will ensure that the text and pictures are vertically centered in each row.
-
Next, we assign bitmaps and check boxes to selected columns by populating the corresponding ValueItems collection. Select the Values property page by clicking the Values tab.
-
Drop down the Column combo box and select Column2 (ContactType). Check the Translate box to instruct the grid to translate the data in Column2 before displaying it. Note that the grid at the bottom of the page now displays two columns labeled Value and DisplayValue. The Value column is for data values from the database. The DisplayValue column is for translated values you want the grid to display.
-
Check the CycleOnClick box so that when you click a cell in Column2 at run time, the cell will automatically cycle through all the values defined in the Value - DisplayValue table.
-
The possible values of the ContactType field are 0, 1, and 2, which represent telephone, mail, and personal contact, respectively. We shall display bitmaps in the cell instead of these numeric values. If you installed the full product, you will find the following files in the BITMAPS subdirectory of the True DBGrid installation directory: PHONE.BMP, MAIL.BMP, and PERSON.BMP.
Click the first row within the Value column and enter 0 as the first value. Click the same row within the DisplayValue column to enable the Picture button on the right. Click this button to show an open file dialog. To associate a bitmap with the value 0, choose PHONE.BMP and click the dialog's OK button to accept the selection. The phone bitmap will then appear in the DisplayValue column. Repeat this step with the following values and bitmaps:
Value DisplayValue
1 MAIL.BMP
2 PERSON.BMP
-
After defining the bitmap entries for Column2 (ContactType), open the Column combo box again and select Column3 (Callback). This column contains a Boolean field with allowable values of 0 and -1 (False and True), which in this case represent whether a call needs to be returned. We shall display check boxes instead of Boolean values.
-
Drop down the Presentation combo box and select 4 – Check Box. True DBGrid will automatically translate 0 and –1 to a check box.
-
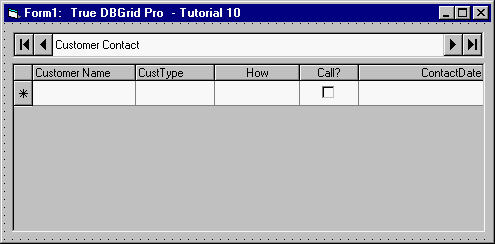
Click the OK button at the bottom of the Property Pages dialog to accept the changes. You should see the column captions on the grid modified according to the changes you made in step 3.
-
Display the primary context menu again as in step 2, but this time choose the Edit option to enter the grid's visual editing mode, which enables you to interactively change the grid's row height and column layout.
-
Place the mouse cursor over a column divider in the column header area, changing it to a horizontal double-arrow resizing cursor. Drag the divider to the left to shorten the How and Call? columns.
-
Now place the mouse cursor over the row divider, changing it to a vertical double-arrow resizing cursor. Drag the divider downward to increase the row size to about double the current height.
-
Click Form1 anywhere outside TDBGrid1 to exit visual editing mode. You have now completed reconfiguring the grid, which should look like the figure below.
Run the program and observe the following:
-
TDBGrid1 displays data from the joined table as in Tutorials 10 through 11.
-
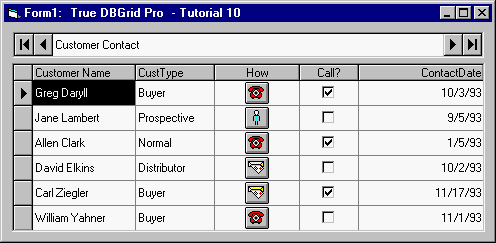
The How and Call? columns now display bitmaps instead of numeric values as shown in the following figure.
-
Click a cell in the How column to make it the current cell. Then click it again several times and observe how the cell cycles through the PHONE, MAIL, and PERSON bitmaps.
-
Click a cell in the Call? Column and observe how the cell cycles through the check box bitmaps.
This concludes Tutorial 10.