This tutorial explains how to specify constraint expressions for individual fields as well as for the whole record. It also describes how to specify default values for fields in a new record, how to use the Required and ReadOnly properties of a True DataControl field, and how to cancel pending edits using the CancelUpdate method.
-
Start a new project.
-
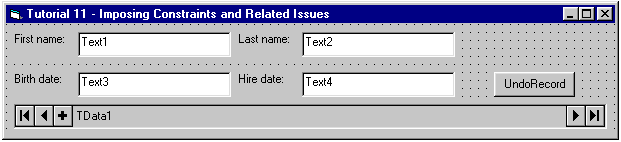
Place the following controls on the form (Form1) as shown in the figure: a TData control (TData1), four TextBox controls (Text1 to 4), four labels (Label1 to 4) and a button (Command1).
-
Set properties as follows (you can use the DataSource property page to set TData data source properties, as described in Tutorial 1):
Example Title Copy CodeTData1.ConnectionString Provider=Microsoft.Jet.OLEDB.3.51;Persist Security Info=False;Data Source=C:\Program Files\ComponentOne Studio\Common\TDDEMO.MDB TData1.CommandType 2 – adCmdTable TData1.RecordSource Employees Text1.DataSource TData1 Text1.DataField FirstName Text2.DataSource TData1 Text2.DataField LastName Text3.DataSource TData1 Text3.DataField BirthDate Text4.DataSource TData1 Text4.DataField HireDate Command1.CausesValidation False
Set label and button captions as shown in the picture.
-
Open the True DataControl property pages for TData1. Go to the Fields page, and select the HireDate field. Type Date in the Default Expression text box to specify a default value for the HireDate field when new records are added.
-
Click the right mouse button over the HireDate field and select New Constraint from the context menu (alternatively, you can use the New button). An empty constraint expression for the HireDate field appears indented beneath the field name in the list, and the field controls on the right side of the page are replaced with expression editing controls. Go to the Constraint Expression text box and enter the following expression:
Example Title Copy CodeHireDate <= Date
(You can ignore the Condition text box for now. This is used for entering an optional condition specifying whether to apply the constraint expression or to skip it.)
Type the following text into the Message Expression text box:
Example Title Copy Code"Hire date can't be in the future"This completes the constraint definition for the HireDate field.
-
Go to the Constraints property page. Create a new constraint by clicking the right mouse button over the constraints area (left part of the page) and choosing New from the context menu (alternatively, you can use the New button). The expression editing controls on the right side of the page become available. Type the following text into the Constraint Expression text box:
Example Title Copy CodeIsEmpty(HireDate) or HireDate >= BirthDate
Type the following text into the Message Expression text box:
Example Title Copy Code"You can't hire a person who is not born"This completes the constraint definition for the entire record.
-
Return to the Fields property page. Select the BirthDate field. Check the Required check box, which is unchecked by default.
-
Select the LastName field. Check the ReadOnly check box, also unchecked by default. Repeat this step for the FirstName field.
-
Go to the General property page and check the AddNew check box in the Buttons group. We will need the AddNew button to add records.
-
Add the following code to Command1:
Example Title Copy CodePrivate Sub Command1_Click() TData1.CancelUpdate End Sub
Run the Program and Observe the Following:
-
In the first record (employee Nancy Davolio) enter 1/1/2000 in the HireDate field (its original value is 6/4/92). Press Tab twice, or click on another control with the mouse. The error message: "Hire date can’t be in the future" will appear in accordance with the constraint imposed on the HireDate field in Step 5. Note that regardless of whether you answer Yes or No to the question: "Would you like to restore the previous value?", focus is returned to the control where the error occurred. You are not allowed to leave the field unless you correct the error.
-
Enter 12/8/40 in the HireDate field. Press Tab or click another control with the mouse. Although the entered date is incorrect (less than BirthDate), you are allowed to leave the control. This is because the corresponding constraint is a record-level constraint; it is checked only when you leave the record or post the change to the database. Now, try to move to another record with the TData1’s Next button. The error message: "You can't hire a person who is not born" will be displayed in accordance with the record-level constraint imposed in Step 6.
-
Click the UndoRecord button. This executes the CancelUpdate method, which restores all fields to their original value, canceling all changes that the end user has made since the record was retrieved from, or saved to, the database. The original HireDate reappears: 6/4/92.
-
Note that the UndoRecord button received focus when it was clicked, even though Text4 contained an invalid HireDate at that point. Normally, an invalid value would not be permitted in a bound control, and clicking a command button would trigger the same error message as moving to another grid row. However, because the UndoRecord button (Command1) has CausesValidation=False, it can receive focus without forcing field update. You can use the CauseValidation property for controls (such as Help or Undo buttons) that should always be made available to the end-user.
-
Clear the BirthDate value from Text3. Then press Tab or click another field in the same row with the mouse. The error message: "Field BirthDate can’t be left empty" will appear as specified by the Required property in Step 7. Click the UndoRecord button to restore the previous value.
-
Try to change FirstName or LastName. You will not be allowed to do it, in accordance with the ReadOnly property you specified for these fields in Step 8. You will, however, get an ugly “Binding Collection Error” message box, but that comes from the standard Visual Basic TextBox control. Other, more sophisticated data-bound controls will honor the ReadOnly property in a decent way, without popping up messages.
-
Press the Add button on the TData1 control to add a new row. The HireDate field in the newly created row will be automatically set to today’s date as returned by the VBScript function Date, which was specified in the Default Expression for the HireDate field in Step 4.
Close the program. You have successfully completed Tutorial 11.