All of the ComponentOne ActiveX controls are supported in the Microsoft .NET Framework. To use a ComponentOne ActiveX control in Visual Studio, follow these steps:
- Open Visual Studio and select File | New | Project. The New Project dialog box opens.
- Under Installed Templates, expand the desired programming language node, and select Windows. Note that you may need to expand Other Languages to find the language you want to use.
- Select a .NET Framework version, and then select Windows Forms Application.

- Enter a project name in the Name field, enter or browse for a project location in the Location field, and then click OK. A new Microsoft Visual Studio .NET project is created in the specified location.
- Make sure the Toolbox is visible (if necessary, select Toolbox in the View menu).
- To place the ComponentOne ActiveX components on their own tab, right-click anywhere in the Toolbox and select Add Tab from the context menu.
- Enter a tab name, for example “C1 ActiveX”, in the caption text box and click OK.
- Right-click the tab and select Choose Items.
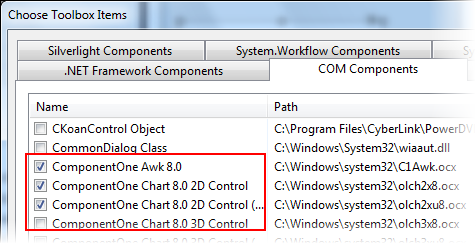
- Click the COM Components tab, click the Name header to sort alphabetically, and scroll to find the ComponentOne controls.

- Select the checkbox next to any of the ComponentOne ActiveX controls that you would like to add to the Toolbox and click OK.
- Drag the control from the Toolbox onto the form.
 Context Menus