To create a new FlexGrid for LightSwitch project, complete the following steps:
- In Visual Studio, select File | New | Project.
- Under Installed Templates, select LightSwitch. The .NET Framework 4 must be selected in order to create LightSwitch applications.
- Choose LightSwitch Application for the preferred language, enter a name for the application, and click OK. Your LightSwitch project is created. You'll notice it contains the Data Sources and Screens folders.
- In the Solution Explorer, right-click the project node and select Properties.
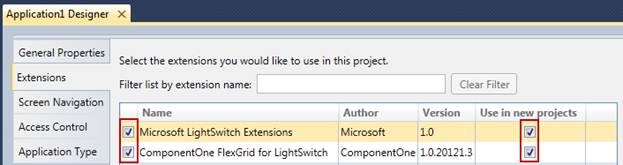
- In the Properties window, select the Extensions tab and make sure the Microsoft LightSwitch Extensions and FlexGrid for LightSwitch items are selected. You can also select the Use in new projects fields if desired.