The following procedure explains how to make C1Calendar a popup calendar using its client-side object model to create a rich popup calendar without having to postback to the server. C1Calendar's default behavior can easily be set to a popup calendar by assigning script to the client side calendar. For more information about items and definitions in C1WebCalendar's client-side object model, see Client-Side Calendar.
A popup calendar can be created with a few lines of JavaScript and by declaring an onclick event to its associated control in the HTML markup .aspx page, for example a Button control.
To associate a C1Calendar popup calendar with an input control such as a button control and to close the popup control when a user selects a date on the popup calendar.
By the end of this procedure you will be able to do the following:
• Access and manipulate C1Calendar's client-side objects
• Associate a popup calendar with an input control
• Determine the location of the popup calendar
• Close the popup calendar when the user selects a date from it
• Assign the value of the selected date's popup calendar to its associated control
To create a client-side popup calendar that appears at the bottom-left of the textbox control when a user clicks on the button control at run time, create a client-side function using the PopupSetting and PopupBeside classes. Complete the following steps:
1. Add the following controls to your page: HTML TextBox, HTML Button, and C1Calendar.
2. Align the controls on your page so they appear like the following:
3. In C1Calendar’s properties window set the PopupMode to True.
4. In the .aspx page add the following script for the SelectDate and CalendarClosed functions:
<script language="javascript" type="text/javascript">
function SelectDate()
{
var calendar = Sys.Application.findComponent("C1Calendar1.ClientID");
var input = document.getElementById("Text1");
calendar.popupBeside(input, C1.Web.UI.PositioningMode.bottomLeft);
}
function CalendarClosed()
{
var calendar = Sys.Application.findComponent("C1Calendar1.ClientID");
var input = document.getElementById("Text1");
input.value = calendar.get_selectedDate().toLocaleDateString();
}
</script>
The first function above, SelectDate, uses the popupBeside class to determine the dock alignment for the popup calendar and to make the Popup calendar popup to the bottom left of the associated element, for example TextBox1.
The second function above, CalendarClosed, assigns the value of the selected date to the textbox control once the popup calendar closes.
5. Switch to design view to assign the CalendarClosed function name to the server-side property, ClientOnAfterClose. The ClientOnAfterClose property will call the CalendarClosed function after the Popup calendar closes which will assign the selected date value to the textbox.
6. In the .aspx page include the onclick attribute in the markup for a Button HTML control. This will allow the attribute onclick to get passed through to the browser so when you click on the button control, the event will call the Popup method we defined in the client script so the popup calendar will appear. Add, the onclick markup for the Button control to make the popup calendar appear anytime the user clicks on the Button control.
<input id="Text1" type="text" /><input id="Button1" type="button" value="..." onclick="SelectDate()" />
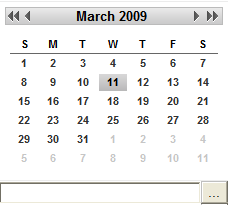
![]() This topic illustrates the following:
This topic illustrates the following:
Run the Web page and complete the following tasks at run time
• Click on the button control to invoke the popup calendar.
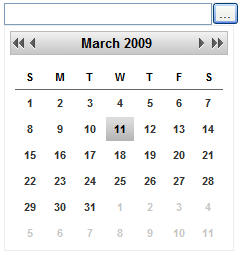
• Select a date from the popup calendar.
![]()
The popup calendar will close and assign the selected date to the textbox control.
|