This tutorial teaches you how installed templates, add the XML Data Source component to the Web site, assign it to the C1Menu control, and then set the binding for the C1Menu.
Complete the following steps:
- From the Toolbox, double-click the C1Menu icon to add the control to your project.
- Create and prepare the XML file by completing the following steps:
- Right-click the App_Data in the Solution Explorer and select Add New Item. The Add New Item dialog box appears.
- Select the XML File and rename it "Menu_Hierarchy.xml". The XML file opens.
- In the XML view, add the following data to the Menu_Hierarchy.xml document:
To write code in Source View
<?xml version="1.0" encoding="utf-8" ?><root><MenuItem Text="CDs">\<MenuItem Text="Back to Black"></MenuItem><MenuItem Text="Frank"></MenuItem><MenuItem Text="Nevermind"></MenuItem><MenuItem Text="In Utero"></MenuItem></MenuItem><MenuItem Text="Cassette Tapes"><MenuItem Text="Bleach"></MenuItem><MenuItem Text="Cheap Thrills"></MenuItem><MenuItem Text="Dangerous"></MenuItem><MenuItem Text="Bad"></MenuItem></MenuItem><MenuItem Text="Vinyl Records"><MenuItem Text="Axis: Bold as Love"></MenuItem><MenuItem Text="Full Circle"></MenuItem><MenuItem Text="Off The Wall"></MenuItem><MenuItem Text="Other Voices"></MenuItem></MenuItem>
- Switch back to the Design view of the .aspx page and complete the following steps to create a new data source:
- Click C1Menu's smart tag to open the C1Menu Tasks menu and then, from the Choose Data Source drop-down list, select New Data Source.
- The Data Source Configuration Wizard dialog box opens.
- Select XML File and then click OK.
XmlDataSource1is added to the project.
- Complete the following steps to configure the data source:
- Click C1Menu's smart tag to open the C1Menu Tasks menu; click Configure Data Source.
The Configure Data Source dialog box opens. - In the XPath expression text field, enter "root/MenuItem". This will select all MenuItems that are children of root so that the MenuItems are the top-level nodes on the Web page.
- Next to Data file text field, click Browse to open the Select XML File dialog box.
- Select the App_Data project folder , and then select Menu_Hierarchy.xml from the Contents of folder pane
- Click OK to close the Select XML File dialog box.
- Click OK to close the Configure Data Source dialog box.
- Click C1Menu's smart tag to open the C1Menu Tasks menu; click Configure Data Source.
- Complete the following steps to bind the XML tags to the C1MenuItems.
- Click C1Menu's smart tag to open the C1Menu Tasks menu and click Edit Databindings.
- The Bindings Collection Editordialog box opens.
- Click Add to add an empty binding to the project.
- Set the binding's properties as follows:
- Set the DataMember property to "MenuItem".
- Set the TextField property to "Text".
- Click OK to close the Bindings Collection Editor
- Press F5 to run the project.
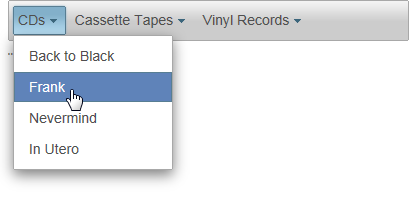
 This topic illustrates the following:
As the project is running, click through the menu and observe that the data from the Menu_Hierarchy.xml file is reflected in the C1Menu control.