You can wrap items using the C1WrapPanel.BreakLine attached property. In this example, HyperlinkButtons are used. Complete the following steps:
1. Right-click the project in the Solution Explorer and select Add Reference.
2. In the Add Reference dialog box, locate and select the C1.Phone.dll assembly and select OK.
3. Add the XAML namespace to the <phone:PhoneApplicationPage> tag by adding xmlns:c1="clr-namespace:C1.Phone;assembly=C1.Phone" so it appears similar to the following:
<phone:PhoneApplicationPage x:Class="C1WP7.MainPage" xmlns="http://schemas.microsoft.com/winfx/2006/xaml/presentation" xmlns:x="http://schemas.microsoft.com/winfx/2006/xaml" xmlns:phone="clr-namespace:Microsoft.Phone.Controls;assembly=Microsoft.Phone" xmlns:shell="clr-namespace:Microsoft.Phone.Shell;assembly=Microsoft.Phone" xmlns:d="http://schemas.microsoft.com/expression/blend/2008" xmlns:mc="http://schemas.openxmlformats.org/markup-compatibility/2006" mc:Ignorable="d" d:DesignWidth="480" d:DesignHeight="768" FontFamily="{StaticResource PhoneFontFamilyNormal}" FontSize="{StaticResource PhoneFontSizeNormal}" Foreground="{StaticResource PhoneForegroundBrush}" SupportedOrientations="Portrait" Orientation="Portrait" shell:SystemTray.IsVisible="True">
4. Edit the TitlePanel content to change the text in the TextBlock controls. It will appear similar to the following:
<!--TitlePanel contains the name of the application and page title-->
<StackPanel x:Name="TitlePanel" Grid.Row="0" Margin="12,17,0,28">
<TextBlock x:Name="ApplicationTitle" Text="ComponentOne" Style="{StaticResource PhoneTextNormalStyle}"/>
<TextBlock x:Name="PageTitle" Text="WrapPanel" Margin="9,-7,0,0" Style="{StaticResource PhoneTextTitle1Style}"/>
</StackPanel>
5. In the XAML window of the project, place the cursor between the <Grid x:Name="ContentPanel"></Grid> tags and click once.
6. Add the following markup between the <Grid x:Name="ContentPanel"></Grid> tags to add a C1WrapPanel:
<c1:C1WrapPanel x:Name="c1wrappanel1"></c1:C1WrapPanel>
7. Place your cursor in between the <c1:C1WrapPanel> tags and press ENTER.
8. Add the following XAML to wrap HyperlinkButtons:
<Border Margin="2" BorderBrush="Black" BorderThickness="2" Background="Orange">
<HyperlinkButton Foreground="White" Content="Example Text" FontSize="25" />
</Border>
<Border Margin="2" BorderBrush="Black" BorderThickness="2" Background="Green" c1:C1WrapPanel.BreakLine="After">
<HyperlinkButton Foreground="White" Content="Break After" />
</Border>
<Border Margin="2" BorderBrush="Black" BorderThickness="2" Background="Blue">
<HyperlinkButton Foreground="White" Content="C1WrapPanel" FontSize="16"/>
</Border>
<Border Margin="2" BorderBrush="Black" BorderThickness="2" Background="Red">
<HyperlinkButton Foreground="White" Content="Wrap Vertically" />
</Border>
<Border Margin="2" BorderBrush="Black" BorderThickness="2" Background="Purple">
<HyperlinkButton Foreground="White" Content="Wrap Horizontally" FontSize="20" />
</Border>
Notice the C1WrapPanel.BreakLine property is set to After for the second HyperlinkButton. This will add a break after the button.
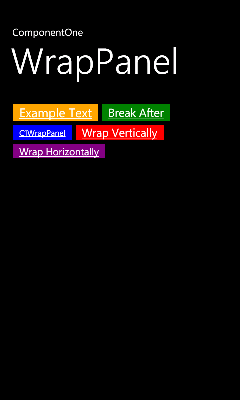
9. Run your project. The C1WrapPanel will resemble the following image:
Notice there is a break after the second HyperlinkButton.