By default, the C1DateTimePicker control shows both the date and time pickers, but you may also choose to show only the date picker or only the time picker. In this topic, you will learn how to change the editor mode in XAML, from the Properties window, and in code.
In XAML
To change the EditMode, place EditMode="Date" in the <c1:C1DateTimePicker> tag so the markup resembles the following:
<c1:C1DateTimePicker x:Name="C1DateTimePicker1" EditMode="Date">
From the Properties Window
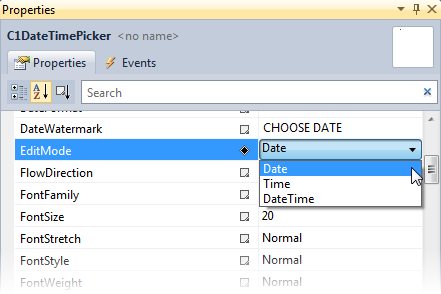
Locate the EditMode property in your application's Properties window. Use the drop-down list to select "Date" as the EditMode, as in the following image:
In Code
1. Add x:Name="C1DateTimePicker1" to the <c1:C1DateTimePicker> tag so that the control will have a unique identifier for you to call in code.
2. Open the MainPage.xaml.cs page by right-clicking on your project and selecting View Code from the menu.
3. Insert the following using statement at the top of the page.
Imports C1.Phone
•C#
using C1.Phone;
4. Place the following code after the InitializeComponent() method:
C1DateTimePicker1.EditMode = C1DateTimePickerEditMode.Date
•C#
C1DateTimePicker1.EditMode = C1DateTimePickerEditMode.Date;
5. Press F5 to run the application.
 This Topic Illustrates
Changing the Edit Mode of the C1DateTimePicker