The AutoPostBack property indicates whether or not the control posts back to the server each time a user interacts with the control. This topic will walk you through creating a C1AutoComplete control, setting the content, and setting the AutoPostBack property.
Complete the following steps:
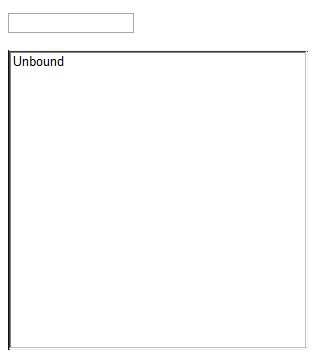
- Add a C1AutoComplete control and a standard ListBox control to your application. Your Design view should resemble the following image:
- Select the C1AutoComplete control on your page and then navigate to the Visual Studio Properties window. Locate the AutoPostBack property in the list and set it to True.
- Click the Events button
 to view the C1AutoComplete Events. Locate the ItemSelected event and enter C1AutoComplete1_ItemSelected.
 - Switch to Source view and locate the
<cc1:C1AutoComplete> </cc1:C1AutoComplete>tags. Insert the following markup between the tags to create your C1AutoCompleteDataItems.To write code in Source View
<Items> <cc1:C1AutoCompleteDataItem Label="c++" Value="c++" /> <cc1:C1AutoCompleteDataItem Label="java" Value="java" /> <cc1:C1AutoCompleteDataItem Label="php" Value="php" /> <cc1:C1AutoCompleteDataItem Label="coldfusion" Value="coldfusion"/> <cc1:C1AutoCompleteDataItem Label="javascript" Value="javascript"/> <cc1:C1AutoCompleteDataItem Label="asp" Value="asp" /> <cc1:C1AutoCompleteDataItem Label="ruby" Value="ruby" /> <cc1:C1AutoCompleteDataItem Label="python" Value="python" /> <cc1:C1AutoCompleteDataItem Label="c" Value="c" /> <cc1:C1AutoCompleteDataItem Label="scala" Value="scala" /> <cc1:C1AutoCompleteDataItem Label="groovy" Value="groovy" /> <cc1:C1AutoCompleteDataItem Label="haskell" Value="haskell" /> <cc1:C1AutoCompleteDataItem Label="perl" Value="perl" /> </Items> - Locate the
<asp:ListBox></asp:ListBox>tags and add the following markup to govern the width and height of the ListBox control:To write code in Source View
Width="300px" Height="300px" - Right-click the Source view and select View Code from the list. There should be code that resembles the following that Visual Studio created to handle the ItemSelected event you set previously:
To write code in Visual Basic
Visual Basic Copy CodeProtected Sub C1AutoComplete1_ItemSelected(ByVal sender As Object, ByVal args As C1.Web.Wijmo.Controls.C1AutoComplete.C1AutoCompleteDataItemEventArgs) End Sub
To write code in C#
C# Copy Codeprotected void C1AutoComplete1_ItemSelected(object sender, C1.Web.Wijmo.Controls.C1AutoComplete.C1AutoCompleteDataItemEventArgs args)
- Place the following code below the ItemSelected event handler. This code will handle adding a new item to the ListBox control from the C1AutoComplete control:
To write code in Visual Basic
Visual Basic Copy CodeListBox1.Items.Add(New ListItem(C1AutoComplete1.Text))
To write code in C#
C# Copy CodeListBox1.Items.Add(new ListItem(C1AutoComplete1.Text));
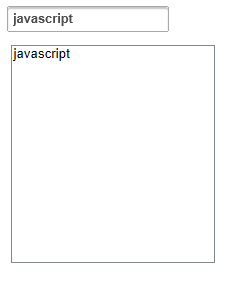
- Press F5 to run your application. Enter "ja" into the search box and select one of the AutoCompleteDataItems that appears. Select the item to observe the AutoPostBack property. The application should resemble the following image: