The ActiveReports WPF Viewer is a custom control that allows to easily view section, RDL and page report layouts.
This walkthrough is split up into the following activities.
- Creating a WPF Application project in Visual Studio
- Adding the ActiveReports WPF Viewer control to the xaml page
- Loading a report to the ActiveReports WPF Viewer
- Previewing a report
- Customizing the ActiveReports WPF Viewer
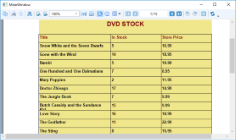
When you have completed this walkthrough, you will have the ActiveReports WPF Viewer displaying a report that looks similar to the following.
To create a WPF application in Visual Studio
- On the Visual Studio File menu, click New > Project.
- In the New Project dialog that appears, select WPF Application in the list of templates.
- Specify the name and location of the project and then сlick the OK button.
- In the Visual Studio Solution Explorer, right-click YourProject and select Add, then New Item.
- In the Add New Item dialog that appears, select the ActiveReports 13 Page Report and create the rptSingleLayout report as described in the Single Layout Reports walkthrough.
To add the WPF Viewer control
- In Solution Explorer, open MainWindow.xaml.
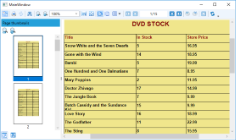
- From the Toolbox ActiveReports 13 tab, drag the Viewer control and drop it on the design view of MainWindow.xaml.
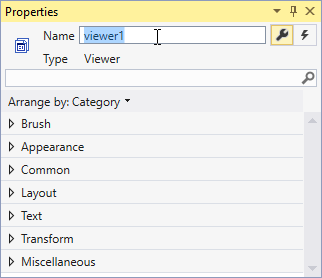
- In the Properties window, set the properties of the Viewer control as follows.
Property Name Property Value HorizontalAlignment Stretch VerticalAlignment Stretch Margin 0 - In the Properties window, rename the Viewer control to viewer1.
To load a report to the WPF Viewer
- In the Solution Explorer, select the rptSingleLayout report you have created.
- In the Properties window, set Copy to Output Directory to Copy Always.
- On MainWindow.xaml, with the viewer selected, go to the Properties window and double click the Loaded event.
- In the MainWindow code view that appears, add code like the following to the viewer1_loaded event to bind the report to the viewer. This code shows an .rdlx report being loaded but you can use an .rpx report as well.
Visual Basic.NET code. Paste INSIDE the viewer1_Loaded event in MainWindow.xaml.vb. Copy CodeViewer1.LoadDocument("rptSingleLayout.rdlx")C# code. Paste INSIDE the viewer1_Loaded event in MainWindow.xaml.cs. Copy Codeviewer1.LoadDocument("rptSingleLayout.rdlx");
To view the report
To customize the WPF Viewer
The ActiveReports WPF Viewer is a customizable control. You can easily change the look of the WPF Viewer and its elements, such as the error panel, search panel, sidebar and toolbar by modifying properties in the default WPF Viewer template (DefaultWPFiewerTemplates.xaml).
To add the customization template to the WPF project
- Open your WPF project.
- In Solution Explorer, select the YourProjectName node.
- On the Visual Studio Project menu, click Add Existing Item.
- In the dialog that appears, locate and select DefaultWPFViewerTemplates.xaml and click OK. You can find DefaultWPFViewerTemplates.xaml at [systemdrive]\Program Files\GrapeCity\ActiveReports 13\Deployment\WPF\Templates folder (on a 64-bit Windows operating system, this file is located in [systemdrive]\Program Files (x86)\GrapeCity\ActiveReports 13\Deployment\WPF\Templates).
- On MainWindow.xaml before the opening <Grid> tag, add the following code.
Paste to the XAML view of MainWindow.xaml before the opening <Grid> tag Copy Code<Window.Resources> <ResourceDictionary Source="DefaultWPFViewerTemplates.xaml" /> </Window.Resources>
To customize the WPF Viewer sidebar
- In Solution Explorer, double-click DefaultWPFViewerTemplates.xaml.
- In the file that opens, search for "thumbnails tab".
- In the GroupBox Header property of <!-- thumbnails tab -->, remove "{Binding Source.ThumbnailsPane.Text}" and type "THUMBNAILS".
- Search for "TabControl x:Name="Sidebar".
- Add Background="Yellow" after TabControl x:Name="Sidebar".
- Press F5 to see the customized viewer sidebar.
To add a customized button to the WPF Viewer toolbar
- In Solution Explorer, select the YourProjectName node.
- On the Visual Studio Project menu, select Add New Item.
- In the Add New Item dialog that appears, select Class, rename it to MyCommand and click Add.
- In the MyCommand.cs/vb that opens, add the following code to implement a command.
To write the code in Visual Basic.NET
Visual Basic.NET code. Add to MyCommand.vb Copy CodeImplements ICommand Public Function CanExecute(ByVal parameter As Object) As Boolean Implements System.Windows.Input.ICommand.CanExecute Return True End Function Public Event CanExecuteChanged(ByVal sender As Object, ByVal e As System.EventArgs) Implements System.Windows.Input.ICommand.CanExecuteChanged Public Sub Execute(ByVal parameter As Object) Implements System.Windows.Input.ICommand.Execute MessageBox.Show("GrapeCity is the world's largest component vendor.", "About Us", MessageBoxButton.OK) End Sub
To write the code in C#
C# code. Add after the statement using System.Text; Copy Codeusing System.Windows.Input; using System.Windows;
C# code. Add to MyCommand.cs Copy Codepublic class MyCommand : ICommand { public bool CanExecute(object parameter) { return true; } public void Execute(object parameter) { MessageBox.Show("GrapeCity is the world's largest component vendor.", "About Us", MessageBoxButton.OK); } public event EventHandler CanExecuteChanged; }
- In Solution Explorer, double-click DefaultWpfViewerTemplates.xaml.
- In the file that opens, add the following code.
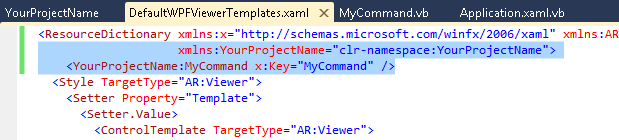
XML code. Add to DefaultWpfViewerTemplates.xaml Copy Code<ResourceDictionary> ... xmlns:YourProjectName="clr-namespace:YourProjectName"> <YourProjectName:MyCommand x:Key="MyCommand" /> ... </ResourceDictionary>
- In the same file, add the following code to add a button.
XML code. Add to DefaultWpfViewerTemplates.xaml before the closing Toolbar tag Copy Code<Button Command="{StaticResource MyCommand}" Content="About Us" />
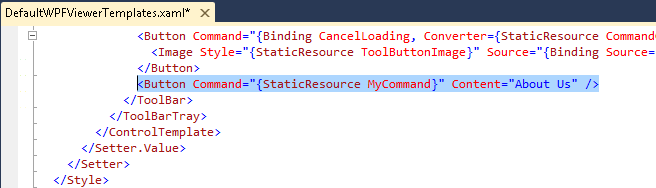
- Press F5 to see the new customized button About Us in the Viewer toolbar.
To remove the Refresh button from the WPF Viewer toolbar
- In Solution Explorer, double-click DefaultWpfViewerTemplates.xaml.
- In the file that opens, search for "<!--Refresh btn-->".
- Replace the existing content in Visiblity="..." with the following.
XML code. Add to DefaultWpfViewerTemplates.xaml Copy Code<Button Command=... Visibility="Collapsed">