ActiveReports provides the WPF Viewer that you can use to load and view your reports. This viewer contains a toolbar and a sidebar with Thumbnails, Search results, Document map and Parameters panes.
Warning: The TargetInvocationException occurs on running a WPF browser application in Partial Trust. Refer to Running WPF Viewer in Partial Trust section given below to run your WPF Browser Application in Partial Trust. To ensure that you are using Full Trust:
- From the Visual Studio Project menu, select YourProject Properties.
- On the Security tab, under Enable ClickOnce security settings, select the This is a full trust application option.
WPF Viewer Toolbar
The following table lists the actions you can perform through the WPF Viewer toolbar.
| Toolbar Element | Name | Description |
|---|---|---|
 |
Toggle Sidebar | Displays the sidebar that includes the Thumbnails, Parameters, Document map and Search results panes. |
 |
Displays the Print dialog where you can specify the printing options. | |
 |
Galley mode | Provides a viewer mode which removes automatic page breaks from an RDL report and displays the data in a single scrollable page. This mode maintains page breaks you create in the report.1 |
 |
Find | Displays the Find dialog to find any text in the report. |
 |
Zoom out | Decreases the magnification of your report. |
 |
Zoom in | Increases the magnification of your report. |
 |
Current zoom | Displays the current zoom percentage which can also be edited. |
 |
Fit page width | Fits the width of the page according to viewer dimensions. |
 |
Fit whole page | Fits the whole page within the current viewer dimensions. |
 |
First page | Takes you to the first page of the report. This button is enabled when a page other than the first page is open. |
 |
Previous page | Takes you to the page prior to the current page. This button is enabled when a page other than the first page is open. |
 |
Current page | Opens a specific page in the report. To view a specific page, type the page number and press the Enter key. |
 |
Next page | Takes you to the page following the current page. This button is disabled on reaching the last page of the report. |
 |
Last page | Takes you to the last page of the report. This button is disabled on reaching the last page of the report. |
 |
Backward | Takes you to the last viewed page. This button is enabled when you move to any page from the initial report page. Clicking this button for the first time also enables the Forward button. |
 |
Forward | Takes you to last viewed page before you clicked the Backward button. This button is enabled once you click the Backward button. |
 |
Back to parent report | Returns you to the parent report in a drillthrough report. |
 |
Refresh | Refreshes the report. |
 |
Cancel | Cancels rendering of the report. |
1To view drillthrough reports in WPF Viewer, you need to turn off the Galley mode.
WPF Viewer Sidebar
The WPF Viewer sidebar appears on the left of the Viewer control when you click the Toggle sidebar button in the toolbar. By default, this sidebar shows the Thumbnails and Search Results panes. The additional Document map and Parameters also appear in this sidebar. You can toggle between any of the viewer panes by clicking the buttons for each pane at the bottom of the sidebar.
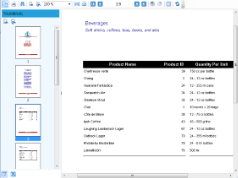


Thumbnails pane
The Thumbnails pane appears by default in the sidebar when you click the Toggle sidebar button in the toolbar.
This pane is composed of a thumbnail view of all the pages in a report. Click any thumbnail to navigate directly to the selected report page. You can also modify the size of the thumbnail when you click (+) or (-) button to zoom in and zoom out.
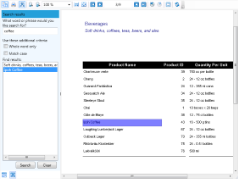
Search results pane
The Search pane is the other default pane besides Thumbnails that appears in the sidebar when you click the Toggle sidebar button. This pane lets you enter a word or phrase from which to search within the report.
To search in a report:
- Enter the word or phrase in the search field.
- Under Use these additional criteria, you may optionally choose to search for the whole word or match the case of the search string while searching in the report.
- Click the Search button to see the results appear in the Find results list.
- Click an item in the list to jump to that item in the report and highlight it.
To start a new search or clear the current search results, click the Clear button under the Find results list.
Document map pane
The Documents map pane sis enabled for reports where the Label property or the Document map label is set. This pane displays each value for the text box, group, or sub report that you label, and you can click them to navigate to the corresponding area of the report in the Viewer.
If a report does not have the Label property or Document map label set, the Documents map panes does not appear in the sidebar.
Parameters pane
The WPF Viewer allows you to view reports with parameters. In the toolbar, click the Toggle sidebar button to open the WPF Viewer sidebar and if your report contains parameters, the Parameters pane shows up automatically.
- In the Parameters pane, you are prompted to enter a value by which to filter the data to display.
- Enter a value or set of values and click View report, to filter the report data and display the report.
If a report does not have parameters, the Parameters pane does not appear in the sidebar.
Display the report in the WPF Viewer
Set up your WPF Application project by using the following steps.
- Create a new WPF Application project or open an existing one.
- For a new project, in the Visual Studio Solution Explorer, right-click YourProject and select Add, then New Item.
- In the Add New Item dialog that appears, select the ActiveReports 13 Page Report, ActiveReports 13 RDL Report, ActiveReports 13 Section Report (code-based) or ActiveReports 13 Section Report (xml-based). This adds the necessary references to your project.
- From the Toolbox ActiveReports 13 tab, drag the Viewer control and drop it on the design view of MainWindow.xaml.
Note: Dragging the Viewer control to the design view of MainWindow.xaml automatically adds the corresponding reference to the licenses.licx file.
- In the Properties window, with the report selected, set Copy to Output Directory to Copy always.
Note:
- If Page/RDL report is selected from dropdown of Source property (containing relative path), 'Copy to Output Directory' for selected report should be set as 'Copy always/Copy if newer' otherwise error "Could not find file ... " appears on loading WPF Viewer.
Caution: In WPF Viewer control, previewing code-based Section reports using Source and SourceFormat properties is not supported.
- On MainWindow.xaml, with the viewer selected, go to the Properties window and double click the Loaded event.
- In the MainWindow code view that appears, add code like the following to the viewer1_loaded event to bind the report to the viewer. Each of these code snippets presumes a report in the project of the type indicated with the default name. (If you have renamed your report, you need to rename it in the code as well).
Note:
- Refer to the LoadDocument method to see other ways to load a report in WPF Viewer.
- We can set report for WPFViewer directly on XAML file and load the report in WPF Viewer using Source and SourceFormat properties.
To write the code in Visual Basic.NET
The following example demonstrates how you display a page report or RDL Report in the WPF Viewer control.
Visual Basic.NET code. Paste INSIDE the viewer1_Loaded event in MainWindow.xaml.vb. Copy CodeViewer1.LoadDocument("YourReportName.rdlx")The following example demonstrates how you can display a section report (code-based) in the WPF Viewer control.
Visual Basic.NET code. Paste INSIDE the viewer1_Loaded event in MainWindow.xaml.vb. Copy Codeviewer1.LoadDocument(new YourReportName())
The following example demonstrates how you can display a section report (xml-based) in the WPF Viewer control.
Visual Basic.NET code. Paste INSIDE the viewer1_Loaded event in MainWindow.xaml.vb. Copy CodeViewer1.LoadDocument("YourReportName.rpx")To write the code in C#
The following example demonstrates how you display a page report or RDL report in the WPF Viewer control.
C# code. Paste INSIDE the viewer1_Loaded event in MainWindow.xaml.cs. Copy Codeviewer1.LoadDocument("YourReportName.rdlx");The following example demonstrates how you can display a section report (code-based) in the WPF Viewer control.
C# code. Paste INSIDE the viewer1_Loaded event in MainWindow.xaml.cs. Copy Codeviewer1.LoadDocument(new YourReportName());
The following example demonstrates how you can display a section report (xml-based) in the WPF Viewer control.
C# code. Paste INSIDE the viewer1_Loaded event in MainWindow.xaml.cs. Copy Codeviewer1.LoadDocument("YourReportName.rpx");
Additional Features
Following is an introduction to the additional capabilities of the Viewer to guide you on using it effectively.
Keyboard Shortcuts
The following shortcuts are available on the WPF Viewer.
| Keyboard Shortcut | Action |
|---|---|
| Ctrl + F | Shows the search pane. |
| Ctrl + P | Shows the print dialog. |
| Esc | Closes the print dialog. |
| Page Down | Moves to the next page. |
| Page Up | Moves to the previous page. |
| Ctrl + T | Shows or hides the table of contents. |
| Ctrl + Home | Moves to the first page. |
| Ctrl + End | Moves to the last page. |
| Ctrl + Right | Navigates forward. |
| Ctrl + Left | Navigates backward. |
| Ctrl + - | Zooms out. |
| Ctrl + + | Zooms in. |
| Left, Right, Up, Down | Moves the visible area of the page in the corresponding direction. |
| Ctrl + 0 (zero) | Sets the zoom level to 100%. |
| Ctrl + rotate mouse wheel | Changes the zoom level up or down. |
| Ctrl + G | Moves the focus to current page toolbar option. |
| F5 | Refreshes the report. |
Advance Printing Options
You can set the PrintingSettings property of the Viewer to directly print without displaying a dialog or to switch from a ActiveReports print dialog to a .NET Framework standard print dialog (System.Windows.Forms.PrintDialog) on clicking the Print button on the Viewer toolbar. You can set the PrintingSettings property of the Viewer control from the Properties window.
PrintingSettings property provides the following options:
| PrintingSettings Options | Description |
|---|---|
| ShowPrintDialog |
Displays a dialog in which the user can set the printer options before printing. |
| ShowPrintProgressDialog | Displays a print progress dialog, in which the user can cancel the printing job. |
| UsePrintingThread | Specifies whether printing should be performed for individual threads or not. |
| UseStandardDialog | Specifies whether to use the .NET Framework standard print dialog (System.Windows.Forms.PrintDialog) while printing the document (section or page). |
Running WPF Viewer in Partial Trust
You can run a WPF Viewer Browser Application in Partial Trust by customizing the permission set in the app.mainfest file. While customizing the permission set, some of the permissions are to be set explicitly like MediaPermission, UIPermission, etc. Follow these steps to learn how to run a WPF Viewer application in partial trust.
Note: These steps assume that you have already created a WPF Browser Application that contains the WPF Viewer control.
- In the Solution Explorer, right-click your WPF Browser Application and select Properties.
- On the properties page that opens, go to the Security tab.
- On the Security tab, set Zone your application will be installed from to Custom and click the Edit Permissions XML button. This opens the app.mainfest file.
- In the app.manifest file, replace the existing xml code inside the <applicationRequestMinimum> </applicationRequestMinimum> tags with the following code.
Code
- Press F5 to run your WPF Browser Application.
Note: The Partial Trust Limitations are applicable to the WPF viewer running in Partial Trust. For more information, see Medium Trust Support.
See Also